
Desserts
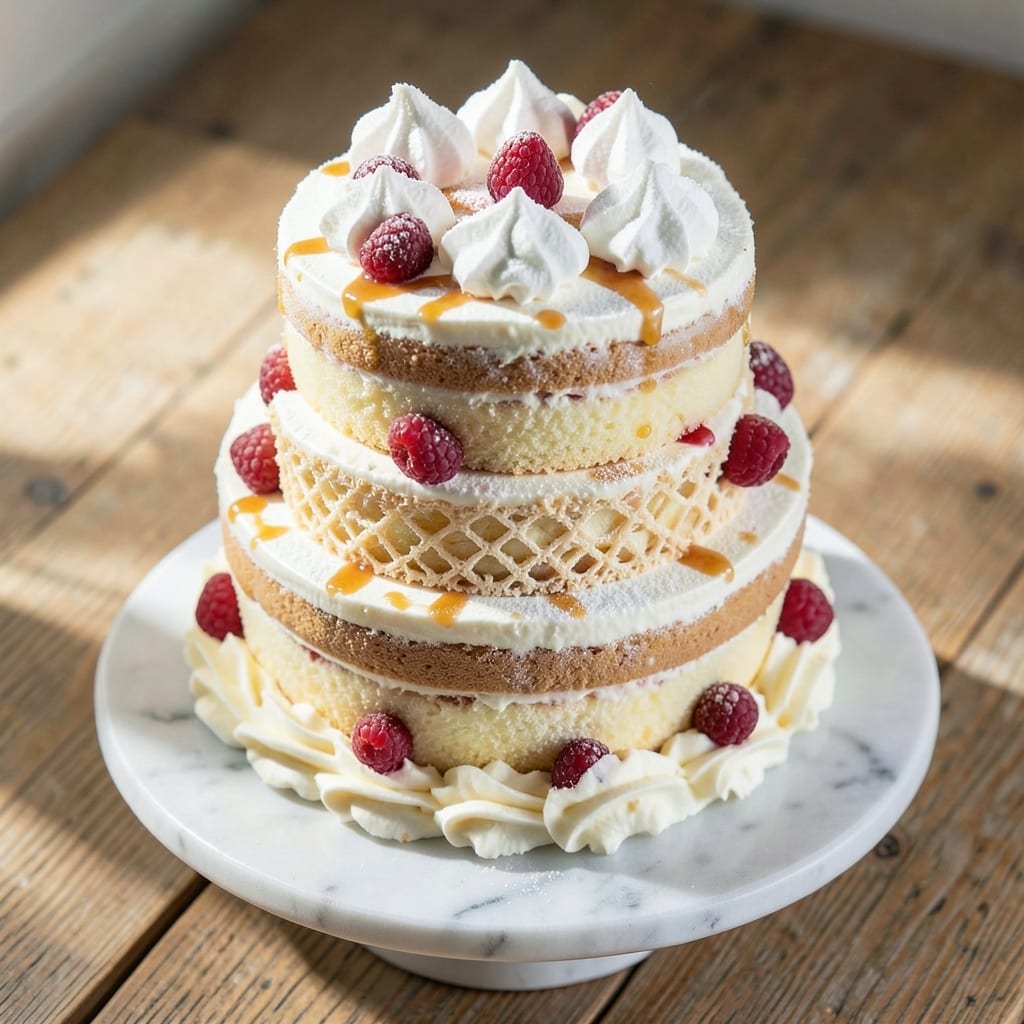
This angel food wedding cake recipe delivers the ethereal lightness brides dream of—fluffy, airy layers that seem to defy gravity, perfect for a celebration where every bite feels like a moment of magic. 💫 The secret lies in whipped egg whites and a precise baking technique that creates those signature cloud-like crumbs, all without a hint of heaviness. What makes this recipe truly special is its ability to adapt to both classic and modern tastes, whether you prefer traditional vanilla or bold flavors like coconut or berry swirl.
The foundation of this cake begins with a simple batter of egg whites, sugar, and cake flour, baked in a tube pan to create its signature shape. Once cooled, the layers are stacked with whipped frosting—traditional buttercream or modern Italian meringue—to achieve that signature cloud-like texture. The result is a dessert that's as beautiful as it is delicious, with a delicate crumb that melts in your mouth and a frosting that's light yet rich enough to hold its shape.
What sets this recipe apart is its versatility—you can keep it classic with vanilla and buttercream or experiment with flavors like lemon curd, raspberry filling, or even matcha-infused frosting. The cake's natural lightness makes it perfect for warm weather weddings, while the frosting options allow you to customize it to your vision. Whether you're baking for a small gathering or a grand celebration, this recipe ensures every slice is as stunning as it is delicious.
Ready to create a wedding cake that's as memorable as the day itself? This recipe combines tradition with modern techniques, ensuring your dessert is not just a centerpiece but the highlight of the celebration. Let's get started on crafting something truly extraordinary.
Ingredients for angel food wedding cake
Twelve ingredients craft ethereal layers that float like clouds, perfect for weddings where every bite feels magical.
| Ingredient | Amount | Notes |
|---|---|---|
| Large Egg Whites 🥚 | 12 whole | Room temperature, pasteurized preferred |
| Granulated Sugar 🍚 | 1 ½ cups | Superfine preferred for smooth texture |
| Cake Flour 🌾 | 1 ½ cups | Sifted thoroughly for lightness |
| Unsalted Butter 🧈 | 1 cup | Softened for smooth frosting |
| Vanilla Extract 🌿 | 1 tbsp | Pure vanilla for authentic flavor |
| Powdered Sugar 🍚 | 4 cups | For buttercream frosting |
| Heavy Cream 🥛 | 1 cup | Cold for stable whipped cream |
| Lemon Juice 🍋 | 1 tbsp | Freshly squeezed for brightness |
| Almond Extract 🌿 | ½ tsp | Optional, for depth of flavor |
| Salt 🧂 | ¼ tsp | Fine sea salt for balance |
| Raspberry Jam 🍓 | ½ cup | For filling, seedless preferred |
| Fresh Raspberries 🍓 | 1 cup | For garnish, optional |
Egg whites are the heart of this cake—room temperature is key for maximum volume. Pasteurized eggs are safer for large batches, but fresh works if you're confident. I always grab Great Value brand from Walmart since it's pasteurized and affordable. For sugar, superfine dissolves faster, but regular granulated works if you pulse it in a food processor first. The cake flour? Bob's Red Mill is my go-to—it's sifted and reliable. Pro tip: sift all dry ingredients together to avoid lumps. The butter for frosting should be softened but not melted—I microwave it for 40 seconds to just melt it, then let it cool slightly.
No vanilla extract? Vanilla sugar or seeds from a pod work in a pinch. For the buttercream, if you're watching fat, swap half the butter for Greek yogurt or vegan butter. The lemon juice brightens everything, but orange zest** adds a citrusy twist if you want to get fancy. The raspberry filling can be store-bought (I like Smash brand for its smooth texture), but homemade is easy—just simmer raspberries with sugar and cornstarch. For a modern twist, replace the jam with lemon curd or coconut cream**—just adjust the filling amount to avoid soggy layers.
This cake stays fresh for 3 days at room temperature if wrapped tightly in plastic, but I always refrigerate it overnight to set the frosting properly. For make-ahead baking, assemble the cake 2 days ahead—it actually tastes better after the flavors meld. The frosting can be made 1 day ahead** and stored in the fridge, just re-whip it before using. Garnish with fresh berries right before serving—they add a pop of color and keep the cake looking fresh. If you're freezing, wrap each layer individually in plastic and freeze for up to 1 month**—thaw overnight in the fridge before frosting.
Why You'll Love This Recipe
- No Mixer Needed: I swear by this trick—whipping those egg whites by hand (or with a whisk) gives you a cloud-like texture that store-bought can’t touch. Honestly, the only tool you really need is patience, and the result is worth every second of those sturdy arms.
- Vanilla Buttercream Bliss: That buttercream? It’s the star. Rich, velvety, and just sweet enough—no overpowering frosting here. The vanilla extract shines through, and the butter keeps it luscious without being heavy. (Yes, even if you’re not a frosting fan.)
- Wedding Cake Without the Stress: Between us, baking three layers for a big day is intimidating. This recipe lets you bake two pans at once, then stack them like a pro. Plus, the cake stays moist for days, so you’re not scrambling to serve it all at once.
- Budget-Friendly Elegance: Egg whites and sugar are cheap, but this cake looks like you spent a fortune. No fancy mix, no pricey additives—just pure, light, and airy perfection. And leftovers? They disappear faster than you can say “second slice.”
Step-by-step instructions for angel food wedding cake
Here's how to bake a cloud-like angel food cake with fluffy layers and dreamy frosting.
🍳 Step 1: Prep and Whip the Egg Whites
Separate the 12 whole large egg whites into a completely grease-free mixing bowl. I use a glass bowl for this—it's non-reactive and helps prevent any grease contamination. Add 0.25 tsp salt and let the egg whites sit at room temperature for 15 minutes before whipping. Room temperature whites whip up faster and hold more air.
Using a stand mixer fitted with the whisk attachment, beat the egg whites on low speed until frothy. Gradually add 1.5 cups granulated sugar, 1 tablespoon at a time, increasing the speed to high after each addition. The sugar should dissolve completely between each addition. You're looking for stiff, glossy peaks that stand straight up when the whisk is lifted—this takes about 8-10 minutes. Don't rush this step; properly whipped egg whites are the secret to that signature light-as-air texture.
👨🍳 Step 2: Fold in the Cake Flour
Sift 1.5 cups cake flour into the egg white mixture. I like to sift it directly into the bowl while the mixer is running on low speed. This prevents any flour lumps from forming and ensures an even distribution. Use a rubber spatula to gently fold the flour into the egg whites until just combined—you should still see some white streaks. Overmixing develops gluten, which makes the cake dense instead of light and airy.
Divide the batter evenly into three 9-inch round cake pans that have been prepared with pan grease (only the sides, no bottom grease—this helps create that classic angel food cake texture). Tap the pans gently on the counter to remove any air bubbles. Bake in a preheated 350°F oven for 35-40 minutes or until the tops spring back when touched lightly. A toothpick inserted into the center should come out clean. Let the cakes cool in the pans for 10 minutes before inverting them onto a wire rack to cool completely.
🥘 Step 3: Prepare the Raspberry Filling and Buttercream
While the cakes cool, prepare the raspberry filling by warming 0.5 cup raspberry jam in a small saucepan over low heat for 2-3 minutes until it's smooth and spreadable. Set aside to cool slightly. For the buttercream, beat the 1 cup softened unsalted butter with 4 cups powdered sugar on medium speed until light and fluffy, about 3-4 minutes. Add 1 tbsp vanilla extract, 0.5 tsp almond extract, and 1 tbsp lemon juice, mixing until combined.
In a separate bowl, whip the 1 cup cold heavy cream to soft peaks using a hand mixer. Gently fold the whipped cream into the buttercream mixture until fully incorporated. This adds a lighter texture to your frosting. Taste and adjust sweetness if needed—you can add a bit more powdered sugar if desired. The frosting should be smooth, spreadable, and hold its shape on the cakes.
🍽️ Step 4: Assemble the Wedding Cake
Once the cakes are completely cool, level the tops if needed. Place the first cake layer on a cake stand or plate, and spread a thin layer of the raspberry jam over the top. Add a layer of whipped cream frosting, then place the second cake layer on top. Repeat this process with the remaining jam and frosting, then place the final cake layer. Spread a thin crumb coat of frosting over the entire cake and refrigerate for 15 minutes to set.
After the crumb coat sets, apply the final layer of frosting, creating smooth sides and a swirl pattern on top. Use a piping bag fitted with a star tip for decorative swirls. Garnish with 1 cup fresh raspberries, pressing them gently into the frosting. For extra elegance, you can also add edible flowers or gold leaf accents. Serve immediately or refrigerate for up to 2 hours before serving to allow the flavors to meld.
Pro Tips For Making Angel Food Wedding Cake
- Use Room-Temp Egg Whites: I learned this the hard way—cold egg whites from the fridge whip up stiff but with a weird, gummy texture. Let them sit in a warm (not hot) bowl for 10 minutes first. The difference in volume and lightness is night and day.
- Sift Flour Twice: Angel food cake relies on that cloud-like texture, so don’t skimp on sifting. Do it once before mixing, then sift it again right before folding it into the egg whites. That extra step keeps the batter airy and prevents dense pockets.
- Don’t Overmix the Batter: The moment you see streaks of flour disappear, stop stirring. I used to think more mixing = better integration, but angel food cake turns tough when overworked. Fold just until combined—about 15 gentle swirls with a spatula.
- Bake Until Springy: Check for doneness at 15 minutes, but don’t pull it when the top looks set. Press the center lightly—it should spring back immediately. If it bounces slowly, it needs 5 more minutes. Underbaking is the #1 reason angel food cake collapses later.
Serving suggestions for leftovers
Elegant Plating
Serve your angel food wedding cake on a three-tiered cake stand for maximum drama—this creates visual height and makes the layers look even more ethereal. I love using gold-rimmed stands for a classic touch or clear acrylic stands for a modern twist. For a rustic vibe, try a wooden cake board with fresh raspberries scattered around the base. Always use a serrated knife to slice clean, precise portions—this prevents crumbs from ruining the presentation. 💫
Flavor Pairings
Complement the cake with sparkling rosé wine—its crisp acidity cuts through the sweetness beautifully. For a non-alcoholic option, raspberry-infused sparkling water adds a refreshing contrast. I also recommend serving with mini macarons in complementary flavors like vanilla bean or lemon to balance the cake's lightness. If you want to add a savory element, salted caramel truffles provide a sophisticated contrast to the fruity notes. 🍷
Seasonal Garnishes
For spring weddings, top the cake with edible violets or pansies—their delicate petals add a romantic touch. In summer, fresh mint leaves sprinkled between frosting swirls bring a bright, herbal note. Autumn calls for toasted pecans or candied walnuts pressed into the sides for texture. Winter celebrations shine with gold leaf accents or crystallized ginger for a festive sparkle. Always add garnishes just before serving to keep them fresh. ✨
Portioning Tips
Use a cake leveler to ensure even slices—this prevents uneven layers that can look messy. For a wedding buffet, serve individual slices on parchment-lined plates to catch any crumbs. I recommend 3-inch diameter slices for elegant portions that show off the layers. Label each slice with a custom cake topper featuring the couple's names or wedding date for a personal touch. 💍
Make-Ahead Serving
Assemble the cake 2 days ahead and store it in an airtight container at room temperature. Refrigerate for 1 hour before serving to let the frosting soften slightly. For outdoor weddings, keep the cake in a cooling tent with ice packs beneath the stand to maintain temperature. Always transport it vertically to prevent frosting from sliding. A quick dusting of powdered sugar right before serving removes any potential fingerprints. ❄️
Nutrition facts
Frequently asked questions
Why does angel food cake need to be baked in a tube pan?
The tube pan creates the classic shape while allowing steam to escape through the center tube, which helps the cake rise evenly and develop that signature light, airy crumb. Without it, the cake would be denser and lack the signature texture.
Can I substitute cake flour with all-purpose flour?
Not recommended—cake flour has a lower protein content (7-9%) than all-purpose (10-12%), which prevents gluten development and keeps the texture light. If you must substitute, use 1.25 cups all-purpose flour and remove 1.5 tbsp of the total flour to compensate for the extra protein.
How do I prevent the cake from collapsing after baking?
Never grease the bottom of the pan (only the sides) and don't overmix the batter. Also, let the cake cool in the pan for 10 minutes before inverting—this helps set the structure. Avoid opening the oven door early to check doneness, as sudden temperature drops can cause collapse.
What's the best way to store angel food cake?
Wrap each layer tightly in plastic wrap and store at room temperature for up to 3 days. For longer storage, freeze layers individually for up to 1 month. Thaw overnight in the fridge before frosting. Never refrigerate unfrosted layers—they absorb moisture and become soggy.
Can I make this cake gluten-free?
Yes! Replace the cake flour with a 1:1 gluten-free baking flour blend (like Bob's Red Mill) and add 0.5 tsp xanthan gum to improve texture. You may need to adjust the baking time slightly—check for doneness at 30 minutes** since gluten-free versions bake faster.