
Desserts
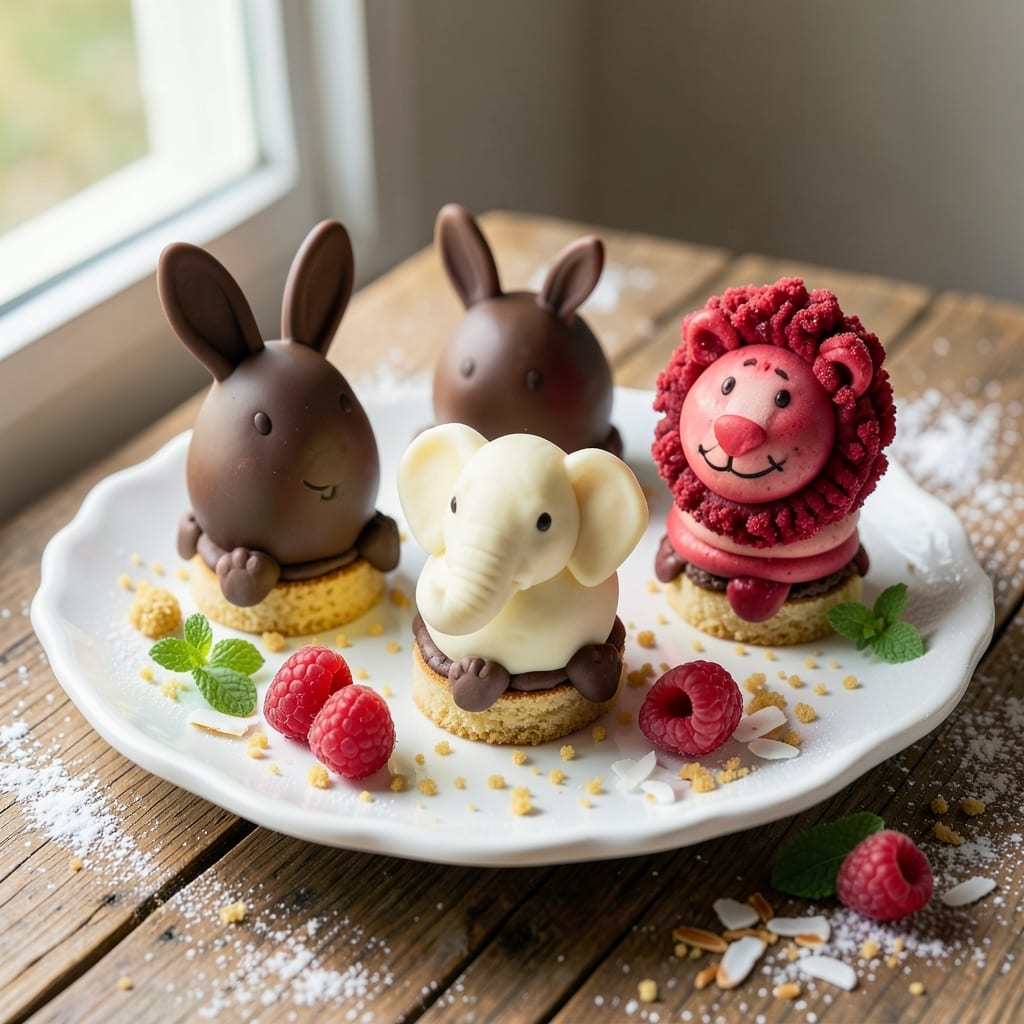
Transforming simple cake into adorable animal cake pops is an art that combines baking precision with playful creativity. 🎨 These whimsical treats start with moist vanilla cake baked in mini muffin tins, then shaped into perfect bite-sized rounds. The real magic happens when you dip them in velvety chocolate and add fondant details that bring animals to life—ears, tails, and tiny faces that make every bite irresistible.
The secret to flawless cake pops lies in the right frosting consistency—smooth, pipeable, and sturdy enough to hold fondant decorations without crumbling. I've perfected a foolproof method using powdered sugar and buttercream that sets just enough to support your creative designs. Whether you're crafting lions, bunnies, or elephants, the technique remains the same—just let your imagination guide the fondant shaping.
What makes these animal cake pops truly special is how they transform any occasion into a celebration. Kids will adore the playful designs, and adults will appreciate the delicate balance of flavors—tender cake, rich chocolate, and the subtle sweetness of fondant. Each pop becomes a tiny edible masterpiece, perfect for parties, gift-giving, or simply indulging in a little whimsy.
Ready to create your own edible zoo? The process is simpler than it looks, and the results are always impressive. With just a few tools and some patience, you'll have cake pops that look like they came from a professional bakery. Let's get started on your animal-themed dessert adventure!
Ingredients for animal cake pops
Simple cake and sweet frosting transform into magical animal cake pops with just a few tools.
| Ingredient | Amount | Notes |
|---|---|---|
| All-Purpose Flour 🌾 | 1 ½ cups | Sifted for light texture |
| Granulated Sugar 🍚 | 1 ½ cups | White or light brown |
| Unsalted Butter 🧈 | 1 cup | Room temperature, full-fat |
| Large Eggs 🥚 | 2 whole | Room temperature preferred |
| Vanilla Extract 🌸 | 2 tsp | Pure vanilla preferred |
| Baking Powder 🧂 | 2 tsp | Aluminum-free recommended |
| Salt 🧂 | ½ tsp | Fine sea salt preferred |
| Milk 🥛 | ½ cup | Whole milk for richness |
| Powdered Sugar 🍚 | 3 cups | Confectioners' sugar, sifted |
| Heavy Whipping Cream 🥛 | 1 cup | Cold for best whipping |
| White Chocolate Chips 🍫 | 1 ½ cups | For dipping, high-quality |
| Fondant 🎨 | 1 lb | Pastel colors for animals |
| Mini Muffin Tin 🍰 | 1 whole | 24-36 cavity size |
| Lollipop Sticks 🍬 | 24 whole | Wooden, 4 inches long |
| Parchment Paper 📄 | 1 sheet | For easy release |
The cake is the foundation—King Arthur Flour or Bob's Red Mill all-purpose flour gives the best texture. Wilton or Mise en Place baking powder ensures proper rise, and Land O'Lakes butter (if you're in the US) is my go-to for creaminess. Grab Wilton lollipop sticks—they're sturdy and perfect for holding cake pops. For the fondant, Wilton pastel colors are ideal, but any brand works as long as it's pliable. The white chocolate chips? Ghirardelli or Guittard make all the difference for smooth dipping. If you're short on time, pre-made fondant from craft stores works too—just knead it until smooth.
No vanilla extract? Vanilla bean paste or even vanilla sugar in a pinch (use half the amount). Running out of powdered sugar? Mix granulated sugar with 1 tbsp cornstarch for a close substitute. Short on lollipop sticks? Popsicle sticks work, but secure them well—they need to hold up to fondant decorations. For the frosting, heavy whipping cream is non-negotiable, but if you're dairy-free, coconut cream (chilled overnight) works surprisingly well. The cake batter can be mixed in a stand mixer or by hand—just don't overmix. And if your white chocolate chips melt unevenly? Microwave in 20-second bursts, stirring between each, for silky results.
Store cake pops in an airtight container between parchment layers for up to 3 days—they soften over time, so make them fresh for best texture. Fondant decorations? Keep them in sealed bags to prevent drying. The frosting can be made a day ahead and stored in the fridge, but bring it to room temp before using. Freeze fondant in portions if you're not using it all at once—it softens faster than you'd think. And if your cake pops start to dry out? Dip them in melted chocolate again—it's like a mini makeover!
Why You'll Love This Recipe
- No Mixer Needed: I swear by this trick—just fold the butter into the flour until it resembles coarse crumbs, then add wet ingredients. No electric mixer, no fuss, and the cake batter comes together faster than you can say "vanilla extract."
- Vanilla Butter Bliss: That first bite? Rich, buttery, and packed with vanilla—like a warm hug in cake-pop form. The eggs bind it just right, so it’s tender without being cakey, and the sugar caramelizes into a sweet, golden crust that’s impossible to resist.
- Party in a Jar: Between us, these are my secret weapon for birthdays, holidays, or just because. Shape them into little animals (or keep them round), dip them in chocolate, and suddenly you’ve got a showstopper dessert that looks way more impressive than it takes to make.
- Pantry Staple Magic: Honestly, you’re already stocked for this. Flour, sugar, butter, eggs, and vanilla? That’s it. No specialty ingredients, no last-minute grocery runs—just pull what you’ve got, and you’re golden. Plus, leftovers? Toss them in the freezer and reheat for a snack later.
Step-by-step instructions for animal cake pops
Let's create adorable, edible animal cake pops with silky frosting and playful details.
👨🍳 Step 1: Bake the Perfect Mini Cake Bites
Preheat your oven to 350°F and line the mini muffin tin with the parchment paper, cutting circles to fit each cavity. In a large bowl, whisk together the 1.5 cups all-purpose flour, 1.5 cups granulated sugar, 2 tsp baking powder, and 0.5 tsp salt. In a separate bowl, cream the 1 cup unsalted butter until light and fluffy, then beat in the 2 whole large eggs one at a time, followed by the 2 tsp vanilla extract.
Gradually mix the dry ingredients into the wet, alternating with the 0.5 cup milk until just combined. Fold in the 1.5 cups white chocolate chips so they're evenly distributed. Spoon the batter into the prepared muffin tin, filling each cavity about ¾ full. Bake for 12-15 minutes until a toothpick inserted comes out clean. Let cool completely in the tin before removing.
🍳 Step 2: Create Silky White Frosting
In a medium bowl, beat the 1 cup cold heavy whipping cream with an electric mixer until soft peaks form. Gradually add the 3 cups powdered sugar while mixing on low speed, then increase to medium-high until the frosting is smooth and holds stiff peaks. This should take about 2-3 minutes—don't rush it, or you'll end up with grainy frosting.
Transfer half the frosting to a separate bowl and tint it with food coloring if you'd like colored cake pops. Keep both bowls chilled until ready to use. The frosting should be thick enough to hold its shape when piped but still smooth enough to spread easily.
🥘 Step 3: Assemble the Cake Pops
Insert a lollipop stick into the bottom of each cake pop, pressing gently until it stands upright. Dip the stick end of each cake pop into the frosting, then roll it in the 1 lb fondant you've shaped into animal forms (like elephants, giraffes, or bunnies). Press gently to adhere, then place on a fresh sheet of parchment paper to set.
For extra flair, pipe a small amount of frosting onto the animal fondant to create details like eyes or spots. Let the pops set for 15-20 minutes in the refrigerator until the fondant is firm and the frosting is completely hardened. This ensures they'll hold their shape when you're ready to serve.
⏰ Step 4: Final Touches and Serving
Once fully set, carefully transfer your animal cake pops to a serving platter. If any fondant pieces come loose during handling, simply press them back into place with your fingers. For extra sparkle, you can dust them lightly with edible glitter or sprinkle with tiny edible confetti.
Serve immediately for the most fun presentation, or store in an airtight container in the refrigerator for up to 3 days. These whimsical treats are perfect for parties, children's events, or just as a playful dessert any time you want to bring a smile to someone's face!
Pro Tips For Making Animal Cake Pops
- CHILL THE DOUGH FIRST: Skip rolling out cold dough straight from the fridge—it cracks like a brittle cookie. Let your cake pop dough sit at room temp for 20-30 minutes before shaping. I learned this the hard way when my first batch of animal shapes split at the ears.
- WEIGH THE FLOUR: Scooping flour from the bag packs in extra air, making your cake pops dry and crumbly. Use a kitchen scale for 1:1 ratio with sugar—250g flour for every 250g sugar. Yes, it’s one more step, but your texture will be buttery and smooth.
- DIP IN MELTED CHOCOLATE: Dipping warm cake pops in melted chocolate (70% dark or milk) sets faster than coating. Use a fork to hold each pop and let excess drip off before decorating—this keeps your animals from turning into sticky blobs.
- FREEZE HALFWAY THROUGH: If your cake pops start sagging under their own weight, pop them back in the freezer for 15 minutes before decorating. I was skeptical until I tried it—now I never skip this, especially with larger animal shapes.
Make-ahead tips for this animal cake pops
Frosting Prep Ahead
Make your frosting 24 hours before assembling—it tastes even better after resting! Store it in an airtight container in the fridge, covered with plastic wrap pressed directly on the surface to prevent a skin from forming. When ready to use, let it sit at room temperature for 30-45 minutes while you shape your fondant animals. This gives it the perfect consistency for dipping and rolling. 🥛
Fondant Shaping Shortcuts
Save time by pre-rolling fondant into ¼-inch thick sheets and storing them between layers of parchment paper in a sealed bag. For animal shapes, use cookie cutters to outline basic forms before adding details like ears or tails. I keep a stash of pre-cut fondant shapes in the freezer—they thaw quickly and are ready for assembly. For extra stability, chill your fondant shapes on a baking sheet for 10 minutes before attaching to cake pops. 🎨
Cake Bites Storage Hack
Bake your cake pops 3 days ahead and store them in a single layer on a baking sheet in the fridge. Once cooled, transfer them to an airtight container separated by parchment paper to prevent sticking. When ready to assemble, let them come to room temperature for 15 minutes before inserting lollipop sticks—this prevents cracks when you dip them in frosting. 🍰
Fondant Color Mixing
Mix fondant colors a week in advance and store them in small, labeled ziplock bags. I keep a color chart on my fridge so I can quickly recreate shades. For animal-specific colors, use Wilton pastel pink for flamingos, yellow for lions, and gray for elephants. Store mixed fondant in the fridge for up to 2 weeks—it stays pliable and ready for shaping whenever inspiration strikes. 🎨
Assembly Timeline
Plan your assembly in stages: First, shape all your fondant animals and let them firm up in the fridge for 30 minutes. Then, dip your cake pops in frosting and roll them in fondant one batch at a time to keep everything fresh. Work in 3 batches if making 24 pops—this prevents the frosting from getting too warm and losing its structure. Store finished pops in the fridge until serving. ⏰
Gift-Giving Prep
For parties or gifts, assemble your cake pops 1 day ahead and store them in a single layer on a parchment-lined tray in the fridge. When ready to serve, transfer them to a decorative box or clear cellophane bag tied with ribbon. Add a small fondant animal charm as a gift topper for extra whimsy. These treats stay fresh for 3 days when properly stored, making them perfect for last-minute celebrations. 🎁
Nutrition facts
Frequently asked questions
Can I use store-bought cake mix for animal cake pops?
Yes, you can use a boxed cake mix, but the texture won't be as moist or crumb-free as homemade. For best results, add 1 extra egg and 2 tablespoons of milk to the mix to improve binding. Also, reduce the baking time by 2-3 minutes since boxed mixes tend to bake faster. The frosting and fondant steps remain the same!
How do I keep fondant from sticking to my hands while shaping?
Lightly dust your hands with cornstarch or powdered sugar before handling fondant. Work in a cool environment (around 65-70°F) to prevent it from getting too soft. For extra slip, use a silicone mat or parchment paper as a workspace. If fondant still sticks, chill your hands in cold water for 30 seconds before shaping again.
What's the best way to make fondant animal details look professional?
Start with a smooth fondant base by rolling it evenly (¼-inch thick) and using a cookie cutter for basic shapes. For details like ears or spots, use a small round cutter or your fingers to create texture. Pipe tiny dots of frosting for eyes or use a toothpick to draw fine lines. Chill details on a baking sheet for 5-10 minutes before attaching—they'll hold their shape better.
Can I make these cake pops without fondant?
Skip the fondant and use melted chocolate or colored candy melts for dipping instead. Roll the dipped pops in crushed nuts, sprinkles, or edible glitter for texture. For a rustic look, use cookie crumbs or cocoa powder. The key is to let the chocolate set completely (15-20 minutes) before serving to avoid mess.
Why did my cake pops fall apart when dipping in frosting?
This usually happens if the cake bites are too dry or the frosting isn't thick enough. Make sure your cake pops are fully cooled and store them in an airtight container with parchment between layers for up to 3 days. For extra stability, chill the frosting for 10 minutes before dipping and work in a cool room. If they still crumble, try adding 1 tablespoon of marshmallow fluff to the frosting for better adhesion.