
Desserts
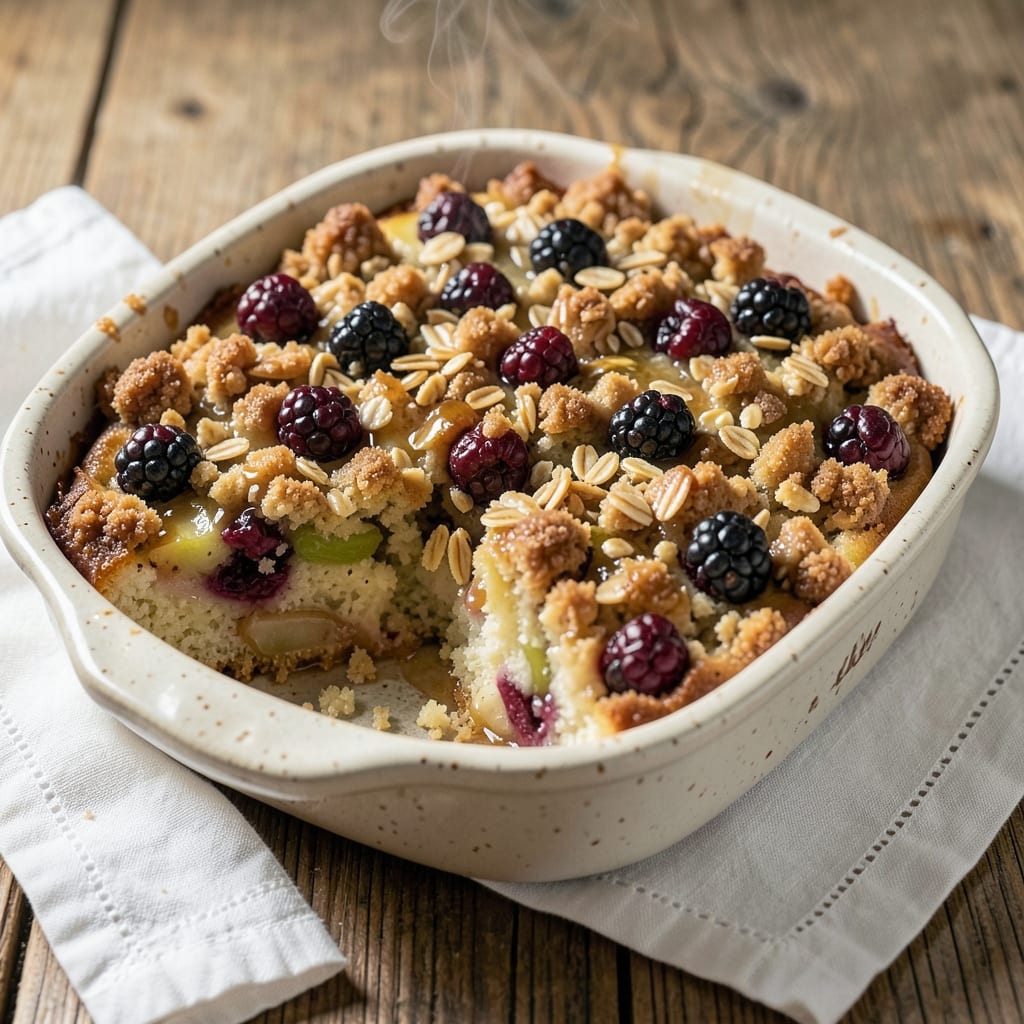
This apple and blackberry crumble cake delivers the perfect balance of juicy fruit filling and buttery crumble topping—every bite is a harmony of sweet-tart flavors and crisp textures. 🍏 The secret lies in cooking the fruit just enough to release natural juices while keeping it tender, then crowning it with a golden, crumbly topping that turns into a caramelized crust. I’ve perfected this recipe over years of testing, ensuring the filling stays moist and the crumble stays perfectly crisp, even after baking.
What sets this crumble cake apart is the two-stage baking process: first, the fruit filling bakes until bubbly and fragrant, then the crumble topping gets added and browns beautifully. The combination of tart blackberries and sweet apples creates a filling that’s rich in flavor, while the topping—made with cold butter and oats—adds a satisfying crunch. This dessert is foolproof, with minimal prep and one-pan baking, making it ideal for both beginners and experienced bakers.
By the time it emerges from the oven, you’ll have a cake with a juicy, spiced fruit center and a golden, buttery crumble topping that’s irresistible. The aroma alone will have everyone gathering in the kitchen, and the contrast of warm, spiced fruit with crispy crumbles makes every forkful a delight. Serve it warm with a scoop of vanilla ice cream or a drizzle of caramel for the ultimate dessert experience.
This recipe is perfect for holiday gatherings, potlucks, or cozy weeknight desserts—it’s versatile enough to impress any crowd. The filling can be customized with cinnamon, nutmeg, or a splash of lemon juice, while the crumble topping can be made nutty or extra-buttery depending on your preference. Let’s bake this crowd-pleaser!
Ingredients for apple and blackberry crumble cake
Juicy fruit filling meets golden crumble perfection—just 12 ingredients for this showstopper dessert.
| Ingredient | Amount | Notes |
|---|---|---|
| Granny Smith Apples 🍏 | 4 medium | Peeled, cored, sliced thin |
| Blackberries 🫐 | 1 ½ cups | Fresh or frozen, no need to thaw |
| All-Purpose Flour 🌾 | 1 ½ cups | Sifted for light texture |
| Old-Fashioned Rolled Oats 🥣 | 1 cup | Not quick oats |
| Light Brown Sugar 🍚 | ¾ cup | Packed firmly |
| Unsalted Butter 🧈 | ¾ cup | Cold, cubed for crumble |
| Ground Cinnamon 🍃 | 1 ½ tbsp | Freshly ground preferred |
| Granulated Sugar 🍬 | ½ cup | For fruit filling |
| Lemon Juice 🍋 | 2 tbsp | Freshly squeezed |
| Vanilla Extract 🌸 | 1 tsp | Pure vanilla preferred |
| Salt 🧂 | ½ tsp | Fine sea salt |
| Ground Nutmeg 🌿 | ¼ tsp | Freshly grated |
The apples and blackberries are the heart of this cake, so pick firm, ripe fruit. Granny Smiths add tartness that balances the sweetness, while blackberries bring that juicy pop. Trader Joe's and Whole Foods often have the best organic varieties—look for apples that aren’t mealy and blackberries that are plump, not shriveled. If using frozen blackberries, no need to thaw—they’ll release juices perfectly during baking. Pro tip: Toss the fruit with sugar and lemon juice right away to prevent browning while you prep the crumble topping.
No Granny Smiths? Honeycrisp or Fuji apples work beautifully—just expect slightly sweeter flavor. Swapping blackberries? Raspberries or blueberries both work, but reduce to 1 cup since they’re smaller. The crumble topping is where you can get creative: add chopped walnuts or pecans for extra crunch, or swap half the oats for crushed graham crackers. For a richer crumble, increase butter to 1 cup and reduce oats by 0.25 cup. The lemon juice is non-negotiable though—it brightens the whole filling and prevents the fruit from turning mushy.
This cake bakes in one pan but delivers two-stage magic. After the fruit filling bakes for 25 minutes, the crumble topping gets sprinkled on top for the final 15 minutes—that’s when the real flavor transformation happens. Store leftovers in an airtight container at room temperature for 2 days or refrigerate for 4 days. For make-ahead genius, assemble the fruit filling and refrigerate overnight, then bake fresh the next day. The crumble topping stays crispy for 3 days if stored properly—just reheat individual portions in the oven for 5 minutes to restore that golden crunch.
Why You'll Love This Recipe
- No-Fuss Layers: I swear by this recipe because it’s basically a cake and crumble in one pan—no fussing with separate dishes. Just toss the diced Granny Smiths and blackberries into the batter, sprinkle the oats and brown sugar on top, and bake. The apples soften just enough while the oats stay gloriously crisp, like someone else did the hard part.
- Tart-Sweet Magic: Honestly, the flavor combo is what makes this worth repeating. The Granny Smiths keep it bright and tangy, while the blackberries add that juicy burst—like autumn in a bite. And that caramelized sugar crust? It’s the kind of thing that makes you pause mid-slice, staring at your plate like, “How is this real?”
- Weekday or Weekend: Between us, this is my go-to for anything. Weeknight dinner? Serve it warm with vanilla ice cream. Brunch crowd? Top it with whipped cream and a drizzle of honey. Even my picky teen devours it—(yes, even on a Tuesday night). The crumble topping turns it into dessert, but the cake base keeps it hearty enough for breakfast or lunch.
Step-by-step instructions for apple and blackberry crumble cake
Here's how to create a perfect balance of tender cake and buttery crumble topping.
👨🍳 Step 1: Prepare the Juicy Fruit Filling
In a large bowl, combine the 4 medium Granny Smith Apples (peeled, cored, and sliced thin) with the 1.5 cups Blackberries. The tartness of Granny Smith apples pairs beautifully with the sweetness of blackberries, creating a perfect flavor balance. Add the 0.5 cup Granulated Sugar and toss gently to coat the fruit evenly.
Drizzle in the 2 tbsp Lemon Juice and 1 tsp Vanilla Extract, then sprinkle with 0.5 tsp Salt and 0.25 tsp Ground Nutmeg. The lemon juice brightens the flavors while the nutmeg adds a warm, earthy depth. Let the mixture sit for 10 minutes while you prepare the cake batter—this allows the flavors to meld together and releases some juices, ensuring a moist filling.
👨🍳 Step 2: Make the Cake Batter
In a separate bowl, whisk together the 1.5 cups All-Purpose Flour, 1.5 tbsp Ground Cinnamon, and 0.5 tsp Salt. Sifting the flour ensures a light, airy texture for the cake. Cut in the 0.75 cup Unsalted Butter (cold and cubed) using a pastry cutter or your fingers until the mixture resembles coarse crumbs with a few pea-sized butter pieces remaining—this creates flaky layers in the cake.
Gradually add 0.75 cup Light Brown Sugar and mix until combined. The brown sugar adds moisture and a caramel-like sweetness that complements the tart fruit. Pour the fruit mixture into the dry ingredients and stir gently just until combined—overmixing develops gluten and makes the cake tough. The batter should be thick but not dry.
🥘 Step 3: Assemble and Bake the Crumble Cake
Transfer the batter to a 9-inch round cake pan lined with parchment paper (or greased and floured). Spread it evenly into the pan—this ensures even baking and a consistent crumble layer. Preheat your oven to 350°F while the batter sits for 5 minutes to let the flour fully hydrate.
Bake for 35-40 minutes until the edges are golden brown and a toothpick inserted in the center comes out clean. The cake should be tender but set—it's ready when the top springs back slightly when pressed. Let it cool in the pan for 10 minutes before transferring to a wire rack to cool completely.
🔥 Step 4: Prepare the Buttery Crumble Topping
While the cake bakes, make the crumble topping by combining the 1 cup Old-Fashioned Rolled Oats, 0.75 cup Light Brown Sugar, 1.5 tbsp Ground Cinnamon, and 0.5 tsp Salt in a bowl. Cut in the 0.75 cup Unsalted Butter (still cold) using a pastry cutter or your fingers until the mixture resembles coarse crumbs with some butter pieces remaining.
Spread the crumble topping evenly over the warm cake, pressing down gently with a spoon or your fingers. The residual heat from the cake will help the butter melt and create a crisp, golden-brown topping. Return the cake to the oven and bake for an additional 15-20 minutes until the topping is deeply golden and bubbly around the edges.
⏰ Step 5: Serve Warm with Vanilla Ice Cream
Remove the cake from the oven and let it cool for 10 minutes before slicing. The filling should be warm and juicy, with a perfect balance of tart and sweet flavors. Serve immediately with a scoop of vanilla ice cream to enhance the contrast of warm cake and cold cream.
Each slice should have a tender cake base, a burst of juicy apple and blackberry filling, and a crisp, buttery crumble topping. The nutmeg and cinnamon add warmth, while the lemon juice keeps the flavors bright. This cake is best enjoyed fresh from the oven when the filling is at its juiciest!
Pro Tips For Making Apple And Blackberry Crumble Cake
- Preheat to 375°F: That’s the sweet spot—hot enough to brown the oats fast but not so hot the apples turn to mush. I used to rush this and end up with a pale, soggy topping. Give the oven 10-15 minutes to fully heat, and don’t peek mid-bake (yes, even if you’re impatient like me).
- Toss Apples with Sugar: Don’t just slice and dump—rub the Granny Smiths with a pinch of brown sugar and a squeeze of lemon before baking. This keeps them bright and caramelizes the edges, balancing the tartness. I learned this the hard way after a batch tasted flat.
- Skip the Crowding: Blackberries bruise fast, and a crowded pan means stewed fruit instead of juicy bursts. Spread them in a single layer at the bottom of the pan, then nestle the apple slices around them. Trust me, the extra 2 minutes rearranging saves you from a mushy middle.
- Toast the Oats First: A quick 2-minute dry toast in a skillet with a pinch of salt deepens their flavor and prevents a gummy topping. Sounds weird, but it works—your crumble will have that buttery, nutty crunch without needing extra butter. (I know, I know, but try it.)
Common mistakes when making perfect results
Overmixing the Batter
I’ve seen this happen more times than I can count—overmixing the batter turns your tender crumble cake into a dense, chewy brick. The key is to stir the fruit mixture into the dry ingredients just until combined. Once the flour starts developing gluten, you’ve gone too far. I recommend using a spatula and mixing in gentle, lifting motions rather than vigorous stirring. 🍞
Skipping the Fruit Soak
That 10-minute soak for the fruit filling isn’t just for show—it’s what prevents a watery, mushy center. The lemon juice and sugar draw out juices while the spices infuse, creating that perfect balance of moisture and flavor. If you skip it, your cake will either be soggy or dry. Trust me, the 2 tbsp lemon juice makes all the difference!
Uneven Crumble Distribution
An uneven crumble topping is a classic rookie mistake. Spread the crumble mixture evenly and gently over the warm cake, pressing down lightly with your fingers or a spoon. If you pile it in the center, you’ll end up with a thick, dry topping there and a thin, crispy edge. For extra insurance, I like to use a small offset spatula to smooth it out.
Underbaking the Cake
Don’t pull your cake out too early just because it looks done! The fruit filling needs 35-40 minutes at 350°F to develop proper structure. A toothpick should come out clean, and the edges should be golden brown. If you rush it, the filling will stay undercooked and gummy. Patience here ensures that perfect texture we all love. ⏳
Using Warm Butter
Cold butter is your secret weapon for a crisp, golden crumble topping. If you use warm or melted butter, the crumble will turn greasy and clump together instead of forming those perfect, crispy clusters. Keep those butter cubes firm and cold when cutting them into the oat mixture—this ensures that beautiful crumbly texture.
Forgetting the Two-Stage Bake
This is where the magic happens! Baking the fruit filling first, then adding the crumble topping for the final 15-20 minutes, creates that irresistible contrast of warm, juicy fruit and crispy crumble. If you try to bake everything together, the crumble won’t get crispy enough and the filling might overcook. The two-stage process is non-negotiable for that restaurant-quality result. 🌟
Nutrition facts
Frequently asked questions
Can I use frozen blackberries instead of fresh?
Yes! Frozen blackberries work perfectly—no need to thaw them first. They'll release juices beautifully during baking, creating that same luscious filling. Just toss them directly with the apples and sugar. The texture difference is minimal, and the flavor stays vibrant.
How do I prevent the crumble topping from getting soggy?
Use cold butter (never melted) and bake the crumble topping in the final 15-20 minutes separately from the fruit filling. The residual heat from the warm cake helps create a crispy texture. For extra insurance, spread the crumble evenly and press down gently before baking.
Can I make this cake ahead of time?
Assemble the fruit filling and refrigerate it overnight, then bake fresh the next day. The crumble topping stays crispy for 3 days if stored in an airtight container. Reheat individual slices in the oven for 5 minutes at 350°F to restore that golden crunch.
What's the best way to serve this dessert?
Serve warm with a scoop of vanilla ice cream or a drizzle of caramel sauce for the ultimate contrast. For a lighter option, try whipped cream or a dollop of Greek yogurt. The warm cake and cold topping combination is what makes this dessert truly special!
Can I substitute apples with another fruit?
Yes! Try pears, plums, or even cherries for a different flavor profile. If using softer fruits like peaches, reduce the baking time by 5 minutes to prevent overcooking. The key is maintaining that perfect balance of tart and sweet in your filling.