
Desserts
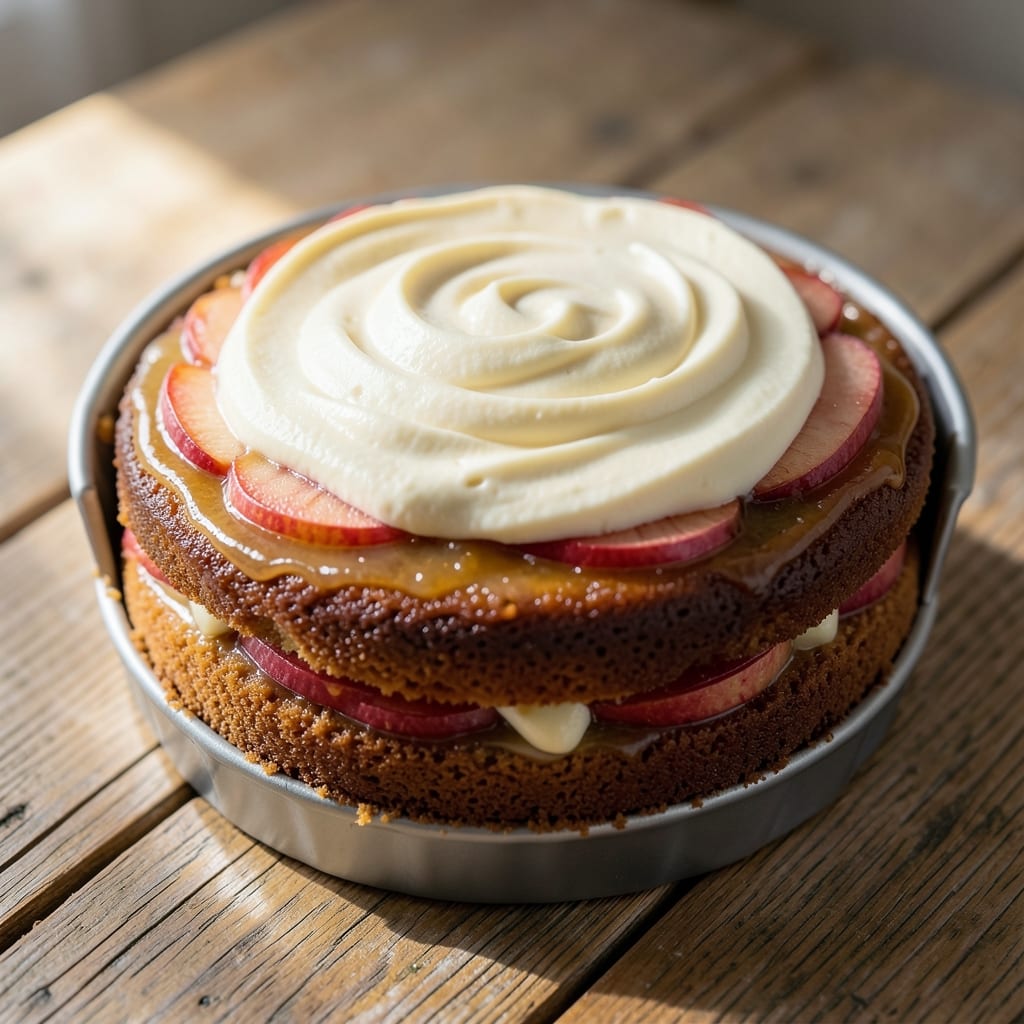
This apple cake recipe in springform pan delivers the perfect balance of moist layers and a golden caramelized top that makes every slice worth savoring. The springform pan ensures even baking and effortless removal, while the tender crumb and spiced apple filling create a dessert that feels both comforting and impressive. I developed this recipe after years of testing—it’s the one that finally earned compliments instead of "Is this too dense?" questions.
The secret to success lies in the technique: thinly sliced apples tossed in cinnamon and sugar before baking, layered between a buttery crumb that stays soft. Baking at 350°F for 40–50 minutes guarantees a perfectly set top without drying out the cake. The springform pan’s flexibility also makes it ideal for serving—no need to worry about crumbling edges when releasing the cake from the pan.
What you’ll end up with is a cake that’s richly spiced, with juicy apple chunks peeking through tender layers and a caramelized crust that adds just the right amount of crunch. The aroma alone will have your kitchen smelling like autumn, and the texture—moist but not soggy—is the result of precise ingredient ratios and baking times.
Serve warm with a scoop of vanilla ice cream or a dusting of powdered sugar for a restaurant-worthy finish. This recipe scales beautifully for gatherings, and the springform pan makes it easy to transport. Let’s get baking!
Ingredients for apple cake recipe springform pan
The foundation of this springform pan apple cake: buttery crumb, spiced apples, and precise ratios for perfect moisture.
| Ingredient | Amount | Notes |
|---|---|---|
| All-Purpose Flour 🌾 | 2 ½ cups | Sifted for light texture |
| Granulated Sugar 🍚 | 1 ½ cups | Superfine preferred for smoothness |
| Brown Sugar 🍚 | ½ cup | Packed for moisture |
| Unsalted Butter 🧈 | 1 cup | Cold, cubed for crumb |
| Large Eggs 🥚 | 2 whole | Room temperature |
| Vanilla Extract 🍯 | 1 tbsp | Pure, not imitation |
| Baking Powder 🧂 | 2 tsp | Freshly measured |
| Ground Cinnamon 🌿 | 1 ½ tsp | Freshly ground preferred |
| Ground Nutmeg 🌿 | ¼ tsp | Freshly grated |
| Salt 🧂 | ½ tsp | Fine sea salt |
| Red Apples 🍎 | 4 medium | Thinly sliced, peeled |
| Lemon Juice 🍋 | 1 tbsp | Freshly squeezed |
| Powdered Sugar 🍚 | ¼ cup | For dusting |
The apples are non-negotiable—Honeycrisp or Fuji deliver the right balance of sweetness and tartness. Whole Foods or local orchards carry the best varieties, but any crisp apple works in a pinch. Avoid mealy ones like Red Delicious. Peel them first for consistent texture, then slice into 1/4-inch thick rounds. Toss immediately with cinnamon and sugar to prevent browning. The butter matters too: Plugrá or Land O’Lakes cultured add richness, but any unsalted will work. Keep it cold when creaming to avoid a dense crumb.
No vanilla extract? Vanilla bean paste at half the amount gives deeper flavor. Short on powdered sugar for dusting? Confectioners’ sugar from a jar works, but sift it first to avoid lumps. The baking powder must be fresh—test by mixing with water; it should fizz immediately. If your apples are particularly juicy, drain them briefly after tossing to prevent a soggy bottom. For extra richness, swap half the all-purpose flour for cake flour. And if you’re feeling ambitious, add 1/4 cup chopped walnuts to the crumb for texture.
Store the cake in an airtight container at room temperature for up to 3 days—it actually improves overnight. For longer storage, wrap tightly in plastic and refrigerate for 1 week. Reheat slices at 300°F for 5–7 minutes to restore moisture. The springform pan makes slicing effortless—just run a thin knife around the edges first. Leftovers? Freeze in single slices for up to 3 months. Thaw at room temperature before serving.
Why You'll Love This Recipe
- Springform Simplicity: I swear by this recipe because the springform pan handles the crumbly texture like a dream—no lining, no sticking, just pure ease. Mix the dry ingredients, fold in the apples, and let the butter and brown sugar do the magic while you sip coffee.
- Caramel-Kissed Magic: That mix of granulated and brown sugar? It turns the apples into little pockets of caramelized bliss. The butter keeps it moist, and the eggs bind it all together—simple ingredients, but the flavor? Ridiculously good.
- Weeknight Workhorse: Slice it for breakfast, pack it for lunch, or serve it at a potluck—this cake holds up everywhere. Honestly, I’ve even reheated leftovers in the microwave, and it still tastes like it came fresh from the oven.
- Budget-Friendly Staples: Flour, sugar, butter, eggs—these are pantry basics that won’t break the bank. Between us, I’ve made this cake at least six times this year, and it’s always the first to disappear. Plus, the springform pan means no extra dishes to wash.
Step-by-step instructions for apple cake in springform pan
This method delivers a perfectly moist crumb and caramelized top every time.
Prepare the Apple Filling
Peel the 4 medium red apples and slice them into ¼-inch thick pieces. Toss them immediately with the 1 tablespoon lemon juice to prevent browning and preserve their brightness. The acidity also enhances the apples' natural sweetness and prevents them from turning mushy during baking.
Transfer the apples to a bowl and set aside. I like to arrange them in a single layer on the prepared cake pan later, which creates beautiful visual contrast against the golden cake layers. The lemon juice will also help balance the sweetness of the cake, creating a harmonious flavor profile throughout.
Cream Butter and Sugars for Maximum Moisture
In a stand mixer fitted with the paddle attachment, beat the 1 cup unsalted butter (cold and cubed) with the 1.5 cups granulated sugar and 0.5 cup brown sugar on medium speed for 3-4 minutes. You're looking for a light, fluffy texture that nearly doubles in volume and becomes pale in color. This creaming process incorporates air into the batter, which creates that tender, moist crumb we're after.
I press down gently on the butter mixture with a spatula during the first minute to break up any large lumps. This ensures even distribution of the sugars and creates a smoother batter. The brown sugar adds moisture and depth of flavor, while the granulated sugar provides sweetness and structure to the cake.
Combine Wet Ingredients and Dry Ingredients Separately
Add the 2 whole large eggs (room temperature) one at a time, mixing on low speed for 30 seconds after each addition until fully incorporated. Then add the 1 tablespoon vanilla extract and mix for another 10 seconds. The eggs provide structure and richness to the cake, while the vanilla adds aromatic depth that complements the apples beautifully.
In a separate bowl, whisk together the 2.5 cups all-purpose flour (sifted), 2 teaspoons baking powder, 1.5 teaspoons ground cinnamon, 0.25 teaspoon ground nutmeg, and 0.5 teaspoon salt. The cinnamon and nutmeg create warm, aromatic notes that pair perfectly with the apples, while the baking powder ensures proper rise. Sifting the flour prevents lumps and creates a lighter texture.
Layer Cake and Apples in Springform Pan
Preheat your oven to 350°F and grease a 9-inch springform pan thoroughly with butter, then dust with flour. Pour half of the batter into the prepared pan and spread it evenly. Arrange half of the apple slices in a single layer on top of the batter, pressing down gently to create a neat pattern. This layering technique creates the signature alternating pattern of cake and apples.
Spoon the remaining batter over the apples and spread it evenly. Top with the remaining apple slices, again pressing down gently to create a uniform layer. The apples should be evenly distributed throughout the cake, with no more than ¼ inch between slices. This arrangement ensures each bite contains both cake and apple, delivering balanced texture and flavor.
Bake Until Golden and Set
Bake the cake in the preheated oven for 50-55 minutes until the top is deep golden brown and a toothpick inserted in the center comes out clean. The cake should spring back slightly when pressed gently in the center, indicating it's fully set. The springform pan allows for even heat distribution, which is crucial for achieving that perfect caramelized top.
During the last 10 minutes of baking, you'll notice the top develop a beautiful golden-brown crust with caramelized spots. This is where the magic happens—the sugars in the apples caramelize, creating that irresistible aroma and flavor. Let the cake cool in the pan for 15 minutes before releasing the springform and transferring to a wire rack to cool completely.
Dust with Powdered Sugar for Final Touch
Once the cake has cooled completely, dust the top generously with the 0.25 cup powdered sugar using a fine-mesh sieve. This final step adds a delicate sweetness and creates that professional bakery finish. The powdered sugar also helps absorb any excess moisture from the apples, keeping the cake tender while adding a subtle sheen to the surface.
Slice the cake into 4 equal wedges and serve at room temperature. Each slice should reveal the beautiful layers of cake and apple, with a moist crumb that melts in your mouth and a caramelized top that adds depth of flavor. The combination of warm spices, tender apples, and rich cake creates a harmonious balance that makes this cake truly special.
Pro Tips For Making Apple Cake Recipe Springform Pan
- CREAM BUTTER AT ROOM TEMP: Don’t grab that cold butter straight from the fridge—let it sit for 30-45 minutes until it’s soft but still holds shape. I learned this the hard way when my cake turned out dense and greasy after mixing stiff, chilled butter into the flour. Room temp butter blends smoother and creates a lighter crumb.
- WEIGH YOUR FLOUR (NO SCOOPING): Spoon the flour into your measuring cup and level it off with a knife—don’t scoop directly from the bag. Flour compacts differently, and overmeasuring by even 2 tablespoons can make your cake dry. I was skeptical until I tried it, and the texture improved noticeably.
- DON’T OVERMIX THE BATTER: Stop mixing as soon as the flour disappears—overworking the batter develops gluten, which turns your tender cake into a tough, chewy mess. Use a spatula to gently fold in the apples and any wet additions. I used to mix until it looked "perfect," but now I resist the urge.
- BAKE UNTIL 205°F (NOT JUST TIME): Check the internal temp with a thermometer—205°F (96°C) ensures the center is fully set without drying out. My cake used to come out gummy in the middle because I relied on the recipe’s time estimate, which varies by oven. A thermometer is the only reliable way.
Essential equipment for this dish
Springform Pan Essentials
A 9-inch springform pan is non-negotiable for this recipe—it creates even heat distribution and makes removing the cake effortless. I recommend Nordic Ware or Wilton for their sturdy construction and reliable side release. The removable sides prevent crumbling when slicing, which is especially important for layered cakes. 🌟
Non-Stick Spray Alternative
While butter and flour work, I’ve found Baker’s Joy Non-Stick Spray saves time and prevents sticking. Spray the pan generously after buttering, then dust with flour. This combo ensures the cake releases cleanly from the sides. For extra insurance, I line the bottom with parchment paper before adding batter.
Oven Thermometer Check
Your oven’s temperature gauge might be off by 25°F or more. I always use a Thermoworks Oven Thermometer to confirm 350°F—this prevents underbaking or overbrowning. Place it near the cake during the last 10 minutes of baking for accuracy. A properly calibrated oven is the secret to consistent results. ⚡
Wire Rack Must-Have
Never let the cake cool in the pan—it traps steam and makes the bottom gummy. A cooling rack (preferably with non-warped wire) is essential. I use a OXO Good Grips rack for its stability. Elevating the cake also prevents soggy layers from residual heat.
Powdered Sugar Sieve
For that bakery-finish dusting, a fine-mesh sieve (like Kitchenaid 6-inch) is key. It distributes ¼ cup powdered sugar evenly without clumps. Tap the sieve gently over the cake for a professional-looking finish. A regular shaker won’t give you the same smooth coverage.
Apple Slicing Tools
Uniform ¼-inch apple slices are critical for even baking. A mandoline (like OXO Good Grips) ensures precision, but a sharp chef’s knife works too. For safety, I use the mandoline’s thickness guide and never touch the blade without the protective hand guard. Thin, even slices caramelize perfectly without turning mushy. 🍎
Nutrition facts
Frequently asked questions
Why does this recipe use a springform pan instead of a regular cake pan?
The springform pan creates a perfectly even bake and makes removing the cake effortless—no crumbling edges! The removable sides also allow for easy slicing, which is especially helpful for layered cakes like this one. Plus, it prevents overbrowning on the sides while letting the top caramelize beautifully.
Can I substitute tart apples like Granny Smith for sweet apples?
Tart apples work wonderfully—their acidity balances the sweetness of the cake. For best results, use a mix of Honeycrisp and Granny Smith (about 60% tart, 40% sweet). The lemon juice in the recipe helps brighten the flavor even more. Just be sure to peel them first for consistent texture.
How do I prevent the cake from becoming dry or gummy?
Keep the butter cold when creaming and don’t overmix the batter—this ensures a tender crumb. Also, let the cake cool in the pan for 15 minutes before releasing the springform, then finish cooling on a wire rack. If it’s still gummy, slice it slightly thicker and serve warm with ice cream. The powdered sugar dusting also helps absorb excess moisture.
What’s the best way to store leftovers?
Store the cake in an airtight container at room temperature for up to 3 days—it actually tastes better the next day! For longer storage, wrap individual slices in plastic and freeze for up to 3 months. To revive, thaw overnight in the fridge or warm slices at 300°F for 5–7 minutes before serving.
Can I make this cake gluten-free?
Yes, but with adjustments! Replace the all-purpose flour with a 1:1 gluten-free baking flour blend (like Bob’s Red Mill) and add 1 teaspoon xanthan gum to improve structure. You may also need to reduce the baking powder by 0.5 teaspoon and bake at 325°F for 55–60 minutes to prevent overbrowning. Test with a toothpick for doneness.