
Desserts
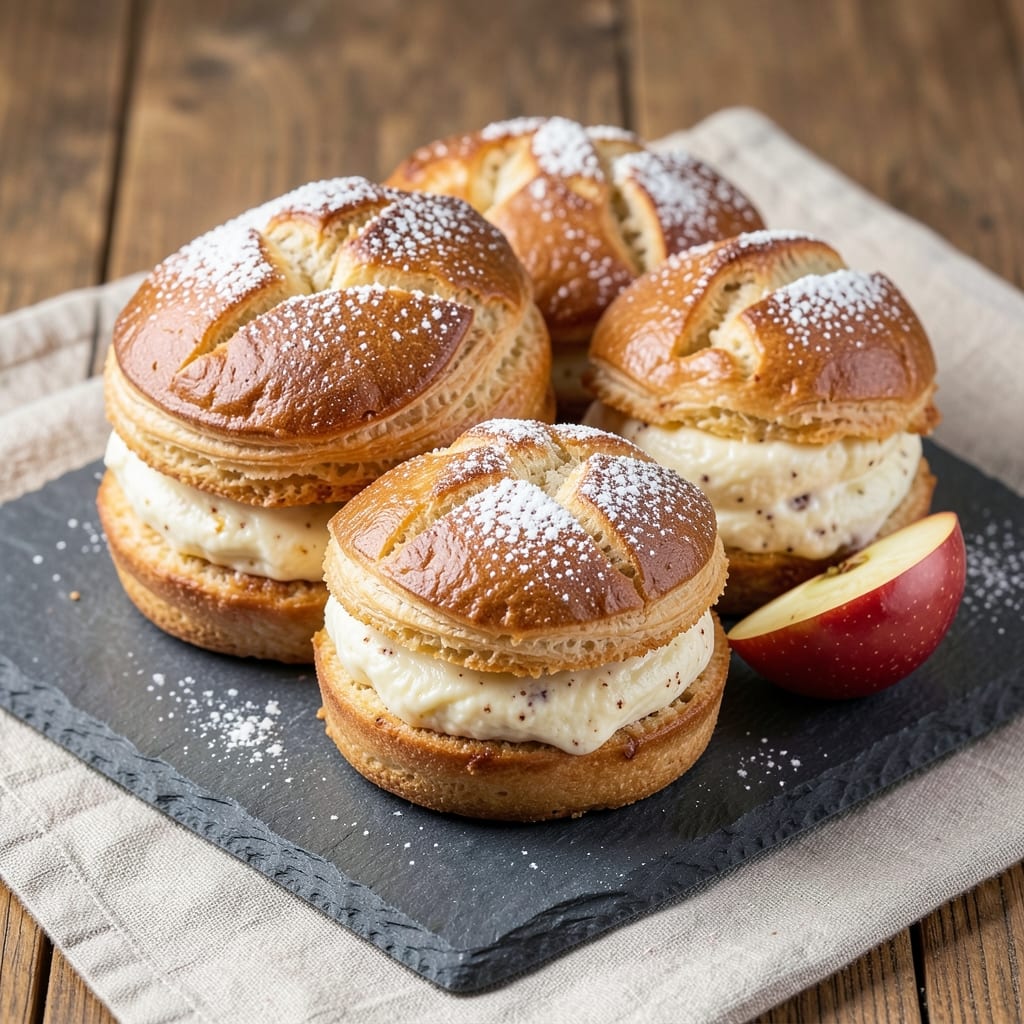
This apple cheesecake buns recipe delivers the perfect balance of flaky layers, spiced apple filling, and creamy cheesecake swirls—all wrapped in golden, buttery pastry. 💛 The secret lies in the precise layering of a tender yeast dough with a warm apple compote and rich cheesecake mixture, creating a dessert that's both comforting and impressive. I've perfected this recipe through years of baking, ensuring the cheesecake filling sets properly while maintaining that signature streusel crunch on top.
The process begins with a simple yet flavorful yeast dough that proofs beautifully, forming the foundation for your buns. While the dough rises, you'll prepare the apple filling—a blend of tender apples, warm spices, and a touch of cinnamon—that infuses every bite with autumnal warmth. The cheesecake mixture, made with cream cheese and a hint of vanilla, adds luxurious richness that pairs perfectly with the apples.
Once baked, you'll have golden-brown buns with a tender, flaky crust that gives way to layers of creamy cheesecake and spiced apple filling. The streusel topping adds a delightful crunch, while the cheesecake filling remains perfectly set, offering a balance of textures and flavors in every bite. This recipe is ideal for fall gatherings, holiday brunch, or whenever you crave a dessert that feels like a warm hug.
With just a few key techniques—proper proofing, careful layering, and precise baking—you'll achieve restaurant-quality results at home. The combination of buttery dough, spiced apples, and creamy cheesecake makes these buns a standout dessert that's sure to impress. Let's get started on creating this showstopping treat!
Ingredients for apple cheesecake buns
Buttery dough meets spiced apples and creamy cheesecake—this dessert is pure comfort in every bite.
| Ingredient | Amount | Notes |
|---|---|---|
| All-Purpose Flour 🌾 | 4 cups | Spooned and leveled for accuracy |
| Unsalted Butter 🧈 | 1 cup | Cold, cubed for dough |
| Granulated Sugar 🍚 | ¼ cup | For dough sweetness |
| Active Dry Yeast 🍞 | 2 ¼ tsp | Freshly opened packet |
| Large Eggs 🥚 | 1 whole | Room temperature |
| Milk 🥛 | ½ cup | Warm, not hot |
| Salt 🧂 | ½ tsp | Kosher or sea salt |
| Red Apples 🍎 | 4 medium | Peeled, cored, diced |
| Light Brown Sugar 🍚 | ½ cup | Packed, for filling |
| Ground Cinnamon 🌿 | 2 tsp | Freshly ground preferred |
| Lemon Juice 🍋 | 1 tbsp | Freshly squeezed |
| Cream Cheese 🧀 | 16 oz | Room temperature, full-fat |
| Powdered Sugar 🍚 | ½ cup | For cheesecake filling |
| Vanilla Extract 🌸 | 1 tsp | Pure vanilla preferred |
| Old-Fashioned Oats 🌾 | ½ cup | Rolled, for streusel |
| Chopped Walnuts 🥜 | ¼ cup | Toasted for crunch |
The apples are non-negotiable here. Honeycrisp or Granny Smith work best—they stay tender without turning mushy. Trader Joe's or local orchards usually have the freshest, but grocery store apples in season are fine too. Peel and core them first—no one wants a mouthful of skin. For the dough, King Arthur flour is my go-to since it has that perfect protein balance, but any all-purpose will work. The butter needs to be cold for flaky layers, so take it out of the fridge just before mixing. Don't skip the warm milk—it activates the yeast perfectly.
No cream cheese? Substitute with ricotta plus an extra tablespoon of powdered sugar—it's not identical, but close. Running short on apples? Pear or quince work beautifully, though the flavor shifts slightly. The oats in the streusel can be swapped for crushed graham crackers if you're out, but toasted nuts add that extra crunch. For the cinnamon, Ceylon is milder if you prefer less spice, but regular works too. The vanilla extract matters—imitation smells like chemicals, so splurge on the good stuff if you can. And if you're making these ahead, the dough can proof overnight in the fridge—just let it come to room temp before shaping.
This dessert is best made a day ahead—flavors meld beautifully. Store the assembled buns (unbaked) in the fridge for up to 24 hours before baking. Once baked, they keep at room temperature for 2 days or in the fridge for 5 days. For freezing, bake first, then wrap tightly in plastic wrap and foil. Reheat in a 350°F oven for 10 minutes to restore that fresh-from-the-oven warmth. I always make a double batch—they disappear fast at holiday gatherings!
Why You'll Love This Recipe
- No Yeast Struggles: I’ve made doughs that took forever to rise—this one? Just mix, let it sit for 30 minutes, and boom. The yeast does all the heavy lifting while I sip coffee.
- Sweet & Tangy Magic: That apple filling—spiced with cinnamon and a hint of lemon—cuts through the rich, creamy cheesecake swirl. Honestly, the contrast is what makes it ridiculous good.
- Breakfast or Dessert: Honestly, I eat these for breakfast when I’m lazy, but they’re also the star of my Sunday brunch spread. Same dough, same filling, just different vibes.
- Leftovers? Please.: These freeze like a dream and reheat in seconds. My go-to for lazy mornings or when I need to feed a crowd without extra effort. (Yes, even on a Tuesday night.)
Step-by-step instructions for apple cheesecake buns
Here's how to create these irresistible buns with layers of spiced apple filling and creamy cheesecake swirls.
👨🍳 Step 1: Prepare the Cheesecake Filling
In a large mixing bowl, beat the 16 oz cream cheese with the 0.5 cup powdered sugar and 1 tsp vanilla extract until completely smooth and creamy. This should take about 3-4 minutes using an electric mixer on medium speed. The mixture should be light and fluffy with no lumps remaining.
In a separate small bowl, whisk together the 1 whole large egg and 0.5 cup milk. Slowly pour this mixture into the cream cheese while continuing to mix on low speed. This gradual addition prevents the filling from curdling. The final mixture should be thick but spreadable - if it's too stiff, add 1-2 teaspoons of the milk you set aside.
🍳 Step 2: Make the Apple Filling
In a medium saucepan, combine the 4 medium red apples (diced), 0.5 cup light brown sugar, 2 tsp ground cinnamon, and 1 tbsp lemon juice. Cook over medium heat for 8-10 minutes, stirring occasionally, until the apples have softened and released their juices. You'll know it's ready when the mixture becomes thick and syrupy, with the apples breaking down slightly.
Remove from heat and let cool completely before using. This cooling step is crucial - warm apple filling will melt the butter in your dough too quickly. I like to spread the cooled filling on parchment paper and refrigerate for 15 minutes while I prepare the dough.
👨🍳 Step 3: Create the Dough and Streusel
In a stand mixer fitted with the dough hook, combine the 4 cups all-purpose flour, 0.25 cup granulated sugar, 0.5 tsp salt, and 2.25 tsp active dry yeast. Mix on low speed until combined. Add the 1 cup cold unsalted butter (cut into cubes) and mix until the butter is evenly distributed and the mixture resembles coarse crumbs.
In a small bowl, warm the 0.5 cup milk to about 110°F (it should be warm to the touch but not hot). Add the warm milk to the flour mixture along with the 1 whole large egg, mixing until a soft dough forms. Knead for 5-7 minutes until smooth and elastic. The dough should be slightly sticky but not wet - if needed, add 1-2 tablespoons of flour.
For the streusel topping, pulse the 0.5 cup old-fashioned oats, 0.25 cup chopped walnuts, and 2 tablespoons of the remaining flour in a food processor until finely ground. Set aside.
🥘 Step 4: Assemble and Bake the Buns
Divide the dough into 12 equal pieces (about 3 ounces each) and roll each into a 12-inch circle on parchment paper. Spread 1-2 tablespoons of the cheesecake filling over each circle, leaving a 1-inch border. Top with 1-2 tablespoons of apple filling, then sprinkle with about 1 teaspoon of the streusel mixture.
Roll up each circle tightly from the center outward, tucking in the sides as you go. Place seam-side down on a parchment-lined baking sheet. Cover with a clean kitchen towel and let rise in a warm place for 1-1.5 hours or until doubled in size. The buns should spring back slowly when pressed gently with a finger.
🔥 Step 5: Bake to Golden Perfection
Preheat your oven to 375°F. Bake the buns for 20-25 minutes until they're golden brown and sound hollow when tapped on the bottom. For extra browning, brush the tops with 1 tablespoon melted butter and return to the oven for 2-3 minutes if needed.
Let cool for 10 minutes before serving to allow the fillings to set slightly. The buns should have a soft, pillowy exterior with a tender interior that bursts with creamy cheesecake and spiced apple flavors in every bite. For best results, serve warm with a scoop of vanilla ice cream or a dollop of whipped cream.
Pro Tips For Making Apple Cheesecake Buns
- SOFTEN THE BUTTER FIRST: Cold butter in the dough is the fast track to tough, dry buns—especially when you’re packing in that cheesecake filling. Microwave the butter in 10-second bursts until it’s just pliable (not melted) before mixing, and your buns will stay tender. I learned this the hard way after making a batch that crumbled like stale crackers.
- WEIGH YOUR FLOUR: Spooning flour into the bowl and scooping it back? That’s how you end up with buns that either collapse or taste like sawdust. Use a kitchen scale for precision—1 cup of all-purpose flour actually weighs 120–125 grams, and that little extra can make your dough too dense. Trust me, your buns will thank you.
- DON’T OVERPROOF THE DOUGH: Watching the dough rise until it’s just puffy—no higher—is non-negotiable. Overproofed dough flattens when baked, and those apple cheesecake buns will look sad and spread out like pancakes. Poke the dough gently: if it springs back slowly, it’s ready. If it bounces back fast, give it 10 more minutes.
- CHILL THE DOUGH BEFORE SHAPING: Warm dough sticks like glue and fights you every step of the way. After the first rise, pop the dough in the fridge for 20–30 minutes before rolling and filling. It’ll firm up enough to handle without tearing, and your buns will hold their shape better in the oven. Yes, even if you’re impatient like me.
Storing and reheating this recipe
Fridge Storage Tips
Store your freshly baked apple cheesecake buns in an airtight container at room temperature for up to 2 days—they taste best when slightly warm. For longer storage, refrigerate in the same container for up to 5 days. The cheesecake filling stays creamy while the dough maintains its flaky texture when properly sealed. I always line the container with parchment paper to prevent sticking—trust me, it makes cleanup a breeze! 💛
Freezing Unbaked Buns
Freeze unbaked buns on a parchment-lined tray for 1 hour to set, then transfer to a ziplock freezer bag with all air removed. This prevents freezer burn and keeps the layers intact. Thaw overnight in the fridge before baking—no need to worry about texture changes. The dough proofs beautifully after thawing, and the fillings stay vibrant. Label your bag with the date to track freshness.
Oven Reheating Method
For the best texture, reheat cooled buns in a 350°F oven for 10-12 minutes until warmed through. Place them on a baking sheet with a splash of water in the pan to add moisture. This method restores that fresh-from-the-oven warmth without drying out the fillings. I like to reheat just a few at a time so they stay moist—no one wants a dry cheesecake bun! ✨
Microwave Shortcut
Need a quick fix? Microwave individual buns on medium power (50%) for 30-45 seconds. Cover with a damp paper towel to prevent drying. This works best for serving 1-2 buns immediately—great for a last-minute dessert craving. Just be cautious with the cheesecake filling; it can get slightly rubbery if overcooked. A quick zap is better than none!
Streusel Freshness
The streusel topping stays crispy for days when stored properly. If you notice it softening after reheating, sprinkle a pinch of powdered sugar on top before serving—it helps restore that delightful crunch. For extra flavor, toast the streusel in a dry pan for 1-2 minutes before reheating the buns. This little trick makes all the difference in texture and taste! 🌟
Nutrition facts
Frequently asked questions
Can I make these buns without yeast?
Yes! Swap the yeast dough for a quick bread dough using 2 cups all-purpose flour, 1 tsp baking powder, 1/2 tsp baking soda, 1/4 cup melted butter, 1/4 cup milk, and 1 egg. Mix, then roll and assemble like the original recipe. Bake immediately at 375°F for 20-25 minutes—no rising needed! The texture will be denser but still delicious.
Why is my cheesecake filling separating?
This usually happens when the cream cheese isn't fully softened or the egg mixture is added too quickly. Always beat the cream cheese until completely smooth, and add the egg-milk mixture slowly while mixing on low. If it separates during baking, the filling will still taste great—just stir it gently after cooling to blend the layers.
Can I use canned apple pie filling instead of fresh?
but adjust the spices! Use 1 (21 oz) can of unsweetened pie filling (like Libby's) and reduce the brown sugar to 1/4 cup. Add 1/2 tsp extra cinnamon and 1/4 tsp nutmeg to compensate for the lack of fresh apple flavor. Simmer for 5 minutes to thicken before using, then cool completely.
How do I prevent the dough from sticking?
Use plenty of flour when rolling—about 1 tablespoon per circle. Keep your work surface well-floured and use parchment paper under the dough. If the dough feels too sticky, let it rest for 10 minutes before rolling. For extra insurance, chill the dough for 30 minutes before shaping—this helps it hold together better.
Can I make these gluten-free?
Yes, but with adjustments. Replace the flour with a 1:1 gluten-free baking flour blend (like Bob's Red Mill) and add 1 tsp xanthan gum. Use 1/4 cup melted butter instead of cold cubes, and let the dough rest for 20 minutes before shaping. The texture will be slightly denser, but the flavors stay rich and satisfying!