Desserts
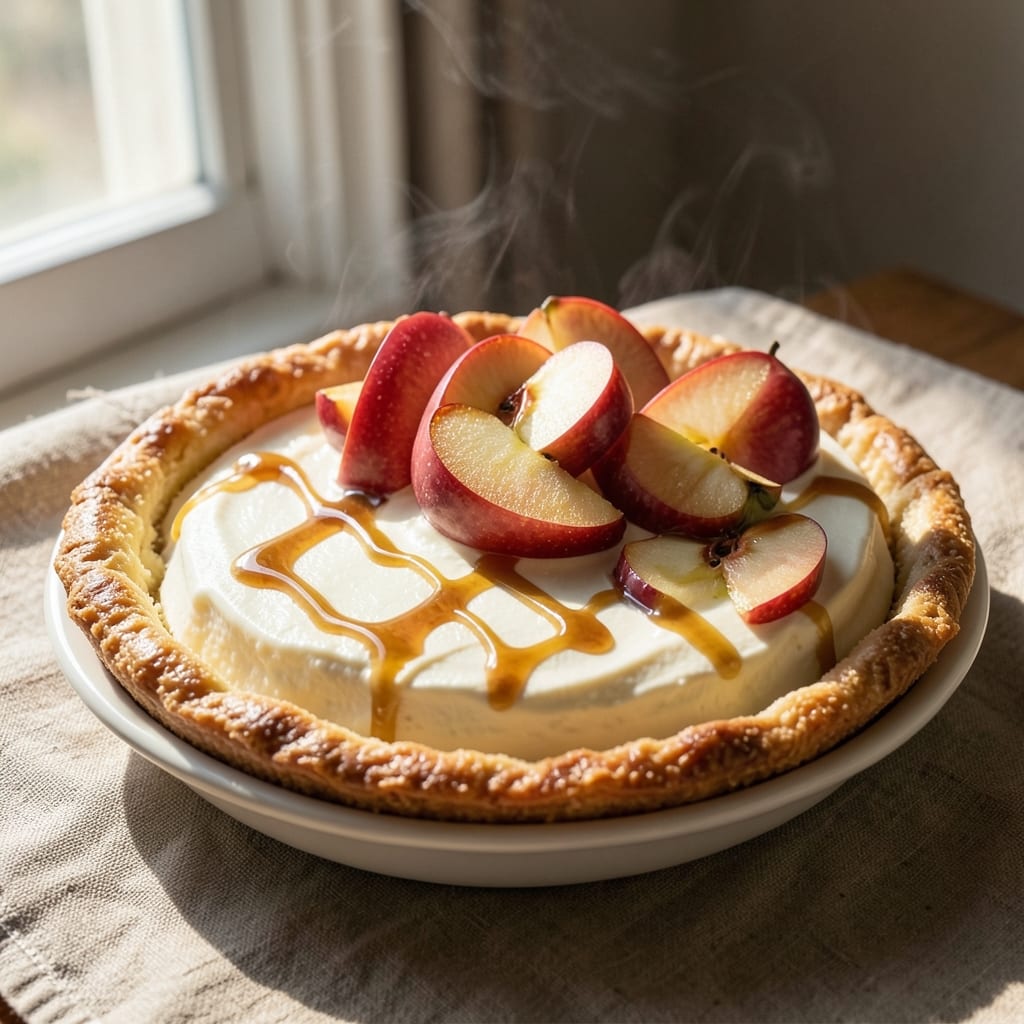
This apple cheesecake pastry recipe combines the best of two worlds—buttery pastry crust and creamy cheesecake filling, all topped with warm spiced apples for a dessert that feels like autumn in every bite. The secret lies in baking the crust first to prevent sogginess, then layering the cheesecake filling and caramelized apples for a texture that's both rich and tender. I've perfected this recipe over years of testing, ensuring the crust stays crisp, the cheesecake stays silky, and the apples add just the right balance of sweetness and tang.
The foolproof technique starts with a classic shortbread crust that bakes until golden, creating a sturdy base for the cheesecake layer. The filling—a blend of cream cheese, eggs, and vanilla—gets a gentle bake in a water bath to keep it smooth and jiggly. Meanwhile, the apples caramelize with cinnamon and brown sugar until they're soft and fragrant, ready to be layered or swirled into the cheesecake. This method guarantees a dessert that's restaurant-quality at home, with no shortcuts that compromise on flavor or texture.
By the time you serve this dessert, you'll have a showstopping centerpiece—cool, creamy cheesecake with pockets of warm apple filling, all encased in a buttery crust that holds up perfectly. The contrast of temperatures and textures makes every forkful exciting, while the spices in the apples add depth that keeps the flavors interesting. It's the kind of dessert that feels special enough for guests but simple enough for a weeknight treat.
Let the cheesecake chill for at least 4 hours (overnight is best) to set completely, then garnish with extra caramelized apples or a dusting of cinnamon before serving. The patience pays off in a dessert that's impossible to resist—creamy, fruity, and perfectly balanced. Ready to bake?
Ingredients for apple cheesecake pastry
Buttery crust meets creamy cheesecake and warm spiced apples for a dessert that feels like autumn in every bite.
| Ingredient | Amount | Notes |
|---|---|---|
| All-Purpose Flour 🌾 | 2 cups | Sifted for light texture |
| Unsalted Butter 🧈 | 1 cup | Cold, cubed for crust |
| Granulated Sugar 🍚 | ½ cup | Fine grain preferred |
| Large Eggs 🥚 | 1 whole | Room temperature |
| Pure Vanilla Extract 🌿 | 1 tsp | High-quality preferred |
| Cream Cheese 🧀 | 16 oz | Full-fat, room temp |
| Powdered Sugar 🍚 | 1 cup | Sifted for smoothness |
| Ground Cinnamon 🌶️ | 2 tsp | Freshly ground preferred |
| Granny Smith Apples 🍎 | 4 medium | Peeled, cored, sliced |
| Light Brown Sugar 🍚 | ½ cup | Packed firmly |
| Diamond Crystal Kosher Salt 🧂 | ½ tsp | Fine grain preferred |
| Heavy Cream 🥛 | ½ cup | Cold for water bath |
| Lemon Juice 🍋 | 1 tbsp | Freshly squeezed |
| Ground Nutmeg 🌶️ | ¼ tsp | Freshly grated preferred |
The butter makes or breaks this crust—European-style has higher fat content for superior flakiness. Plugrá or Kerrygold are my go-tos, but any good-quality unsalted will work. For the apples, Granny Smith is ideal—their tartness balances the sweetness, but Honeycrisp or Fuji work too if that's what's in season. Peel and slice them uniformly so they caramelize evenly. The cream cheese should be room temperature when mixing to avoid lumps—this is non-negotiable for that silky texture. Store butter in the fridge until ready to use, then let it sit for 30 minutes before cutting.
No vanilla extract? Seeds from a vanilla bean work beautifully, or a splash of almond extract at half the amount. Running short on powdered sugar? Granulated sugar sifted with cornstarch mimics the texture perfectly. The crust can be made a day ahead and stored in an airtight container—freeze it for up to 3 months if prepping early. For the apples, a pinch of cayenne adds warmth without heat, while a splash of bourbon deepens the flavor if you're feeling fancy. The cheesecake filling should be smooth as silk—pulse the cream cheese in a food processor if you're worried about lumps.
This dessert requires patience—the crust needs 15 minutes in the freezer before baking to prevent shrinking, and the cheesecake must chill 4-6 hours (overnight is best) to set properly. Store the fully assembled cheesecake in the fridge for up to 5 days, covered tightly. For make-ahead convenience, assemble the cheesecake (without apples) and refrigerate for 24 hours, then add the apple layer and bake. The apples can be prepped and stored in lemon juice for 2 days before baking to prevent browning. Serve at room temperature for the best texture contrast.
Why You'll Love This Recipe
- No-Roll Pastry Magic: I swear, this dough comes together faster than my morning coffee. Just toss the flour, cold butter, and sugar—no food processor, no chilling stress—then fold in the eggs until it’s almost too pretty to bake.
- Vanilla-Apple Hug: That vanilla extract? It’s the secret handshake here. The buttery crust meets the tender apples (if you add them) like a warm, spiced embrace—sweet but not cloying, thanks to the eggs keeping it luscious without being heavy.
- Weeknight to Party: Honestly, this is my lazy Sunday dessert and my “oh no, guests are coming” fix. Same crust, same filling—just adjust the apples (or skip ‘em entirely for a classic cheesecake twist). Slice it thin for a snack, thick for a showstopper.
- Budget Baking Wins: Four ingredients, zero waste. That butter and sugar stretch further than you’d think, and the leftovers? They last forever in the fridge—perfect for when you’re too tired to bake but still crave something rich. (Yes, even on a Tuesday night.)
Step-by-step instructions for apple cheesecake pastry
Here's the method for creating a perfectly balanced apple cheesecake with a buttery crust and spiced filling.
Prepare the Buttery Crust
In a food processor, combine the 2 cups all-purpose flour and 0.5 cup granulated sugar. Pulse until evenly distributed. Add the 1 cup cold, cubed unsalted butter and process until the mixture resembles coarse crumbs with pea-sized butter pieces remaining. This texture ensures a flaky, tender crust rather than a dense one.
Transfer the mixture to a mixing bowl and gently stir in 0.5 tsp Diamond Crystal kosher salt. Press two-thirds of this crust mixture evenly into a 9-inch springform pan, creating an even layer along the bottom and up the sides. Chill in the refrigerator while you prepare the filling. The cold butter will firm up, preventing the crust from spreading too much during baking.
Create the Spiced Apple Filling
Peel, core, and thinly slice the 4 medium Granny Smith apples into ¼-inch thick rounds. Toss the apple slices with 1 tbsp freshly squeezed lemon juice, 0.5 cup packed light brown sugar, 2 tsp freshly ground cinnamon, and 0.25 tsp freshly grated nutmeg. Let the mixture sit for 10 minutes while you prepare the cheesecake layer. This macerating process enhances the apples' natural sweetness and tenderizes them slightly.
In a separate bowl, beat the 16 oz cream cheese and 1 whole large egg at medium speed until completely smooth, about 2 minutes. Gradually whisk in 1 cup powdered sugar until fully incorporated. The mixture should be thick but pourable. Fold in 0.5 cup cold heavy cream just until combined—overmixing introduces air, which can cause cracks during baking.
Assemble and Bake the Cheesecake
Preheat your oven to 350°F. Spread the remaining crust mixture evenly over the chilled crust in the springform pan, creating a second crust layer. This double-crust technique prevents sogginess and adds texture. Pour the cheesecake mixture over the crust, then arrange the prepared apple slices in an even layer on top. The apples should be tightly packed but not overlapping.
Bake for 45-50 minutes until the edges are golden brown and the center is just set—it should still have a slight wobble when gently shaken. Remove from the oven and let cool in the pan for 10 minutes. Then, transfer to a wire rack to cool completely. The residual heat will finish setting the filling while preventing condensation from forming on the bottom.
Finish and Serve
Once fully cooled, run a knife around the edge of the springform pan to loosen the cheesecake. Remove the side of the pan and let it sit at room temperature for 15 minutes before slicing. This resting period allows the filling to firm up slightly, making clean slices easier to achieve. The cheesecake should have a smooth, creamy texture with tender, caramelized apples throughout.
Serve chilled or at room temperature. The contrast between the buttery crust, spiced apple filling, and creamy cheesecake layers creates a harmonious balance of textures and flavors. Store any leftovers covered in the refrigerator for up to 3 days, though it's unlikely to last that long with its irresistible appeal.
Pro Tips For Making Apple Cheesecake Pastry
- Chill the Butter First: Cold butter in the pastry dough is non-negotiable for flaky layers. Cut it into ½-inch cubes and refrigerate for 30 minutes before mixing—no, the fridge isn’t just for leftovers. I learned this the hard way when my first attempt turned into a greasy mess because the butter melted too fast.
- Press the Crust Hard: Don’t be gentle when pressing the dough into the pan. Use your palms and press firmly, especially at the edges, to create a solid barrier. A thin crust is better than a thick one—it’ll stay crisp even after baking. (Yes, it’ll look uneven at first, but that’s how you get a perfect apple cheesecake base.)
- Skip the Overmixing: Once you add the eggs to the filling, mix just until combined. Overmixing introduces air, which causes cracks in the cheesecake layer. A few streaks of egg yolk are fine—this isn’t a soufflé. I used to panic and stir like I was making pancakes, and every time, I got a sad, cracked top.
- Bake Low and Slow: Set your oven to 325°F (160°C) and bake the cheesecake for the full recommended time—no rushing. The center should jiggle slightly when done; it’ll firm up as it cools. I was skeptical until I tried it: rushing the bake leads to a dense, undercooked center, and no one wants that with apples on top.
Perfect pairings for these flavors
Creamy Toppings
Whipped cream is the classic choice—lightly sweetened with 1 tbsp powdered sugar and a pinch of cinnamon to complement the spiced apples. I like to pipe it in swirls for that restaurant-quality look. For extra decadence, try vanilla bean ice cream (like Ben & Jerry's Chunky Monkey) or a dollop of salted caramel sauce drizzled over the top. 🥛
Crunchy Contrasts
Toasted pecans or walnuts add a satisfying crunch—toss ½ cup chopped nuts with 1 tsp melted butter and ½ tsp cinnamon, then bake at 350°F for 5-7 minutes until golden. Sprinkle over the cheesecake just before serving. Another great option is crumbled graham crackers or gingersnap cookies for a buttery, crumbly texture that contrasts beautifully with the creamy filling.
Warm Beverage Pairings
A steaming cup of spiced chai tea or apple cider enhances the dessert's autumnal flavors. For coffee lovers, a dark roast with a splash of vanilla syrup cuts through the richness. I also love pairing this with a bourbon-infused hot toddy—just mix 1 oz bourbon, ½ oz honey, and a squeeze of lemon in hot water. ☕
Fruit-Based Accompaniments
Fresh berries like raspberries or blackberries add a bright, tangy contrast to the sweet cheesecake. Toss them with 1 tsp honey and a pinch of salt for extra flavor. Another idea is a poached pear compote—simmer 2 cups pear slices with ¼ cup red wine, 2 tbsp sugar, and 1 cinnamon stick for 10 minutes until syrupy. Serve warm alongside slices of cheesecake for a luxurious touch. 🍐
Cheesecake Variations
For a caramel apple twist, replace the spiced apples with a layer of homemade apple caramel—simmer 2 cups apple slices with ½ cup brown sugar and 2 tbsp butter until sticky. Swirl it into the cheesecake filling before baking. If you prefer a nutty flavor, fold ¼ cup chopped toasted hazelnuts into the cheesecake batter for depth. Both variations keep the same creamy texture while adding exciting new layers of flavor. 🌟
Nutrition facts
Frequently asked questions
Can I use store-bought pie crust instead of making my own?
For convenience, use a 9-inch refrigerated pie crust—just press it into your springform pan and blind-bake it at 375°F for 10 minutes with pie weights before adding the cheesecake layer. Choose an unrolled crust for best results, as it's less likely to shrink. Pro tip: Brush the baked crust with a thin layer of apricot jam before adding the filling to prevent sogginess.
Why did my cheesecake crack on top?
Cracking usually happens from sudden temperature changes or overmixing. To prevent this:
- Let your oven preheat fully,
- Avoid opening the oven door during baking, and
- Don't overmix the filling—just blend until smooth. If it cracks, cover with whipped cream or caramelized apples to disguise it! For extra insurance, bake at 325°F instead of 350°F for a slower set.
Can I make this gluten-free?
Yes! Replace the all-purpose flour with a 1:1 gluten-free flour blend (like Bob's Red Mill) and use a gluten-free pie crust. For the apples, ensure your spices are certified gluten-free. The texture will be slightly denser, but the flavor remains excellent. For binding, add 1 tbsp xanthan gum to the crust mixture if your blend doesn't include it.
How do I store leftovers?
Keep your cheesecake in an airtight container in the fridge for up to 5 days. To serve, let it sit at room temperature for 30 minutes so the textures aren't icy. For freezing, wrap slices individually in plastic wrap, then place in a freezer bag. Thaw overnight in the fridge—microwaving ruins the delicate texture. Reheat only if serving with warm toppings like caramel sauce.
What's the best way to serve this for a crowd?
Bake two 9-inch cheesecakes and assemble them in a single 10-inch springform pan for easier slicing. Serve with individual toppings at the table: whipped cream, caramel sauce, and toasted nuts in small bowls. For presentation, use a ring mold to create perfect slices, or serve family-style with spoons. This dessert looks impressive even when served buffet-style with a "build-your-own" topping bar.