
Desserts
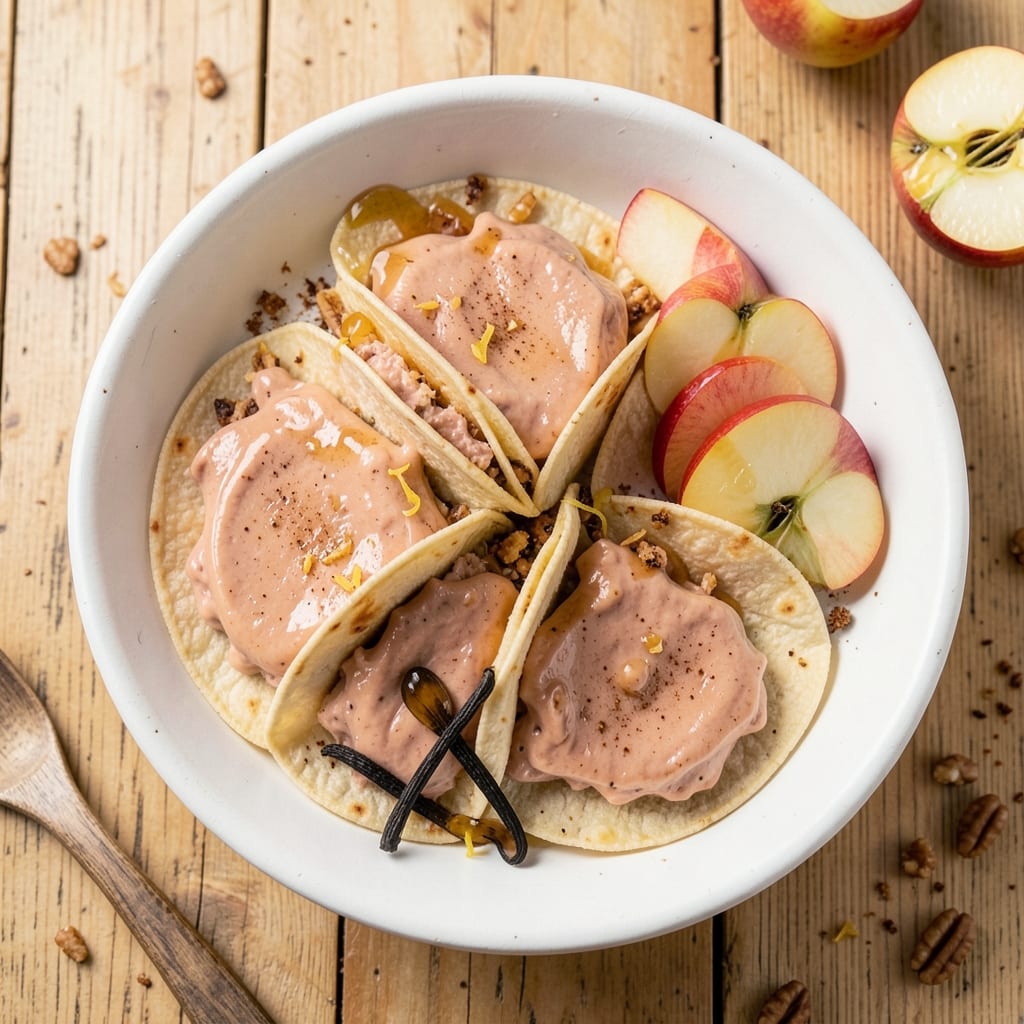
This apple cheesecake tacos recipe transforms dessert into an interactive, crunchy-sweet experience that’s perfect for parties or indulgent nights. The secret lies in a creamy cheesecake filling—smooth, tangy, and lightly spiced—that pairs perfectly with crispy tortillas and caramelized apple bites. What makes this dish special is the fusion of familiar taco techniques with decadent dessert flavors, creating a texture contrast that’s impossible to resist.
The filling starts with a no-bake base of cream cheese and applesauce, blended until velvety and piped into warm tortillas for that signature taco shape. Frying the tortillas until golden ensures a satisfying crunch, while the filling stays cool and creamy inside. Toppings like whipped cream, cinnamon, and extra caramelized apples elevate each bite, balancing sweetness with a touch of warmth.
What you’ll end up with is a dessert that’s as fun to assemble as it is to eat—think taco night meets cheesecake, where every bite delivers a perfect mix of textures and flavors. The creamy filling melts slightly when bitten into, while the tortilla holds its shape, creating a handheld treat that’s both impressive and effortless to serve.
Perfect for a dessert taco bar or as a showstopping plated dish, this recipe is designed to impress without requiring advanced skills. Whether you’re hosting a gathering or craving something playful yet satisfying, these apple cheesecake tacos deliver on every level. Let’s get started!
Ingredients for apple cheesecake tacos
Sweet, creamy, and perfectly crunchy—these ingredients turn dessert into a taco night sensation.
| Ingredient | Amount | Notes |
|---|---|---|
| Cream Cheese 🧀 | 16 oz | Full-fat, room temperature |
| Unsweetened Applesauce 🍎 | 1 cup | Smooth, no sugar added |
| Granulated Sugar 🍚 | ½ cup | For sweetness balance |
| Vanilla Extract 🌿 | 1 tbsp | Pure vanilla preferred |
| Ground Cinnamon 🌶️ | 1 tsp | For warm spice notes |
| Salt 🧂 | ¼ tsp | Kosher or sea salt |
| Corn Tortillas 🌽 | 12 whole | Medium size, fresh or frozen |
| Vegetable Oil 🫒 | 2 cups | For frying tortillas |
| Apples 🍏 | 4 medium | Sweet variety, peeled/cored |
| Unsalted Butter 🧈 | ½ cup | Cubed for caramelizing |
| Brown Sugar 🍚 | ¼ cup | For caramelization |
| Heavy Whipping Cream 🥛 | 1 cup | Chilled for whipping |
| Powdered Sugar 🍚 | 2 tbsp | For dusting whipped cream |
| Cinnamon Sticks 🌿 | 4 whole | For garnish |
The cream cheese is the star—Philadelphia brand is ideal for its smooth texture, but any full-fat variety works. Room temperature is key for blending, so take it out 30 minutes before starting. Applesauce should be unsweetened to avoid overpowering the filling. For the caramelized apples, Honeycrisp or Fuji varieties hold up best during cooking—Trader Joe's or Whole Foods carry them year-round. The tortillas? Mission brand is my go-to for consistent frying, but any corn tortilla works if it's medium-sized (about 4 inches).
No vanilla extract? Almond extract at half the amount works in a pinch. Short on brown sugar? White sugar plus 1/4 tsp molasses mimics the flavor. The whipped cream can be store-bought—Reddi-wip is a lifesaver for parties—but homemade is absolutely worth it for that extra fluff. For the apples, pre-cutting them into bite-sized pieces saves time during assembly. Want more crunch? Add 1/4 cup chopped pecans to the filling before piping.
The filling keeps 3 days in the fridge—pipe it into a container for easy assembly later. Tortillas stay crispy for 24 hours if stored in an airtight container. Caramelized apples reheat beautifully—microwave 30 seconds to restore their gooey texture. Whipped cream? Use within 4 hours or it'll deflate. For a make-ahead dessert, assemble tacos (without toppings) and refrigerate—add toppings fresh before serving.
Why You'll Love This Recipe
- Five-Ingredient Magic: I swear by this combo—cream cheese, applesauce, and cinnamon alone make it taste like dessert. The vanilla ties it all together without extra fuss, and honestly? That’s the kind of recipe I can make while scrolling through my phone.
- Taco Twist Delight: It’s sweet, it’s creamy, it’s taco-shaped—what’s not to love? The applesauce keeps it light, while the cinnamon gives it that warm, cozy bite that makes it feel special, even for a quick lunch.
- Lunchbox Hero: Between us, this is my go-to for school lunches or office snacks. The filling stays fresh for days, and I just assemble them fresh—no reheating, no soggy shells. My kids pack these like they’re gourmet, and honestly? They are.
- Budget-Friendly Indulgence: Cream cheese and applesauce stretch further than you’d think, and sugar and cinnamon are pantry staples. I’ve made this for under $10 for a dozen tacos—feels fancy, costs next to nothing. (Yes, even on a Tuesday night.)
Step-by-step instructions for apple cheesecake tacos
Here's how to create that perfect balance of creamy cheesecake filling and crispy tortillas—every bite is a sweet-savory dream.
Make the Cheesecake Filling
In a mixing bowl, beat the 16 oz cream cheese and 1 cup unsweetened applesauce together until completely smooth and creamy. This step is crucial—you want the mixture to be lump-free for that velvety texture. Gradually add the 0.5 cup granulated sugar, 1 tbsp vanilla extract, 1 tsp ground cinnamon, and 0.25 tsp salt, mixing well after each addition. The filling should be thick but spreadable, like a rich cheesecake batter.
Taste and adjust sweetness if needed—remember, the apples will add natural sweetness later. Cover the bowl and refrigerate the filling for at least 30 minutes to let the flavors meld. This chilling step ensures the filling stays firm enough to hold its shape when spread on the tortillas.
Fry the Tortillas to Golden Perfection
Heat 2 cups vegetable oil in a deep skillet to 350°F—use a thermometer to check, as this is critical for even frying. Working in batches, carefully add the 12 whole corn tortillas to the oil. Fry for 30-45 seconds per side until they turn a beautiful golden brown. The tortillas should puff slightly and become crispy—this is what gives them that satisfying crunch.
Drain the fried tortillas on paper towels, pressing gently to remove excess oil. Keep them warm in a 200°F oven while you prepare the apple topping. If they cool too much, they’ll lose their crispness. This step is all about texture—you want tortillas that hold up to the creamy filling without getting soggy.
Caramelize the Apples
Peel, core, and slice the 4 medium apples into thin wedges. In a large skillet, melt the 0.5 cup unsalted butter over medium heat, then add the apple slices and 0.25 cup brown sugar. Cook for 8-10 minutes, stirring occasionally, until the apples soften and the mixture turns into a glossy, caramelized sauce. The sugar should dissolve completely, creating a sticky, sweet glaze that coats the apples.
Stir in 1 tbsp vanilla extract and 1 tsp ground cinnamon, then simmer for another 2 minutes to infuse the flavors. The apples should be tender but still hold their shape—this ensures they add texture to the tacos without turning mushy. Remove from heat and let cool slightly before assembling.
Assemble the Tacos
Spread a generous layer of the chilled cheesecake filling onto each tortilla—about 2 tablespoons per tortilla. Top with the warm caramelized apples, dividing them evenly. The contrast of the cool, creamy filling and the warm, spiced apples is what makes these tacos irresistible.
For the finishing touch, whip the 1 cup heavy whipping cream with 2 tbsp powdered sugar until soft peaks form. Dollop a small amount of whipped cream on top of each taco, then garnish with a cinnamon stick for an elegant presentation. Serve immediately while the tortillas are still crispy and the filling is at its best.
Pro Tips For Making Apple Cheesecake Tacos
- Whisk Cream Cheese First: Beat the cream cheese with sugar and vanilla until completely smooth before adding applesauce—lumps ruin the texture. I learned this the hard way when my first batch had gritty bits that made every bite feel like sandpaper.
- Use Warm Applesauce: Heat the unsweetened applesauce for 20 seconds in the microwave before mixing—it blends more evenly and prevents a grainy filling. Cold applesauce just sits stubbornly in clumps, no matter how much you whisk.
- Skip the Overmixing: Fold in cinnamon and applesauce just until combined; overworking makes the filling dense and heavy. I used to mix like I was kneading dough, and the result was a sad, compact brick instead of a light, spreadable cheesecake.
- Chill Before Serving: Let the filling sit in the fridge for at least 30 minutes after mixing—it thickens and tastes richer. Serving it warm? You’re missing out on that perfect balance of creamy and tangy. (Yes, even if you’re impatient like me.)
Health benefits of apple cheesecake tacos
Sweet Energy Boost
These tacos pack a natural sweetness from apples and applesauce, making them a satisfying treat without refined sugar overload. The unsweetened applesauce and caramelized apples provide fiber and vitamin C, while the cream cheese delivers protein for sustained energy. I find this combo especially great for after-dinner cravings—it feels indulgent but won't leave you with a sugar crash. 🍏
Protein-Packed Indulgence
The 16 oz cream cheese provides a solid 12 grams of protein per serving, helping balance the dessert's sweetness. Pairing this with the corn tortillas (about 2 grams protein each) creates a satisfying meal-like texture. For extra protein, I sometimes add a dollop of Greek yogurt instead of whipped cream—it adds creaminess while boosting nutritional value. 🧀
Fiber for Digestion
The peeled apples contribute 4 grams of fiber per serving, aiding digestion while satisfying sweet cravings. The corn tortillas add another 2 grams of fiber per taco, making this dessert more balanced than traditional cheesecake. For even more fiber, I'll sometimes sprinkle 1 tsp chia seeds on top before serving. 🌾
Healthy Fat Balance
The unsalted butter and heavy whipping cream provide healthy fats that help slow sugar absorption. These fats also enhance flavor without adding empty calories. I recommend using grass-fed butter when possible for a higher omega-3 content. The fats help make this dessert more satisfying while keeping portions reasonable. 🧈
Antioxidant Benefits
The cinnamon in both the filling and caramelized apples offers antioxidant properties that support metabolism. Apples contain quercetin, a compound linked to heart health benefits. While this isn't a "health food," the ingredients work together to create a dessert with more nutritional benefits than typical sugary treats. 🌿
Portion Control Made Fun
Serving dessert in taco form naturally encourages portion control—each taco is a single serving, making it easier to enjoy without overindulging. The handheld format also makes it perfect for parties where you want to serve dessert without overwhelming guests. I've found this presentation works particularly well with kids who might otherwise eat dessert too quickly. 🎉
Nutrition facts
Frequently asked questions
Can I make these apple cheesecake tacos ahead of time?
The filling keeps well for 3 days in the fridge—just pipe it into a container. For the tortillas, fry them fresh and store in an airtight container at room temperature for 24 hours to maintain crispiness. Caramelized apples reheat beautifully—microwave for 30 seconds to restore their gooey texture. Assemble tacos (without toppings) up to 24 hours ahead and add whipped cream and garnishes fresh before serving.
What if I don't have a deep fryer? Can I bake the tortillas instead?
Yes! Brush corn tortillas with oil and bake at 375°F for 3-4 minutes per side until golden and crispy. For extra crunch, broil for 1 minute at the end. While frying gives the best texture, baking works perfectly for a lighter version. Just keep an eye on them—they burn quickly!
How can I make this recipe gluten-free?
Use gluten-free corn tortillas (like Siete brand) and ensure your cream cheese is certified gluten-free. All other ingredients are naturally gluten-free. For extra security, check labels on applesauce and spices. The texture will be just as delicious—these tacos shine with their sweet-savory balance regardless of gluten content.
Can I substitute the whipped cream with something lighter?
Yes! Try light coconut whipped cream or Greek yogurt sweetened with a touch of honey. For a vegan option, use coconut cream whipped with powdered sugar. These alternatives reduce fat while keeping the creamy texture. Just adjust sweetness to taste—the filling is already rich!
What's the secret to keeping the tortillas crispy?
Fry tortillas at 350°F for 30-45 seconds per side until golden brown. Drain on paper towels and keep them warm in a 200°F oven while assembling. For extra insurance, store assembled tacos (without toppings) in a 200°F oven for 5-10 minutes before serving to restore crispiness. Never refrigerate fully assembled tacos—they'll soften quickly!