
Desserts
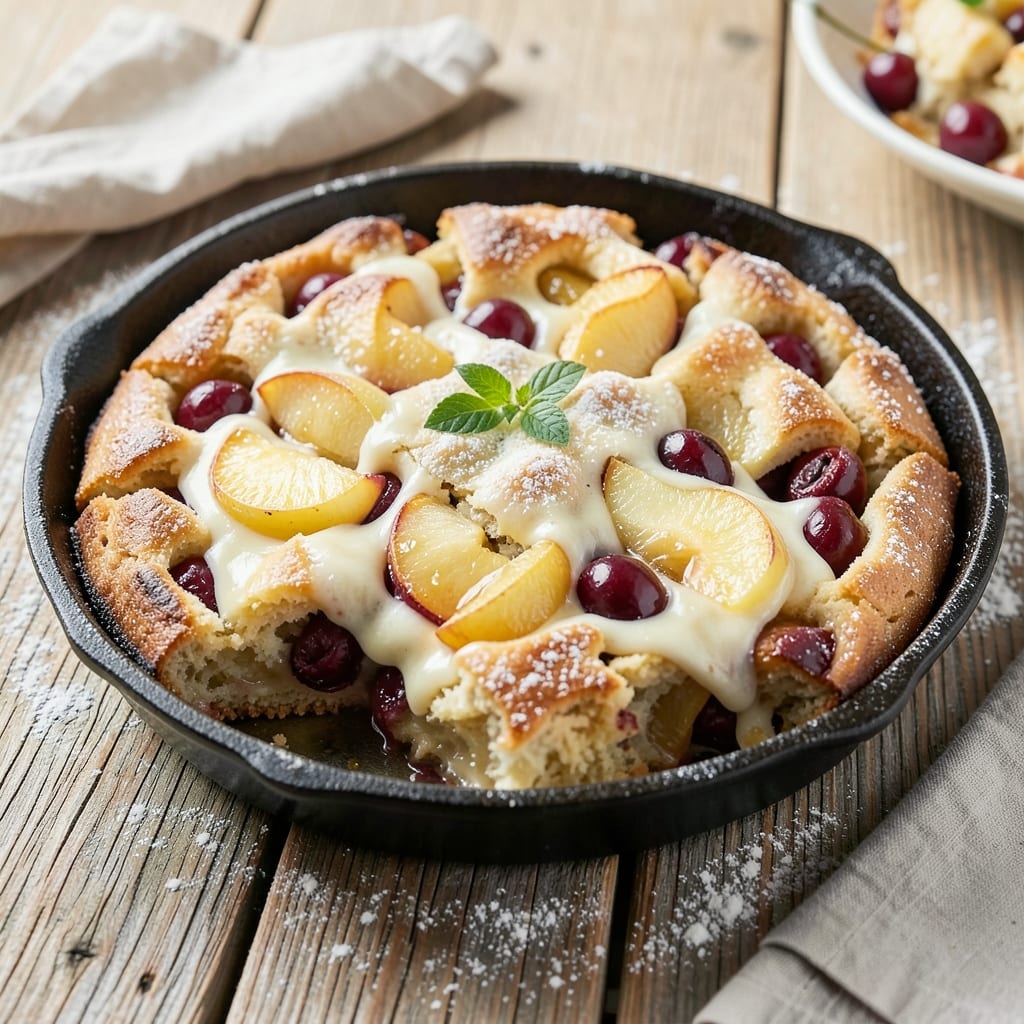
This apple cherry dump cake recipe delivers rustic homestyle comfort with layers of warm spice and juicy fruit. 🍎 The beauty of dump cakes lies in their simplicity—just toss fruit into a pan, pour batter, and bake until golden. I've perfected this technique to ensure tender cake layers and caramelized fruit every time, with a hint of cinnamon that makes each bite irresistible.
The magic happens when tart apples and sweet cherries release their juices, creating pockets of flavor that soak into the cake. A simple spiced batter—flour, sugar, eggs, and a touch of vanilla—comes together in minutes, while the fruit mixture cooks down into a sticky, caramelized topping. This recipe is perfect for using up seasonal fruit or turning a simple dessert into a showstopper with minimal effort.
What you'll end up with is a warm, fragrant cake with a crispy top and moist layers that balance sweet and tart perfectly. The aroma alone will have everyone gathering in the kitchen, and the rustic presentation makes it feel like a homemade masterpiece. Serve it warm with a scoop of vanilla ice cream or a dollop of whipped cream for the ultimate dessert experience.
Adjust the fruit ratio to your preference—more apples for tangy depth or extra cherries for sweetness—and don't worry if the batter looks thick. The dump cake technique forgives imperfections, delivering foolproof results that taste even better the next day. Let's bake this crowd-pleaser!
Ingredients for apple cherry dump cake
Juicy fruit meets tender cake layers—just 11 ingredients for rustic dessert perfection.
| Ingredient | Amount | Notes |
|---|---|---|
| Apples (Honeycrisp or Granny Smith) 🍎 | 4 medium | Peeled and sliced into wedges |
| Pitted Cherries (fresh or frozen) 🍒 | 1 ½ cups | Sweet or tart variety preferred |
| All-Purpose Flour 🌾 | 2 cups | Sifted for even texture |
| Granulated Sugar 🍚 | 1 ½ cups | White or light brown |
| Large Eggs 🥚 | 2 whole | Room temperature preferred |
| Pure Vanilla Extract 🌿 | 1 tbsp | High-quality for flavor |
| Ground Cinnamon 🌶️ | 1 ½ tsp | Freshly ground preferred |
| Salt 🧂 | ½ tsp | Fine sea salt preferred |
| Unsalted Butter 🧈 | ½ cup | Cold, cubed for topping |
| Brown Sugar 🍚 | ¼ cup | Packed for caramelization |
| Lemon Juice 🍋 | 1 tbsp | Freshly squeezed |
The apples and cherries are the stars here. Honeycrisp apples add sweetness while Granny Smith brings tang—mix them for balance. Fresh cherries are ideal, but frozen work too (no need to thaw). For the best fruit, hit up Trader Joe's or your local farmers market when they're in season. Look for firm apples with no bruising and cherries that are plump but not mushy. If using frozen cherries, pat them dry before mixing with apples to keep the fruit from turning into soup.
No Honeycrisp apples? Fuji or Gala are solid substitutes. Short on cherries? Blueberries or peaches work in a pinch—just adjust the sugar to taste. The batter is intentionally simple: flour, sugar, eggs, and vanilla. Diamond Crystal kosher salt is my go-to for baking, but any fine salt works. For extra richness, swap half the butter topping for pecan halves or walnuts. The lemon juice brightens everything, so don't skip it—even if you're not a fan of citrus, the acidity balances the sugar beautifully.
This cake tastes even better the next day, so bake it ahead if you can. Store leftovers in an airtight container at room temperature for 2 days or in the fridge for 4 days. To reheat, wrap individual slices in foil and warm in a 350°F oven for 5-7 minutes. The fruit mixture can be prepped 1 day ahead—just cover and refrigerate. For a showstopping presentation, dust with powdered sugar or serve with vanilla ice cream. The caramelized fruit topping keeps well for 3 days if stored separately.
Why You'll Love This Recipe
- No-Fuss Assembly: I swear by this recipe when I’m too tired to measure precisely—just toss the sliced apples, pitted cherries, and dry ingredients into a bowl. The batter’s forgiving, and the fruit’s natural juices keep it moist without extra fuss.
- Sweet-Tart Magic: Honeycrisp apples bring that perfect crunch, while tart cherries (fresh or frozen) cut through the richness of the cake. It’s like dessert’s version of a love letter—sweet enough to satisfy, but bright enough to keep you coming back.
- Weekend Brunch Star: This cake is my go-to for lazy mornings or potlucks—serve it warm with vanilla ice cream or a dollop of whipped cream. Honestly, it’s the kind of dish that makes you look like a baking pro without trying.
- Budget-Friendly Leftovers: A single batch stretches for days—slice it for breakfast toast, pack it for lunches, or reheat slices in the toaster. Between us, it’s one of those rare recipes where the ingredients don’t break the bank, but the flavor does.
Step-by-step instructions for apple cherry dump cake
Here's how to create layers of tender cake and spiced fruit filling in one easy baking process.
🍳 Step 1: Prep the Fruit Filling
In a large bowl, combine the 4 medium Apples (Honeycrisp or Granny Smith) peeled and sliced into wedges with the 1.5 cups Pitted Cherries (fresh or frozen). Drizzle over the 1 tbsp Lemon Juice and sprinkle with 1.5 tsp Ground Cinnamon. Toss gently to coat the fruit evenly—this brightens the apples and enhances the cherry flavor.
Transfer the fruit mixture to a 9-inch cast iron skillet or oven-safe baking dish. Arrange the slices in an even layer, pressing down lightly so they release their juices. This step is crucial for creating that signature juicy texture promised in the recipe.
👨🍳 Step 2: Mix the Cake Batter
In a separate bowl, whisk together the 2 cups All-Purpose Flour, 1.5 cups Granulated Sugar, 1.5 tsp Ground Cinnamon, and 0.5 tsp Salt. In another bowl, beat the 2 whole Large Eggs until just combined, then mix in the 1 tbsp Pure Vanilla Extract. Gradually pour the wet ingredients into the dry ingredients while stirring until just combined—don't overmix or the cake will become dense.
Here's the thing—this batter should be thick but pourable. If it's too thick, add 1-2 tablespoons of water to help it spread evenly over the fruit when poured. The goal is a smooth, even layer that bakes up tender and moist.
🔥 Step 3: Assemble and Bake
Preheat your oven to 375°F. Pour the cake batter evenly over the fruit mixture in the skillet, spreading it to the edges with a spatula. Dot the top with the 0.5 cup Unsalted Butter cut into small cubes and sprinkle with the 0.25 cup Brown Sugar. The butter will melt and create pockets of golden caramelization while the brown sugar adds depth of flavor.
Bake for 35-40 minutes until the cake is golden brown on top and a toothpick inserted in the center comes out clean. I know it seems like too much time, but trust me—the cake needs this to fully set while keeping the fruit juicy. The edges should pull away slightly from the skillet, indicating it's done.
⏰ Step 4: Rest and Serve
Remove the cake from the oven and let it cool in the skillet for 10 minutes. This resting period allows the juices to redistribute throughout the cake, ensuring each bite delivers that perfect balance of tender cake and spiced fruit. Be careful—the skillet will be hot!
Transfer the cake to a serving plate, spooning up any accumulated juices from the skillet. Serve warm with a scoop of vanilla ice cream or a dollop of whipped cream. The contrast of warm cake with cool dairy makes every bite unforgettable. This is where the magic happens—when all those layers of flavor come together in one perfect bite.
Pro Tips For Making Apple Cherry Dump Cake
- Preheat to 375°F: DESCRIPTION: That’s the magic number—hot enough to caramelize the fruit fast but not so hot the dough burns before it sets. I used to rush this and end up with a cake that was more cake than fruit. Trust me, the oven needs time to heat through.
- Toss Cherries Dry: DESCRIPTION: Drain frozen cherries well and pat them dry with a paper towel—wet fruit steams instead of caramelizing. If using fresh, toss them with a teaspoon of flour first to thicken the juices. (Yes, even if you’re impatient like me.)
- Cut Apples Small: DESCRIPTION: Quarter them, then slice into ¼-inch pieces—any thicker and they’ll stay tough in the center. Granny Smiths hold up better than Honeycrisp, but don’t let them sit in water; they’ll turn mushy. Drain and pat them dry right after slicing.
- Mix Batter Last: DESCRIPTION: Whisk the dry ingredients first, then stir in the wet just before dumping—this keeps the apples and cherries from sinking to the bottom. Stir in the fruit gently so the cherries don’t burst and turn the batter purple. (You’ll see what I mean.)
Pro cooking tips for this recipe
Cast Iron Magic
Cast iron is my secret weapon for this dump cake—it distributes heat evenly and creates that signature crispy bottom. If you don’t own one, a 9-inch oven-safe ceramic or stainless steel skillet works too. Just make sure it’s preheated alongside your oven to prevent temperature shock. 🔥
Pro tip: Skip the oil spray! The fruit juices will naturally release enough moisture to prevent sticking. For extra insurance, I sometimes lightly grease the skillet with a pastry brush and butter, but even that’s optional with this recipe.
Fruit Prep Perfection
Slice apples ¼-inch thick for even cooking—they’ll soften beautifully without turning mushy. For cherries, I recommend pitting them to avoid surprise toothaches, but if you’re short on time, leave the pits in and just remove them after baking. 🍒
Don’t skip the lemon juice—it prevents browning and balances the sweetness. If your cherries are particularly tart, add ½ tsp sugar to the fruit mix. The goal is harmony, not overpowering flavor.
Batter Consistency
This batter should be thick but pourable, like pancake batter. If it’s too stiff, add 1 tablespoon of water at a time until it flows smoothly. Overmixing is the enemy—just stir until just combined to keep the cake tender. A hand mixer on low works best for quick mixing. ✨
For extra richness, I sometimes fold in 2 tablespoons of sour cream into the batter. It adds moisture and a subtle tang that pairs perfectly with the fruit. Trust me, your cake will thank you!
Butter and Sugar Topping
Cube the butter into ½-inch pieces and sprinkle the brown sugar evenly—this creates pockets of caramelized goodness. For a nutty twist, fold ¼ cup chopped pecans into the brown sugar before sprinkling. The nuts toast beautifully while baking. 🌰
If you’re worried about the butter melting too quickly, bake the cake for 35 minutes first, then broil for 2-3 minutes at the end. Just watch it closely—broiling can happen fast!
Doneness Test
The cake is done when the top is golden brown and a toothpick comes out with moist crumbs—not wet batter. If the edges pull away from the pan slightly, that’s a good sign. Overbaking dries out the cake, so resist the urge to peek too often. 🕒
For a foolproof test, use an infrared thermometer to check the center—it should read 200-205°F. If you don’t have one, the 10-minute rest after baking is your best friend for judging doneness.
Nutrition facts
Frequently asked questions
Can I use frozen fruit instead of fresh for this dump cake?
Yes! Frozen cherries work perfectly—just pat them dry before mixing with apples to prevent excess moisture. For apples, use fresh ones since frozen varieties can turn mushy. If your frozen cherries have syrup, drain them first. The texture will be slightly softer but still delicious.
Why does my cake turn out dense instead of tender?
Overmixing the batter is the most common cause. Stir just until combined—lumps are fine! Also check your oven temperature—375°F is critical. If your cake still feels dense, try adding 1 tablespoon of sour cream to the batter next time for extra moisture.
How do I adjust this recipe for a smaller or larger pan?
For a 7-inch pan, reduce fruit to 2 apples + 1 cup cherries and halve the batter. For a 10-inch pan, increase fruit to 5 apples + 2 cups cherries and use 2.5 cups batter. Always adjust baking time by 5-10 minutes—smaller pans bake faster.
Can I make this cake ahead of time?
Bake it 1 day ahead and store at room temperature in an airtight container. The flavors actually improve overnight as the juices redistribute. Reheat slices wrapped in foil at 350°F for 5 minutes before serving. For longer storage, freeze individual portions for up to 3 months.
What's the best way to serve this cake?
Warm slices with vanilla ice cream or whipped cream are classic, but don't overlook these options: dust with powdered sugar, drizzle with caramel sauce, or serve with a scoop of salted caramel ice cream. For a make-ahead dessert, assemble the cake 2 hours before serving so it's at room temperature.