
Desserts
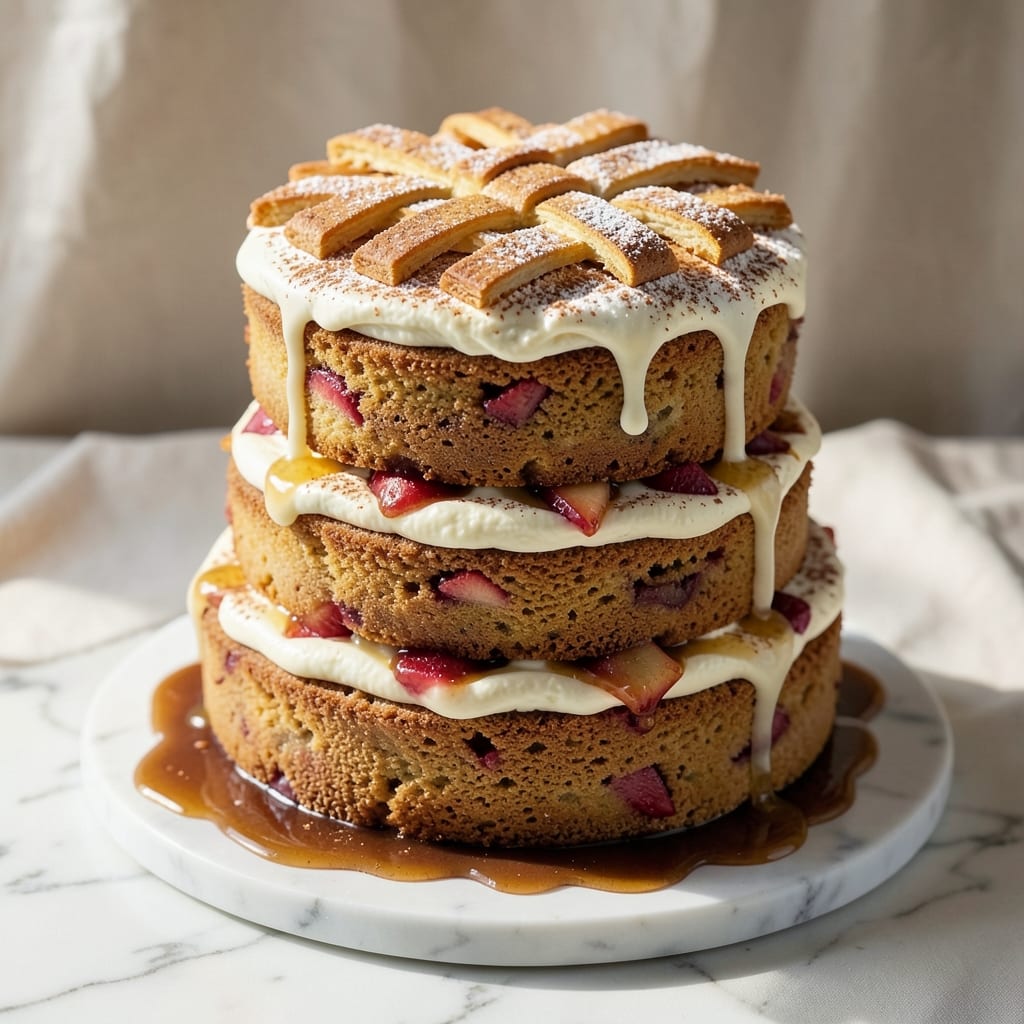
This apple cinnamon wedding cake recipe transforms a classic dessert into a showstopping centerpiece with layers of tender vanilla cake, spiced apple filling, and velvety buttercream. The secret lies in balancing moist cake layers with a caramelized apple compote that infuses every slice with warm, autumnal flavors—perfect for weddings, holidays, or special celebrations where presentation matters as much as taste.
What sets this recipe apart is the foolproof technique for maintaining moisture in both cake and filling, ensuring each bite delivers that perfect harmony of buttery vanilla and spiced apple. The cake bakes up with a tender crumb that stays fresh for days, while the filling—simmered with cinnamon, nutmeg, and a touch of brown sugar—creates a rich, jam-like texture that binds every layer together beautifully.
By the time you've assembled the tiers with piped buttercream borders and fresh apple slices for garnish, you'll have a cake that's as elegant as it is delicious—one that guests will rave about long after the last slice is gone. The frosting stays smooth and stable, making it ideal for intricate piping designs that elevate this dessert from homemade to restaurant-quality.
Whether you're baking for a wedding, anniversary, or simply want to impress at a dinner party, this recipe delivers professional results with simple techniques. Let's create a cake that's as memorable as the occasion it celebrates.
Ingredients for apple cinnamon wedding cake
Eighteen ingredients, three tiers of perfection—this cake balances tender vanilla layers with spiced apple filling.
| Ingredient | Amount | Notes |
|---|---|---|
| All-Purpose Flour 🌾 | 4 cups | Sifted for light texture |
| Granulated Sugar 🍚 | 2 ½ cups | Superfine preferred for smoothness |
| Unsalted Butter 🧈 | 2 cups | Cold, cubed for cake layers |
| Large Eggs 🥚 | 6 whole | Room temperature for even mixing |
| Pure Vanilla Extract 🌿 | 2 tsp | High-quality, pure vanilla |
| Baking Powder 🧂 | 2 tsp | Aluminum-free for stability |
| Ground Cinnamon 🌶️ | 1 tbsp | Freshly ground for warmth |
| Honey 🍯 | ½ cup | Wildflower preferred for depth |
| Granny Smith Apples 🍎 | 6 medium | Peeled, cored, diced small |
| Brown Sugar 🍚 | ½ cup | Packed for filling consistency |
| Ground Nutmeg 🌿 | ¼ tsp | Freshly grated preferred |
| Heavy Whipping Cream 🥛 | 2 cups | Cold for buttercream stability |
| Confectioners' Sugar 🍚 | 4 cups | Sifted for smooth frosting |
| Salt 🧂 | ½ tsp | Diamond Crystal preferred |
| Lemon Juice 🍋 | 1 tbsp | Freshly squeezed for brightness |
The Granny Smith apples are non-negotiable here—their tartness cuts through the sweetness beautifully. Buy organic if possible, but conventional works too. Peel and dice them small so they caramelize evenly. For the flour, King Arthur or Gold Medal brands yield the most tender crumb. The butter should be cold when creamed—take it out of the fridge 30 minutes before mixing. If your kitchen runs warm, chill the dough for 20 minutes before baking. The vanilla extract matters too; Nielsen-Massey or McCormick pure vanilla delivers consistent results every time.
No Granny Smiths? Honeycrisp or Fuji work well, but you'll need to adjust the lemon juice to balance sweetness. Substituting honey for sugar? Use the same amount by weight—it's sweeter, so the cake will be perfectly moist. For the buttercream, European-style butter like Plugrá creates a richer, more stable frosting. Short on time? The filling can be made a day ahead and reheated gently before assembly. The cake layers should be baked just until a toothpick comes out clean—overbaking dries them out. If you're nervous about assembly, bake the tiers a day apart so they're all at room temperature.
Store the cake components separately in an airtight container. The cake layers keep for 3 days at room temperature or 1 week refrigerated, while the filling lasts 5 days refrigerated. The buttercream can be made 2 days ahead and refrigerated—rewhip with a hand mixer before using. For assembly day, let everything sit at room temperature for 1 hour before decorating. The final cake holds for 4 days refrigerated or 2 weeks frozen—wrap tightly in plastic wrap and foil for best results. Garnish with fresh apple slices just before serving for that restaurant-quality presentation.
Why You'll Love This Recipe
- No Fuss Layers: This cake comes together in three bowls—no mixer required. I swear by the creaming method with butter and sugar (that’s where the magic happens), but even if you’re not a baker, you’ll nail the texture.
- Cinnamon-Apple Magic: The moment I fold in the warm spices and thinly sliced apples, my kitchen smells like autumn nostalgia. That buttery crumb with vanilla extract? It’s the kind of flavor that makes people pause mid-bite.
- Wedding or Weeknight: Serve it at a reception with fresh flowers and gold accents, or pull it out for a lazy Sunday brunch. Honestly, the layers are so sturdy they even hold up to my toddler’s “helpful” cake-decorating sessions.
- Leftovers That Win: This cake stays moist for days, which means I can bake one batch and still have slices for guests a week later. Between us? The frosting (if you use it) is the real MVP—rich enough to justify every extra piece.
Step-by-step instructions for apple cinnamon wedding cake
Precision and patience create this showstopping cake with tender layers and fragrant spiced filling.
👨🍳 Step 1: Prepare the Spiced Apple Filling
Peel, core, and dice the 6 medium Granny Smith Apples into ¼-inch cubes. Toss them with ½ cup Brown Sugar, 1 tablespoon Ground Cinnamon, ¼ teaspoon Ground Nutmeg, and 1 tablespoon Lemon Juice. This combination of tart apples and warm spices creates the signature filling that will seep between cake layers.
Transfer the apple mixture to a saucepan and cook over medium heat for 15-20 minutes, stirring occasionally, until the apples soften and release their juices. The filling should thicken slightly but remain moist—this ensures it stays luscious between layers. Let it cool completely before using, as warm filling will melt the buttercream.
👨🍳 Step 2: Bake the Cake Layers
Preheat your oven to 350°F and grease three 8-inch round cake pans with unsalted butter, then line the bottoms with parchment paper. In a stand mixer fitted with the paddle attachment, beat the 2 cups Unsalted Butter and 2.5 cups Granulated Sugar on medium speed for 3-4 minutes until light and fluffy. This creaming process incorporates air, which creates the cake's signature tender crumb.
Add the 6 whole Large Eggs, one at a time, mixing well after each addition. Stir in the 2 teaspoons Pure Vanilla Extract, 4 cups All-Purpose Flour, 2 teaspoons Baking Powder, ½ teaspoon Salt, and 1 tablespoon Ground Cinnamon on low speed until just combined—overmixing develops gluten, which can make the cake dense. Divide the batter evenly among the prepared pans and bake for 25-30 minutes, or until a toothpick inserted into the center comes out clean. Allow the layers to cool in the pans for 10 minutes before transferring to a wire rack to cool completely.
🥘 Step 3: Assemble the Cake with Buttercream
In a separate bowl, beat the 2 cups Heavy Whipping Cream and ½ cup Honey with an electric mixer until soft peaks form. Gradually add the 4 cups Confectioners' Sugar, mixing on high speed until the buttercream is smooth, glossy, and holds stiff peaks. This buttercream should be thick enough to hold its shape but still spreadable—it’s the perfect balance for piping and filling.
Place one cake layer on a cake stand or plate and spread a thin layer of buttercream over the top. Add ½ of the cooled apple filling, then repeat with the remaining layers, finishing with buttercream on the top layer. Chill the cake in the refrigerator for 1 hour to allow the filling to set and the buttercream to firm up slightly before decorating.
🎂 Step 4: Decorate and Finish
Once chilled, use a piping bag fitted with a star tip to pipe buttercream onto the sides of the cake, creating a smooth, elegant base. For a polished look, dust the top and sides with a fine layer of Confectioners' Sugar using a sifter. The contrast between the golden-brown cake layers, the spiced apple filling, and the creamy buttercream will make this cake the centerpiece of any celebration.
Slice and serve at room temperature. The cake should have a moist, tender crumb with bursts of spiced apple flavor in every bite, complemented by the sweet-tart buttercream. For best results, prepare the cake at least 24 hours in advance—this allows the flavors to meld and the filling to fully absorb into the layers.
Pro Tips For Making Apple Cinnamon Wedding Cake
- Cream Butter Slowly: Take your time beating the butter and sugar—at least 3-5 minutes until it’s pale and fluffy. I used to rush this, and the cake turned out dense. That pale color? It’s not just pretty; it guarantees a tender crumb.
- Sift the Flour Twice: Don’t skip the second sift after mixing dry ingredients. The first time removes lumps, but the second ensures even distribution—especially important for a wedding cake where layers matter. (Yes, it’s tedious, but your future self will notice.)
- Avoid Overmixing Batter: Mix the batter just until combined—no more. Overmixing develops gluten, and your cake will turn tough instead of light. Fold in the apples gently; they’re delicate, and you don’t want to bruise them further.
- Chill the Cake Pans: Place your cake pans in the freezer for 10 minutes before baking. This prevents the butter from melting too fast, giving you a more even rise. I learned this after one batch collapsed in the middle—don’t ask how.
Regional styles of apple cinnamon wedding cake
New England Apple Orchard
In New England, apple cinnamon cakes often feature a denser, heartier crumb to complement the region's crisp autumn flavors. The filling here gets a boost of 1 tbsp apple cider vinegar to enhance the apples' natural pectin, creating a jam-like texture that clings beautifully to each layer. Local bakers often use McIntosh apples instead of Granny Smiths—their mild sweetness balances the cinnamon perfectly. 🍎
Southern Comfort Style
Southern bakers take this cake in a richer direction by adding ½ cup pecans to the filling and folding them into the buttercream. The warmth of the pecans pairs beautifully with the spiced apples, while a dusting of powdered sugar on top creates that classic Southern wedding cake look. I've seen versions where the cake layers are brushed with bourbon-infused simple syrup (2 tbsp bourbon + ¼ cup sugar) before baking for extra depth. 🥛
Midwest Homestyle Twist
The Midwest version keeps the classic apple-cinnamon flavor but adds a streusel topping between layers—combine ½ cup flour, ¼ cup brown sugar, and 2 tbsp cold butter, then sprinkle between cake layers before adding filling. This creates a delightful crunch contrast that's popular at Midwestern weddings. The frosting here is often slightly lighter, using 1 cup whipped cream instead of heavy cream for a softer texture. 🌾
Pacific Northwest Elegance
West Coast bakers focus on delicate presentation, using organic apples and natural food coloring to create stunning visual effects. The filling gets a touch of vanilla bean paste (1 tsp) for complexity, while the buttercream incorporates 1 tbsp lemon zest for brightness. Many Pacific Northwest versions feature a thin caramel drizzle around the base for an elegant finish. The cake layers here are often baked in 9-inch pans for taller, more dramatic tiers. 🍯
Texas-Style Spiced Version
In Texas, this cake gets a bold kick with 1 tsp chipotle powder in the filling and a hint of orange zest in the buttercream. The spice level is subtle but noticeable—perfect for those who love warmth in their desserts. Texan bakers also often use red velvet cake layers instead of vanilla for a striking color contrast. The filling is sometimes thickened with 1 tsp cornstarch to handle the extra moisture from the apples. 🌶️
French-Inspired Sophistication
For a French-inspired version, replace the buttercream with crème pâtissière (vanilla pastry cream) and add 1 tbsp Calvados (apple brandy) to the filling. The cake layers are brushed with egg wash before baking for a golden crust, and the final presentation includes edible gold leaf** accents. This version is lighter in texture but packs serious flavor complexity that wows sophisticated palates. 🥂
Nutrition facts
Frequently asked questions
Can I make this cake without a stand mixer?
Use a hand mixer or even a sturdy whisk for the buttercream and cake batter. For the cake batter, cream the butter and sugar with a whisk for 5-7 minutes until light and fluffy. The key is patience—just keep whisking until the mixture doubles in volume. For the buttercream, beat the cream and honey to stiff peaks, then gradually fold in the powdered sugar with a spatula. It'll take a bit more elbow grease, but you'll get the same great results!
How do I adjust this recipe for a smaller cake?
For a single-layer 6-inch cake, reduce all ingredients by ⅓ (about 6 servings). For a two-tier cake with 6-inch and 8-inch layers, use ⅔ of the recipe for the 6-inch layer and full amounts for the 8-inch. Keep the filling proportion the same—½ cup between layers. The buttercream can be scaled down proportionally, but add it gradually to avoid overmixing.
What's the best way to store leftovers?
Wrap the entire cake tightly in plastic wrap, then place it in an airtight container. Store at room temperature for up to 2 days or refrigerate for up to 5 days. To serve, let slices sit at room temperature for 10-15 minutes before enjoying. The filling may firm up slightly in the fridge—just let it come to room temp for the best texture. For longer storage, freeze slices wrapped individually for up to 3 months.
Can I substitute regular sugar for the superfine sugar?
Yes, but pulse the granulated sugar in a food processor for 30-60 seconds to break it into finer pieces. This helps create a smoother cake texture. For the buttercream, regular powdered sugar works fine—just sift it well to avoid graininess. The honey in the buttercream helps keep it creamy, so don't skip that even if you're using regular sugar elsewhere in the recipe!
Why did my cake layers crack on top?
Cracking usually happens from sudden temperature changes or overbaking. Ensure your oven is fully preheated and your pans are properly greased. Bake until a toothpick comes out clean (25-30 minutes), then let layers cool in pans for 10 minutes before removing. For extra insurance, brush warm layers with simple syrup (equal parts sugar and water) while still in pans—this helps seal the surface and prevent cracking.