
Desserts
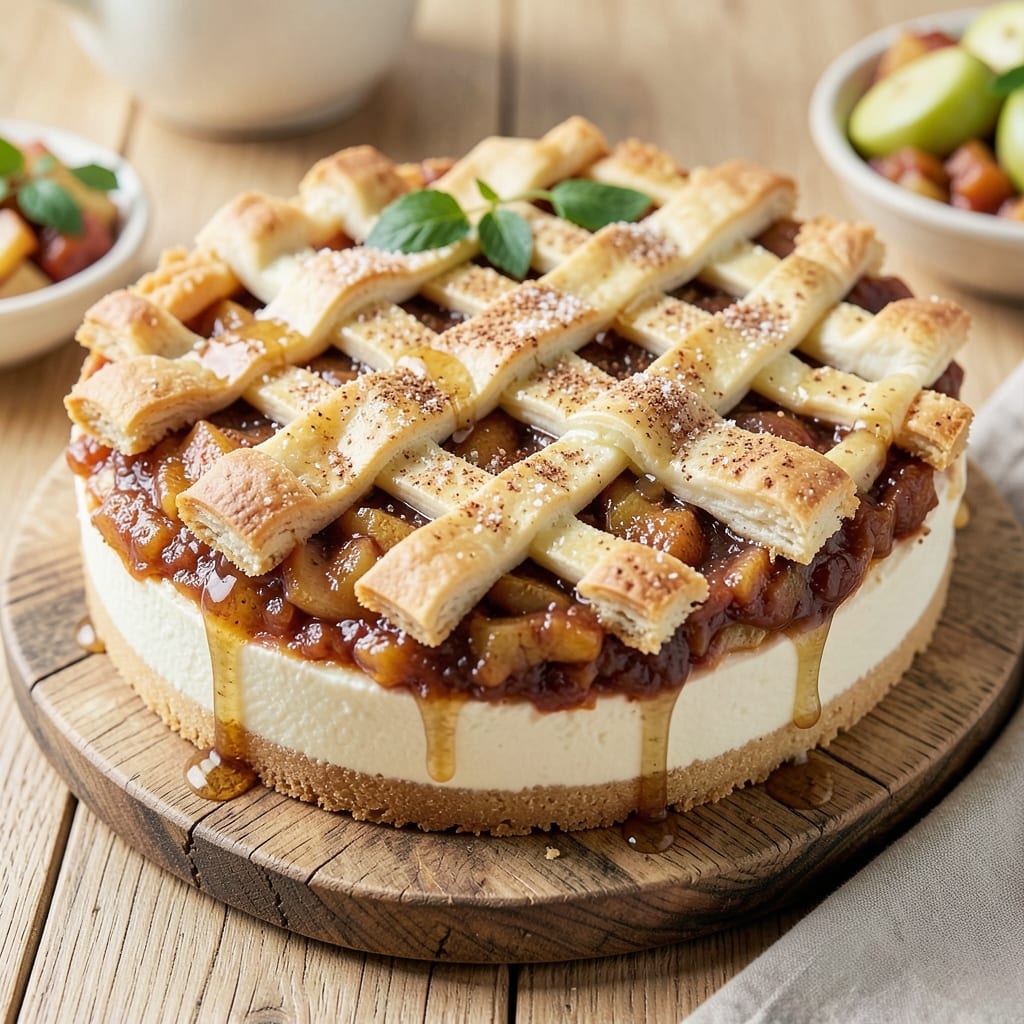
This apple pie filling cheesecake recipe combines two beloved desserts into one showstopping creation—creamy cheesecake layers topped with warm, spiced apple pie filling. The secret lies in baking the cheesecake base first, then layering it with a thick, buttery apple filling that caramelizes beautifully. I've perfected the balance between rich, tangy cheesecake and the comforting flavors of cinnamon-spiced apples, creating a dessert that feels indulgent yet surprisingly simple to assemble.
The two-layered structure starts with a classic New York-style cheesecake—smooth, dense, and perfectly set. Over that goes the apple filling, baked until bubbly and fragrant, with a golden crust that adds texture. This isn't just a dessert; it's an experience, where every bite delivers the creamy sweetness of cheesecake followed by the familiar warmth of apple pie. The key is timing: the cheesecake must be fully cooled before adding the filling to prevent melting, and baking the topping just long enough to set it without drying out.
What makes this recipe special is how it elevates both components—the cheesecake gains depth from the apple's spices, while the filling becomes extra decadent thanks to the cheesecake's richness. The result is a dessert that looks impressive but comes together with straightforward steps: bake, layer, and bake again. Serve it warm with vanilla ice cream or whipped cream for the ultimate dessert experience. Let's get started on this hybrid masterpiece.
This dessert is perfect for holiday gatherings, potlucks, or a special weekend treat—it's the kind of showstopper that will have guests asking for the recipe. The apple filling can be adjusted for tartness or sweetness, and the cheesecake base can be made ahead, making it a versatile option for any occasion. With just a few key techniques, you'll achieve restaurant-quality results at home.
Ingredients for apple pie filling cheesecake
Two layers of indulgence: creamy cheesecake meets spiced apple perfection with these quality ingredients.
| Ingredient | Amount | Notes |
|---|---|---|
| Large Granny Smith Apples 🍎 | 4 whole | Peeled, cored, sliced thin |
| Cream Cheese (Full-Fat) 🧀 | 32 oz | Room temperature, 8 oz blocks |
| Granulated Sugar 🍚 | 2 cups | Divided for layers |
| All-Purpose Flour 🌾 | 1 ½ cups | Sifted for smooth texture |
| Unsalted Butter (Room Temperature) 🧈 | 1 cup | Plus 2 tbsp for crust |
| Large Eggs 🥚 | 4 whole | Room temperature, separated |
| Vanilla Extract 🍯 | 1 tbsp | Pure Madagascar preferred |
| Ground Cinnamon 🌿 | 2 tbsp | Plus 1 tsp for apples |
| Light Brown Sugar 🍚 | ½ cup | Packed, for crust |
| Old-Fashioned Rolled Oats 🌾 | ½ cup | Blended into fine crumbs |
| Salt 🧂 | ½ tsp | Fine sea salt preferred |
| Lemon Juice 🍋 | 1 tbsp | Freshly squeezed |
| Heavy Cream 🥛 | ½ cup | For topping enrichment |
| Puffed Rice Cereal 🍚 | ¼ cup | Crushed for crunch |
| Cornstarch 🌾 | 1 tbsp | For thickening apples |
The apples are non-negotiable—Granny Smiths provide the perfect tartness to balance the sweet cheesecake. Trader Joe's or Whole Foods carry them year-round, but local orchards in fall deliver superior flavor. For the cheesecake base, Philadelphia brand cream cheese is the gold standard—it melts smoothly without graininess. The rolled oats should be old-fashioned, not quick-cooking; Bob's Red Mill is my go-to for consistent texture. Room temperature butter and eggs are critical for a silky texture—let them sit out for 2 hours before mixing.
No Granny Smiths? Honeycrisp or Pink Lady work beautifully, though you may need to add 1 tbsp lemon juice to compensate for their milder tartness. Substituting cream cheese? Neufchâtel has a similar fat content, but avoid low-fat versions—they won't deliver the same rich mouthfeel. For the crust, almond flour can replace half the oats if you're avoiding gluten, though texture will differ slightly. The puffed rice cereal adds a delightful crunch; Rice Krispies work in a pinch, but they lack the delicate snap of specialty puffed rice. When measuring spices, level your tablespoons—spooning directly from the jar packs too much.
Prevent cheesecake cracks by baking at 325°F—higher temps trigger uneven expansion. Store the baked cheesecake base, wrapped tightly, in the fridge for up to 3 days before adding the apple layer; this allows flavors to meld. The assembled dessert keeps 4 days refrigerated, though the apple topping's texture degrades after 2 days. For make-ahead convenience, prepare the apple filling and crust separately, then assemble and bake fresh. Freeze unbaked cheesecake bases for 2 months—thaw overnight in the fridge before proceeding.
Why You'll Love This Recipe
- No-Fuss Assembly: I swear by this recipe because it’s basically a cheesecake hug with apples—just blend the filling, mix the batter, and bake. No fussing with layers or water baths, just a single pan that’s ready when you are.
- Tart-Meets-Rich Magic: That Granny Smith tang cutting through the creamy cheesecake? It’s like autumn in every bite. The apples caramelize just enough to add a subtle sweetness without overpowering the buttery, velvety center.
- Dessert That Works Hard: I make this for potlucks, book club meetings, or even as a "breakfast dessert" when I’m craving something sweet. It’s sturdy enough to slice neatly, but still feels special enough to serve at gatherings.
Step-by-step instructions for apple pie filling cheesecake
Master this two-layered dessert with precise technique and professional results every time.
👨🍳 Step 1: Prepare the Apple Filling
In a large bowl, combine the 4 whole Large Granny Smith Apples (peeled, cored, and sliced thin) with 1 tbsp Cornstarch, 1 tbsp Lemon Juice, and 1 tsp Ground Cinnamon. This combination prevents the apples from turning mushy while adding bright acidity and warm spice. Let the mixture sit for 15 minutes—this allows the cornstarch to begin breaking down the apple fibers for a smoother texture.
Transfer the apple mixture to a non-reactive saucepan and cook over medium heat for 8-10 minutes, stirring occasionally. You're looking for the apples to soften until they're tender but still hold their shape—they should release their juices but not disintegrate. If the mixture becomes too thick, add 1-2 tablespoons of water to maintain a loose consistency. Remove from heat and let cool completely before using.
🥘 Step 2: Assemble the Cheesecake Base
Preheat your oven to 350°F and prepare a 9-inch springform pan by lining the bottom with parchment paper. In a food processor, blend the 0.5 cup Old-Fashioned Rolled Oats into fine crumbs. In a medium bowl, combine these oat crumbs with 0.5 cup Light Brown Sugar, 1.5 cups All-Purpose Flour, 0.5 tsp Salt, and 2 tbsp Unsalted Butter (from the 1 cup total specified).
Use your fingers to work the mixture until it forms a uniform, crumbly texture with no dry spots. Press this base firmly into the prepared springform pan, creating an even layer. Bake for 12-15 minutes until the base is golden brown and fragrant. Remove from the oven and let cool slightly while you prepare the filling layer.
🍳 Step 3: Create the Cheesecake Filling
In a stand mixer fitted with the paddle attachment, beat the 32 oz Cream Cheese (Full-Fat) on medium speed until completely smooth—this should take about 3-4 minutes. Gradually add the 1 cup Unsalted Butter (Room Temperature) and 2 cups Granulated Sugar, mixing until fully incorporated and the mixture is light and fluffy.
Add the 4 whole Large Eggs one at a time, mixing just until each is fully combined after addition. Scrape down the sides of the bowl as needed to ensure even mixing. Stir in the 1 tbsp Vanilla Extract and the cooled apple mixture. The batter should be thick but pourable—if it's too stiff, add 1-2 tablespoons of Heavy Cream to loosen it slightly.
🥘 Step 4: Layer and Bake the Cheesecake
Pour the cheesecake filling evenly over the cooled base in the springform pan. Gently tap the pan on the counter to release any air bubbles. Bake at 325°F for 50-55 minutes until the edges are set and the center still jiggles slightly when shaken. The top should be golden brown with a slight crack pattern.
Remove from the oven and let cool to room temperature before refrigerating for at least 4 hours or overnight. This chilling time is crucial—it allows the layers to fully set and develop their signature textures. The cheesecake layer should be silky smooth with a firm but creamy bite, while the apple layer remains tender and juicy.
🍽️ Step 5: Add the Topping and Serve
Before serving, warm the 0.5 cup Heavy Cream in a small saucepan over low heat until it begins to steam but doesn't boil. Stir in the 0.25 cup crushed Puffed Rice Cereal and 2 tbsp Ground Cinnamon until fully combined. Spoon this mixture evenly over the chilled cheesecake.
Let the topping set for 10-15 minutes at room temperature before slicing. The contrast of the crispy oat crust, smooth cheesecake layer, and juicy apple filling with the crunchy rice topping creates a perfect balance of textures. Serve each slice with a dollop of whipped cream for an elevated presentation.
Pro Tips For Making Apple Pie Filling Cheesecake
- Peel Apples Thinly: Granny Smiths have tough skins that fight back—use a paring knife to slice off just the outer layer, not the whole peel. I learned this the hard way when my first batch tasted bitter from too much skin. Thin slices also cook faster, so they soften into that perfect apple pie filling texture without turning to mush.
- Whip Cream Cheese Cold: Take the cream cheese straight from the fridge and beat it with the butter until it’s just smooth—no need to melt it. I was skeptical until I tried it; the cold fat creates a lighter, less dense texture in the cheesecake layer. Room-temperature butter is fine, but cold cream cheese is non-negotiable for that silky finish.
- Dust Flour After Mixing: Sift that all-purpose flour into the apple mixture after you’ve cooked down the apples and sugar. The flour absorbs moisture instantly, so adding it early turns your filling into glue. Sprinkle it in, then gently fold—this keeps the texture tender, not gummy.
- Bake Low and Slow: Skip the high heat. Set your oven to 325°F (165°C) and bake the cheesecake for 50–60 minutes, then finish under a tent of foil if the top browns too fast. I used to rush it at 350°F, and the center would either stay raw or crack. Low and slow guarantees a creamy middle every time.
Best sauces and condiments for this dish
Caramelized Apple Sauce
Enhance your apple pie filling cheesecake with a homemade caramelized apple sauce—simmer 2 cups apple slices (from the recipe) with 1 tbsp brown sugar, 1 tsp cinnamon, and 1 tbsp butter until syrupy. Spread this sauce over the chilled cheesecake layer before adding the rice topping for an extra layer of depth. 🍎
Vanilla Bean Infusion
Elevate the cheesecake layer by infusing the heavy cream with 1 vanilla bean (split and scraped) while heating it for the rice topping. This adds a luxurious floral note that complements the apple's tartness. For a quicker version, use 2 tbsp vanilla bean paste instead of extract. The infusion takes just 5 minutes on low heat.
Spiced Whipped Cream
Whip 2 cups heavy cream with 2 tbsp powdered sugar, 1 tsp cinnamon, and ½ tsp nutmeg for a festive garnish. This transforms ordinary whipped cream into a dessert-worthy topping that mirrors the warm spices in the apple filling. Serve it alongside slices for dipping or dolloping. ✨
Honey Butter Drizzle
Mix ¼ cup melted butter with 2 tbsp honey and a pinch of salt for a golden drizzle. Warm the mixture slightly to make it pourable, then drizzle over each slice just before serving. The honey adds a subtle sweetness that balances the cheesecake's richness without overpowering the apple flavors. 🍯
Toasted Nut Crunch
For texture contrast, toast ½ cup chopped pecans or walnuts with 1 tbsp brown sugar and ½ tsp cinnamon in a dry pan until fragrant. Sprinkle over the rice topping or mix into the caramelized apple sauce for added crunch. This works especially well with Honeycrisp apples for a nutty depth. 🌰
Caramelized Onion Jam
Create a sweet-savory contrast by caramelizing 1 large onion until deep amber, then simmering with ¼ cup apple cider and 1 tbsp brown sugar until reduced to a jam-like consistency. Spread a thin layer over the cheesecake before adding the apple filling for a sophisticated twist. This pairs beautifully with the creamy cheesecake layer. 🧅
Nutrition facts
Frequently asked questions
Can I make this dessert without a springform pan?
Yes, but with caution! Use a 9-inch round cake pan with a removable bottom instead. Grease it thoroughly and line the bottom with parchment paper. After baking, run a thin knife around the edges to loosen before removing. For a non-stick option, try a ceramic pie dish—just reduce baking time by 5-7 minutes to prevent over-browning. Always let the cheesecake cool completely before unmolding to avoid crumbling.
How do I adjust the sweetness if I prefer less sugar?
Start by reducing the granulated sugar in the cheesecake layer by ¼ cup and the brown sugar in the crust by 2 tablespoons. For the apple filling, omit 1 tablespoon of sugar and increase the lemon juice to 2 tablespoons to enhance tartness. Taste the cooled apple mixture before adding it to the cheesecake—if it still tastes too sweet, simmer it uncovered for 2-3 extra minutes to evaporate excess moisture and concentration.
Why did my cheesecake layer crack?
Cracking usually happens from one of three issues: overmixing (break eggs gently), opening the oven door too early (prevents proper setting), or baking at too high a temperature. Stick to 325°F and avoid peeking! For a smoother finish, create a water bath by placing the springform pan in a larger baking dish filled with 1 inch of hot water. This creates gentle, even heat. If cracks appear, cover them with extra apple filling or whipped cream before serving.
Can I use store-bought apple pie filling instead?
but with adjustments! Choose a thick, chunky filling (not syrupy) and drain excess liquid by pressing it through a fine-mesh sieve. Stir in 1 teaspoon cornstarch and ½ teaspoon cinnamon to mimic the recipe's texture. For best results, warm the filling gently to 160°F before layering—this ensures it's fully set when baked. Store-bought fillings often contain added sugar, so reduce the cheesecake sugar by ¼ cup to balance flavors.
How far ahead can I prepare the components?
The cheesecake base can be baked and stored in the fridge for 3 days before adding the apple layer. The apple filling keeps 2 days refrigerated (covered tightly). For maximum make-ahead convenience, bake the cheesecake base and prepare the apple filling separately, then assemble and bake fresh. The fully assembled dessert stays fresh 4 days refrigerated, though the apple topping's texture degrades after 2 days. Freeze unbaked cheesecake bases for 2 months—thaw overnight in the fridge before proceeding.