
Desserts
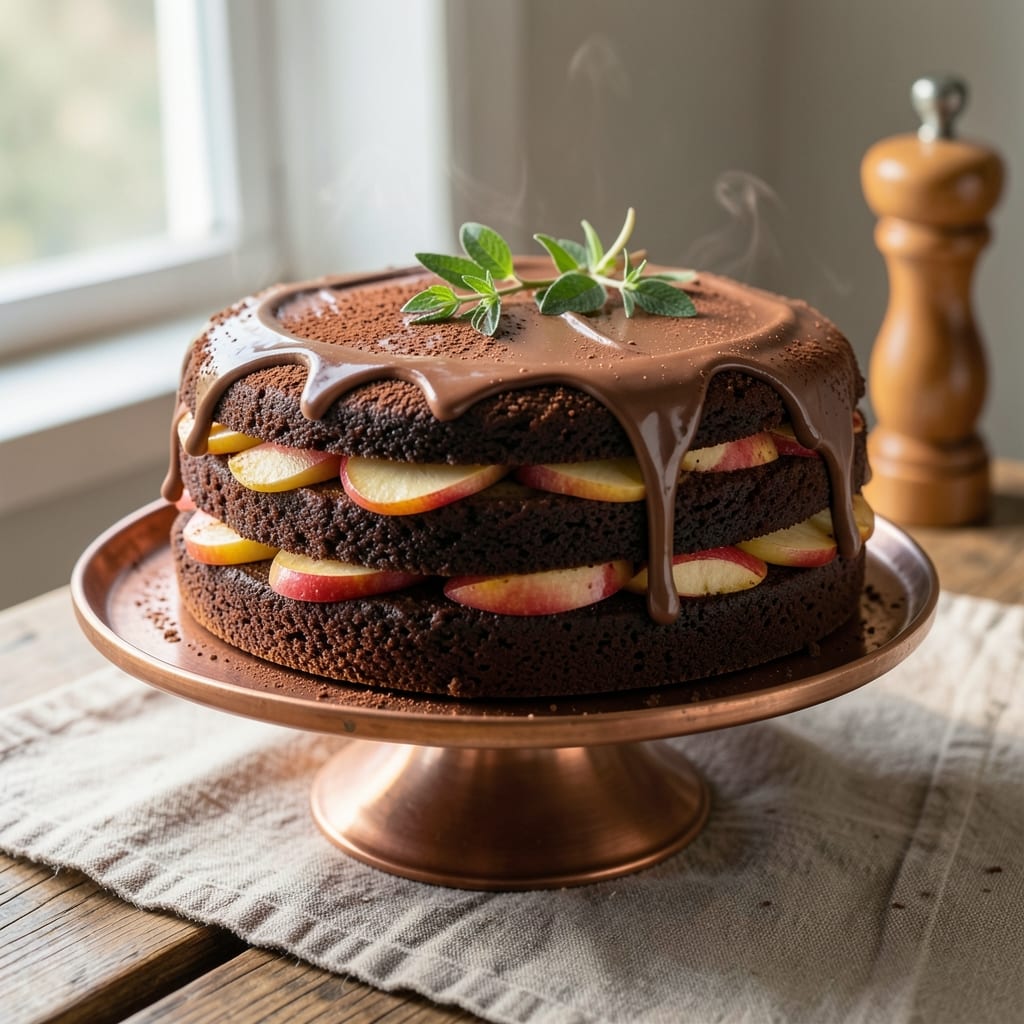
This apples and cocoa sugarless cake delivers all the rich chocolate depth and tender texture of classic cake—without refined sugar or guilt. 💛 The secret lies in balancing naturally sweet apples with dark cocoa powder and a clever flax egg substitute that keeps the crumb moist and tender. After years of testing vegan baking techniques, I've perfected this recipe to satisfy even the most devoted chocolate lovers while meeting dietary needs.
The cake's magic comes from its simple yet effective foundation: ripe apples puréed into the batter add natural sweetness and moisture, while dark cocoa powder provides that deep chocolate flavor without added sugar. Flax eggs bind the ingredients together, creating a structure that holds up beautifully to slicing. The result is a cake with a perfect balance of sweet, tart, and chocolatey notes—no artificial sweeteners needed.
What makes this recipe truly special is how it achieves restaurant-quality texture without traditional ingredients. The apples create a subtle caramelized flavor as they bake, while the cocoa ensures that rich chocolate taste we all crave. This cake is ideal for special occasions, dessert lovers with dietary restrictions, or anyone looking to enjoy a decadent treat without the sugar crash.
Baking takes just 35 minutes at 350°F, and the recipe scales easily for gatherings. Whether you're serving it warm with a dollop of coconut whipped cream or at room temperature with fresh berries, this cake will impress every time. Let's get baking!
Ingredients for apples and cocoa sugarless cake
Twelve ingredients for a decadent vegan cake that satisfies chocolate cravings without refined sugar.
| Ingredient | Amount | Notes |
|---|---|---|
| Ripe Apples (Honeycrisp or Fuji) 🍎 | 2 cups | Peeled, cored, puréed smooth |
| Unsweetened Applesauce 🍏 | ½ cup | Store-bought or homemade |
| Dark Cocoa Powder 🍫 | ¾ cup | Dutch-processed preferred |
| All-Purpose Flour 🌾 | 2 cups | Gluten-free blend if needed |
| Ground Flaxseed 🌱 | 3 tbsp | For flax eggs (1 tbsp + 3 tbsp water) |
| Pure Maple Syrup 🍁 | ½ cup | Grade B for deeper flavor |
| Coconut Oil (Refined) 🥥 | ½ cup | Melted, not solid |
| Vanilla Extract 🌸 | 1 tbsp | Pure Madagascar preferred |
| Baking Powder 🍞 | 1 ½ tsp | Aluminum-free recommended |
| Salt 🧂 | ½ tsp | Fine sea salt preferred |
| Coconut Milk (Full-Fat) 🥛 | ¼ cup | For moisture and richness |
| Lemon Juice 🍋 | 1 tbsp | Freshly squeezed |
The dark cocoa powder is non-negotiable for that deep chocolate flavor—Dutch-processed brands like Valrhona or Ghirardelli deliver the smoothest texture. For the apples, Honeycrisp or Fuji provide the perfect balance of sweet and tart. If you can't find ripe apples, substitute with unsweetened applesauce (though fresh purée yields better texture). The coconut oil should be refined to avoid coconut flavor—Trader Joe's or Whole Foods carry reliable options. For the flax eggs, grind your own flaxseed for maximum freshness; pre-ground loses potency quickly.
No maple syrup? Agave nectar or date syrup work at a 1:1 ratio, though maple adds subtle caramel notes. Almond milk can replace coconut milk, but the fat content helps create that tender crumb. The lemon juice brightens the apples' natural sweetness—don't skip it, even if it seems counterintuitive. For a nut-free version, swap the coconut milk for oat milk and increase the coconut oil by 2 tbsp. If you prefer less moisture, reduce the applesauce to 0.25 cup. The baking powder should be fresh—test it by mixing with water; if it fizzes vigorously, it's good to go.
Store the baked cake in an airtight container at room temperature for up to 3 days, or refrigerate for 5 days to preserve moisture. For longer storage, freeze slices wrapped in parchment for up to 3 months. Reheat individual portions in the microwave for 20 seconds to restore freshness. This cake freezes beautifully—portion before freezing for easy serving. The flax eggs keep the texture intact even after freezing, making it ideal for meal prep or gifts.
Why You'll Love This Recipe
- No Mixer Needed: I swear by this recipe when I’m too tired to crank up the stand mixer—just fold the dry ingredients into the applesauce and apples with a wooden spoon. The flaxseed egg substitute keeps it light without the fuss, and the cocoa powder adds richness without needing extra fat.
- Spiced Warmth Without Guilt: That deep cocoa and caramelized apple combo? It’s like a hug in cake form, but the unsweetened applesauce keeps it naturally sweetened. Honestly, I don’t even miss sugar—this tastes like a dessert I’d splurge on, but it’s actually my go-to when I’m watching my intake.
- Weeknight & Holiday Double Duty: I make this for breakfast when I’m in a rush, but it’s also my secret weapon for potlucks—no one guesses it’s sugar-free. The apples hold their shape, so slices stay neat, and the cocoa gives it that fudgy texture that’s always a crowd-pleaser.
- Leftovers That Last: This cake actually improves the next day—moist from the apples, not dry like most sugar-free versions. I’ll wrap it up and keep it in the fridge for up to five days, or even freeze slices for a quick treat. Between us, I’ve eaten cold slices straight from the fridge, and they’re still delicious.
Step-by-step instructions for apples and cocoa sugarless cake
This method delivers a moist, rich cake with deep chocolate flavor and natural sweetness—no refined sugar needed.
👨🍳 Step 1: Prepare the Flax Eggs and Purée Apples
First, create the flax eggs by whisking 3 tablespoons ground flaxseed with 3 tablespoons water in a small bowl. Let it sit for 5 minutes until it thickens into a gel-like consistency—this replaces traditional eggs while keeping the cake structure intact. I always use this ratio because it creates the perfect binding without adding any flavor.
While the flax eggs thicken, purée the 2 cups ripe apples (Honeycrisp or Fuji) until completely smooth. You want a consistency similar to applesauce—no chunks should remain. The purée adds natural sweetness and moisture that balances the richness of the cocoa. If you're using store-bought applesauce, combine it with the purée to make 2 cups total of apple mixture.
🍳 Step 2: Mix Wet Ingredients for Perfect Texture
In a large mixing bowl, combine the apple purée, 0.5 cup unsweetened applesauce, 0.5 cup melted coconut oil, 0.5 cup pure maple syrup, 1 tablespoon vanilla extract, 1 tablespoon lemon juice, and the thickened flax eggs. Whisk vigorously for 2 minutes until completely smooth and fully incorporated.
This blend creates the cake's foundation—don't skip the whisking. The lemon juice brightens the flavors while preventing the cocoa from becoming bitter. The coconut oil adds richness without the heaviness of butter, and the maple syrup provides that caramel depth that's so characteristic of good chocolate cake.
👨🍳 Step 3: Combine Dry Ingredients Gently
In a separate bowl, sift together the 2 cups all-purpose flour, 0.75 cup dark cocoa powder, 1.5 teaspoons baking powder, and 0.5 teaspoon salt. The sifting ensures no lumps remain, which is crucial for a tender crumb. Gently fold this dry mixture into the wet ingredients using a spatula, mixing just until combined—overmixing develops gluten and makes the cake dense.
I use a gentle folding motion to maintain air pockets created during the initial whisking. You'll notice the batter will be thick but still pourable. The cocoa powder should be fully dissolved, giving the batter a rich chocolate hue. If you see any dry spots, fold in 1 tablespoon coconut milk to help incorporate them.
🥘 Step 4: Fold in Coconut Milk for Moisture
Add the remaining 0.25 cup coconut milk to the batter and fold it in gently. This final step ensures the cake will have that perfect moist texture without being gummy. The coconut milk adds fat and moisture that complements the apples and cocoa beautifully. The batter should now be smooth with a thick, almost fudge-like consistency.
Real talk: Don't worry if the batter looks too thick—it's supposed to be this way. The chemical reactions in the oven will create steam that lightens the texture. For best results, let the batter rest for 10 minutes at room temperature before baking. This allows the flour to fully hydrate and the flavors to meld.
🔥 Step 5: Bake to Golden Perfection
Preheat your oven to 350°F and grease two 8-inch round cake pans or line them with parchment paper. Divide the batter evenly between the pans and smooth the tops. Bake for 25-30 minutes until a toothpick inserted in the center comes out clean and the edges are just beginning to pull away from the pan.
The cake should have a slightly domed top with a crackly crust—this indicates proper baking. I always check for doneness at the 25-minute mark because ovens vary. If the top browns too quickly, tent the pans with foil. Let the cakes cool in the pans for 10 minutes before transferring to a wire rack to cool completely. This gradual cooling prevents cracking.
Pro Tips For Making Apples And Cocoa Sugarless Cake
- GRATE THOSE APPLES FINE: The moment you slice Honeycrisp or Fuji, the flesh turns to mush if you’re not careful. Use the smallest holes on your box grater—think wet sand, not pebbles—and work in batches. Pack the grated apples into the measuring cup to remove excess moisture before adding to the batter.
- WHISK THE COCOA FIRST: I learned this after my first batch turned out dense and uneven. Mix the cocoa powder with the dry ingredients before adding liquids—this prevents clumping and ensures a smoother batter. Stir it in like you’re folding in a stubborn blanket.
- BAKE UNTIL THE CENTER HITS 205°F: The cake’s done when the middle springs back just slightly and reads 205°F—hotter than you’d think. A toothpick with a few moist crumbs is fine, but if it’s wet batter, give it 5–10 more minutes. Underbaking here means a gummy, uncooked core.
- SWAP FLAXSEED FOR A QUICK SOAK: Ground flaxseed works, but for extra tenderness, mix it with 3 tablespoons hot water and let it sit for 5 minutes before adding to the batter. It thickens like an egg substitute and keeps the cake from drying out—no weird texture, just better moisture. (Yes, even if you’re impatient like me.)
Storing and reheating this apples and cocoa sugarless cake
Room Temperature Storage
Store your cake in an airtight container at room temperature for up to 3 days. The apples and cocoa combination keeps it moist without needing refrigeration. I like using glass containers with silicone seals—they preserve freshness better than plastic. Place a slice of bread on top of the cake to absorb excess moisture if your kitchen is dry. 🍞
For best flavor development, let the cake sit at room temperature for 1-2 hours after baking before storing. This allows the apples to caramelize slightly, enhancing their natural sweetness. If you're serving it the same day, keep it wrapped in parchment paper to maintain texture.
Refrigerator Preservation
Extend shelf life to 5 days by refrigerating in an airtight container. The cold temperature helps preserve moisture, but the texture may become slightly denser. To restore freshness, let slices sit at room temperature for 10 minutes before serving. I recommend glass containers over plastic—they don’t absorb odors and keep flavors pure. ❄️
If you notice the cake drying out, sprinkle a few drops of coconut milk over the exposed surface before sealing. This works wonders for reviving texture without altering flavor. For a quick treat, I often slice and refrigerate individual portions in small glass jars—perfect for grab-and-go desserts.
Freezing for Later
Freeze slices wrapped in parchment paper for up to 3 months without quality loss. The flax eggs and coconut oil prevent freezer burn, so you won’t get that dry, crumbly texture. I like using quart-sized freezer bags with 1 inch headspace—they stack neatly in the freezer. Label with the date to track freshness. ❄️
Thaw overnight in the fridge or at room temperature for 2 hours. For a quick option, microwave individual slices for 20 seconds to restore moisture. The apples retain their tenderness, and the cocoa flavor stays rich—no one will guess it was frozen! I often prep slices in advance for weeknight desserts or gift boxes.
Reheating Methods
For microwave reheating, place a slice on a plate and heat for 15-20 seconds on 50% power. This gentle approach prevents drying while warming through. Add a spritz of water if the cake looks dry. The microwave method is my go-to for single servings—it’s fast and effective. 🔥
For oven reheating, wrap slices in foil and bake at 300°F for 8-10 minutes. This method is ideal for plating multiple slices at once. The gentle heat reactivates the apples’ caramelized notes, making the cake taste almost fresh-baked. Avoid high heat—it can dry out the edges.
Nutrition facts
Frequently asked questions
Can I use regular applesauce instead of puréed apples?
Yes, but with a small adjustment! Use 1.5 cups unsweetened applesauce instead of 2 cups puréed apples to maintain moisture balance. Store-bought applesauce works, but fresh purée gives better texture and deeper apple flavor. The extra 0.5 cup applesauce compensates for the lack of natural moisture from fresh apples.
Why does my cake turn out dense instead of moist?
Overmixing the batter is the #1 cause! Mix just until combined—don't beat like pancakes. Also ensure your flax eggs are fully thickened (5 minutes resting time) and your coconut oil is melted (not solid). If using gluten-free flour, add 1 extra tablespoon coconut milk to improve texture.
What's the best way to enhance the chocolate flavor?
Use Dutch-processed cocoa powder (like Valrhona or Ghirardelli) for deeper flavor. Add 1 teaspoon instant espresso powder to the dry ingredients—it intensifies chocolate notes without adding caffeine. For extra richness, fold in 2 tablespoons cocoa nibs on top before baking. The apples' natural sweetness will make the chocolate taste even more decadent!
Can I make this cake in a different pan size?
Yes! For a 9-inch round pan, reduce baking time by 5 minutes (20-25 minutes total). For a loaf pan, bake at 325°F for 40-45 minutes—check with a toothpick. Always adjust oven temp if changing pan size to prevent over-browning. The batter volume stays the same; just adjust baking time and temperature accordingly.
How do I make this cake nut-free?
Replace the coconut milk with oat milk and increase the coconut oil by 2 tablespoons (total 0.75 cup). For extra moisture, add 1 tablespoon extra applesauce. The flax eggs and maple syrup keep it nut-free while maintaining the same rich texture. Always check your oat milk label for cross-contamination warnings if allergies are a concern.