
Desserts
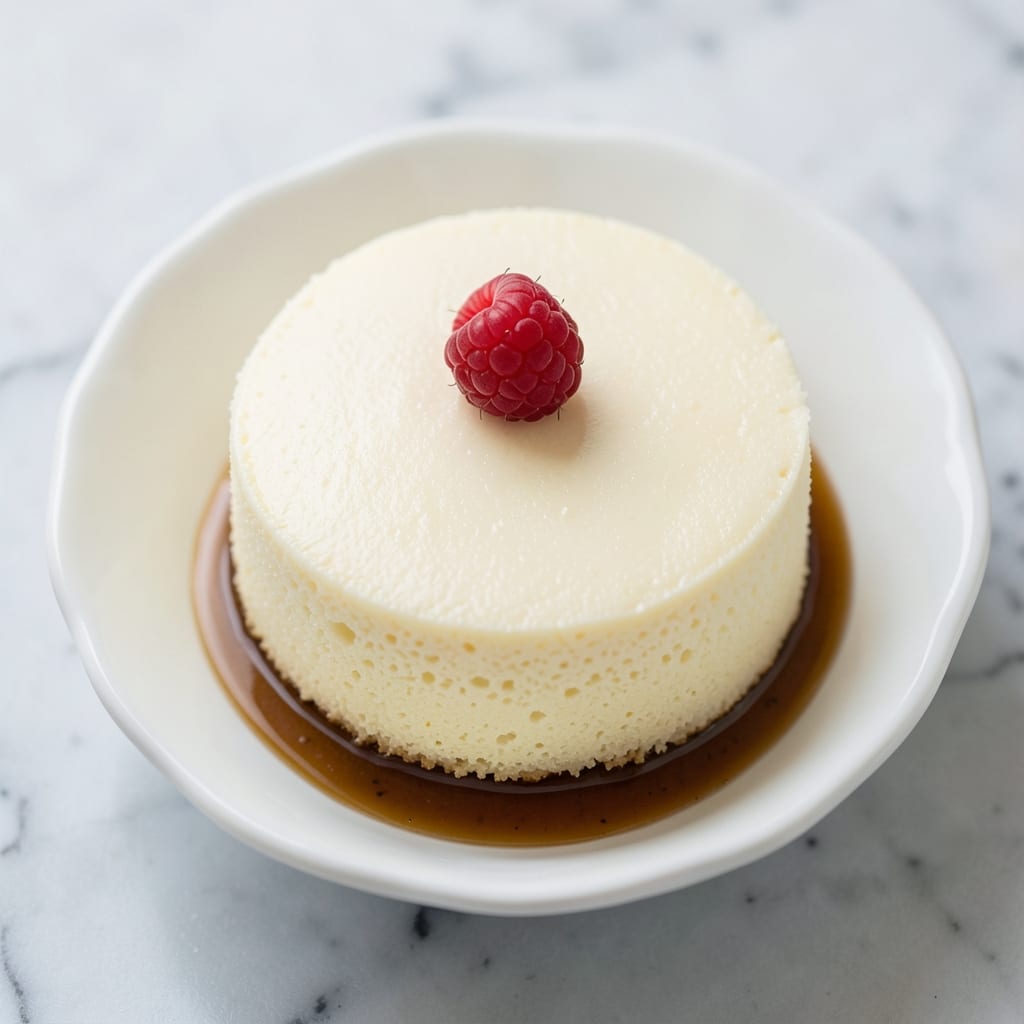
Aquafaba sponge cake delivers the same ethereal lightness as traditional sponge cakes—without a single egg. This vegan recipe transforms humble chickpea brine into a fluffy, airy dessert that's perfect for any celebration. The secret lies in whipping aquafaba to stiff peaks, mimicking egg whites' structure while keeping the texture delicate and tender.
What makes this recipe truly remarkable is its simplicity and dietary flexibility—no eggs, no dairy, yet the result is a cake that's light as a cloud and moist without being dense. The process requires patience (whipping the aquafaba takes time) but yields a dessert that's foolproof once mastered. Ideal for layers, truffles, or serving plain with fresh berries, this cake proves plant-based baking can be just as impressive as traditional recipes.
By the time you pull it from the oven, you'll have a golden, domed cake with a fine crumb and subtle sweetness that's perfect for slicing into elegant portions. The aquafaba's natural leavening creates a tender yet sturdy structure, making it stable enough for filling or frosting without collapsing. This is the kind of dessert that will impress even non-vegans at your table.
Perfect for birthdays, showers, or simply treating yourself, this recipe comes together in one bowl with basic pantry staples. The only equipment you'll need is a stand mixer or hand mixer—no fancy tools required. Let's create something extraordinary with this egg-free masterpiece.
Ingredients for aquafaba sponge cake
Transform humble chickpea brine into ethereal, cloud-like cake—no eggs, no dairy, just pure magic in one bowl.
| Ingredient | Amount | Notes |
|---|---|---|
| Aquafaba (Chickpea Brine) 🥜 | 1 ½ cups | Unsalted, from canned chickpeas |
| Granulated Sugar 🍚 | 1 ½ cups | Organic preferred for purity |
| All-Purpose Flour 🌾 | 1 ½ cups | Sifted for light texture |
| Cream of Tartar 🧂 | ¼ tsp | Stabilizes whipped aquafaba |
| Vanilla Extract 🌿 | 1 tsp | Pure Madagascar preferred |
| Baking Powder 🍞 | 1 ½ tsp | Aluminum-free for vegan |
| Salt 🧂 | ¼ tsp | Fine sea salt preferred |
| Vegetable Oil 🫒 | ¼ cup | Light, neutral flavor |
| Pineapple Juice 🍍 | ½ cup | Fresh for acidity balance |
| Unsweetened Applesauce 🍎 | ½ cup | For moisture without density |
| Lemon Zest 🍋 | 1 tbsp | Brightens overall flavor |
| Cornstarch 🌾 | 1 tbsp | For tender crumb structure |
The aquafaba is your secret weapon—save the brine from a can of chickpeas (or buy unsalted if possible). Trader Joe's sells unsalted chickpeas in bulk, which is perfect for this. Freshness matters: if your brine smells funky, boil it for 5 minutes to sterilize. The sugar should be superfine if you can find it—it dissolves faster and creates a smoother batter. For the flour, King Arthur brand is my go-to; it's finely milled and reliable for delicate baked goods. Don't skip the sifting—this cake's lightness depends on it.
No aquafaba? Silken tofu blended with 1 tsp cream of tartar works in a pinch, though texture will differ slightly. Running short on vanilla? Almond extract at half the amount gives a similar depth. The pineapple juice is non-negotiable for acidity—substitute lemon juice if needed, but reduce to 0.375 cup. For a nut-free option, swap the applesauce for mashed banana (0.5 cup). The cornstarch is key for that tender, melt-in-your-mouth crumb—don't skip it! And if you're feeling fancy, add 1 tsp turmeric for a golden hue without food coloring.
Store baked cake in an airtight container at room temperature for 3 days or refrigerate for 5 days—though it's best fresh. Freeze slices for up to 3 months by wrapping tightly in plastic. For serving, dust with powdered sugar or top with fresh berries to keep it elegant. This cake reheats beautifully: 30 seconds in the microwave restores its softness. Make ahead? Bake the day before—it actually improves as flavors meld.
Why You'll Love This Recipe
- No Eggs Needed: I’ll admit—this sponge cake fools everyone. The aquafaba (that’s just chickpea brine) whips up just like egg whites, giving you that light, airy texture without cracking open a single shell. Honestly, it’s the kind of trick that makes me feel like a baking genius, even when I’m just stirring.
- Vanilla-Sugar Crunch: That caramelized sugar crust? Chef’s kiss. It’s where the magic happens—when the vanilla extract infuses into the edges, you get this perfect balance of tender crumb and buttery, slightly crispy top. Between us, it’s the kind of detail that makes people ask, “What’s in this?” when they take their first bite.
- Pantry Staple Magic: Here’s what sold me—this recipe uses things you already have. No specialty ingredients, no last-minute grocery runs. Just flour, sugar, and that chickpea brine you’d normally toss (or drink, if we’re being real). I’ve made it for birthdays, book club brunches, and even as a “dessert” when I forgot to buy cake.
- Leftovers? Even Better: The best part? This cake doesn’t fight you. It stays moist for days—no dry, sad crumbs here. I’ve packed it in lunches, reheated slices in the toaster for breakfast (yes, really), and even turned extra into trifle layers. It’s the kind of dessert that works harder than you do.
Step-by-step instructions for aquafaba sponge cake
This egg-free sponge cake transforms humble chickpea brine into a cloud-light masterpiece—here's how to make it rise high and stay tender.
Whip Aquafaba to Stiff Peaks
Pour the 1.5 cups aquafaba (chickpea brine) into a clean, grease-free mixing bowl. Add the 0.25 teaspoon cream of tartar and whisk vigorously until fully dissolved—this stabilizes your meringue. Transfer to a stand mixer fitted with the whisk attachment and beat on medium speed for 3 minutes until soft peaks form.
Increase speed to high and continue whipping for 5-7 minutes until the aquafaba forms stiff, glossy peaks that hold their shape when the whisk is lifted. The mixture should look like thick, pale meringue with no liquid pooling at the bottom. This is your foundation—don't rush it. If you see any graininess, strain through a fine-mesh sieve before proceeding.
Gradually Add Sugar for Structure
With the mixer running on low speed, slowly add the 1.5 cups granulated sugar in a thin, steady stream. This gradual incorporation prevents sugar crystals from weighing down your meringue. After all sugar is added, increase speed to medium-high and whip for 3-4 minutes until the mixture is cool to the touch and forms shiny, stiff peaks. The bowl should feel noticeably cooler—this indicates proper aeration.
Scrape the sides of the bowl with a spatula to ensure all sugar is incorporated. If the mixture looks slightly curdled, don't panic—this is normal with aquafaba. Gently fold in the 1 teaspoon vanilla extract using a rubber spatula until just combined. The batter should be thick, glossy, and hold its shape when spooned.
Combine Wet Ingredients
In a separate bowl, whisk together the 0.5 cup pineapple juice, 0.5 cup unsweetened applesauce, 0.25 cup vegetable oil, 1 tablespoon lemon zest, and 1 tablespoon cornstarch until smooth. The lemon zest adds brightness that complements the cake's subtle sweetness, while the applesauce provides moisture without densifying the texture. This wet mixture should be completely homogeneous—no visible streaks of oil or zest.
Gently fold one-third of the aquafaba mixture into the wet ingredients using a spatula, being careful not to deflate the air bubbles. Then, gradually fold in the remaining aquafaba in two additions, alternating with the 1.5 cups sifted all-purpose flour mixed with 1.5 teaspoons baking powder and 0.25 teaspoon salt. Fold just until combined—overmixing develops gluten and makes the cake dense.
Bake for Perfect Rise and Texture
Preheat your oven to 350°F and grease an 8-inch round cake pan or line it with parchment paper. Pour the batter into the prepared pan and smooth the top with a spatula. Tap the pan gently on the counter 3-4 times to eliminate any air pockets. Bake for 35-40 minutes, or until a toothpick inserted in the center comes out clean and the top springs back when pressed.
The cake should rise to form a dome with a golden-brown top and slightly domed sides. If the edges brown too quickly, tent loosely with aluminum foil after 20 minutes. The internal temperature should reach 205-210°F—this ensures complete doneness without drying. Let the cake cool in the pan for 10 minutes, then transfer to a wire rack to cool completely before slicing.
Pro Tips For Making Aquafaba Sponge Cake
- Use a Stand Mixer for Whipping: I learned this the hard way—hand-whipping aquafaba for a sponge cake is a workout that leaves your arm sore and your meringue underwhelming. A stand mixer with the whisk attachment cranks up the volume faster and more evenly, especially when you hit that 200°F (65°C) ribbon stage. Skip the elbow grease and let the machine do the heavy lifting.
- Strain the Aquafaba First: Your chickpea brine is full of tiny particles that’ll weigh down your meringue like an anchor. Strain it through a fine-mesh sieve or cheesecloth before whipping—yes, it’s an extra step, but it makes a real difference in how light and airy your cake turns out. (Save the strained bits for broth or discard them; no waste here.)
- Check Doneness with a Toothpick: That cake might look done, but aquafaba sponge cakes can hide a gummy center if you pull them out too soon. Insert a toothpick into the center—it should come out clean or with one crumb. Overbaking dries it out, but underbaking leaves you with a dense, chewy mess. Oven temp matters: 350°F (175°C) is your sweet spot, but watch those hot spots if your oven runs hot.
- Fold in Flour in Two Batches: Dumping all the flour at once is how you end up with a dense, heavy cake. Split it: fold in half the flour first to lighten the batter, then add the rest gently. Use a spatula and cut through the center to deflate the batter just enough—this keeps those air pockets intact. (And yes, even if you’re impatient like me, rushing this step ruins the texture.)
Pro cooking tips for perfect results
Whipping Aquafaba Like a Pro
Your aquafaba needs patience and precision—skip the rush! Use a clean, grease-free bowl (even a hint of oil prevents stiff peaks) and a stand mixer with whisk attachment (hand mixers struggle with aquafaba's density). Start on medium speed for 3 minutes to dissolve the 0.25 tsp cream of tartar completely—this stabilizes the foam like egg whites. When you increase to high speed, watch for stiff peaks that hold their shape when you lift the whisk. 💫
Pro tip: If your aquafaba looks grainy, strain it through a fine-mesh sieve before whipping. And cool the bowl by running it under cold water for 30 seconds halfway through—this helps the mixture whip faster and reach stiff peaks sooner. I’ve found that room-temperature aquafaba (not straight from the fridge) whips best, so let it sit for 10-15 minutes if it’s cold.
Sugar Integration Secrets
Adding sugar too quickly crashes your meringue—always add it gradually while the mixer runs on low speed. I use a spoon or small ladle to drizzle it in a thin stream, letting each addition fully incorporate before adding more. Once all sugar is in, whip on medium-high until the mixture is cool to the touch and forms glossy peaks. If the bowl feels warm, keep whipping—coolness = proper aeration.
For extra stability, chill the bowl in the freezer for 5 minutes before adding sugar. This trick prevents sugar crystals from weighing down your aquafaba. And if your mixture looks curdled (normal with aquafaba), don’t panic—just fold it in gently with a spatula. The key is patience: rushing this step leads to a dense cake.
Folding Without Deflating
When combining the aquafaba with wet ingredients, use a spatula to gently fold—never stir! Start by folding in one-third of the aquafaba to lighten the wet mixture, then alternate adding the rest of the aquafaba with the flour mixture in two additions. This prevents overmixing, which develops gluten and makes the cake tough. Work quickly but carefully to maintain air bubbles. 🌬️
Pro move: Wet your spatula slightly before folding—this helps merge ingredients without tearing the delicate aquafaba structure. And if your batter looks lumpy, don’t overwork it. A few small lumps are fine; they’ll smooth out during baking. The goal is a thick, glossy batter that holds its shape when spooned—this ensures a light, airy crumb.
Baking for Perfect Rise
Preheat your oven to 350°F and use an 8-inch round pan (greased or lined with parchment). Pour the batter in, smooth the top, and tap the pan 3-4 times on the counter to release air bubbles. Bake for 35-40 minutes until a toothpick comes out clean and the top springs back when pressed. If the edges brown too fast, tent with foil after 20 minutes.
For an even bake, place a baking sheet on the rack below—this prevents the bottom from overcooking. The cake is done when the internal temperature hits 205-210°F. Let it cool in the pan for 10 minutes, then transfer to a wire rack. Never skip cooling—this ensures even slicing and prevents crumbling.
Nutrition facts
Frequently asked questions
Can I substitute aquafaba with another egg replacer?
While aquafaba is ideal for this recipe, you can try silken tofu blended with 1 tsp cream of tartar in a pinch. For best results, whip the tofu mixture until stiff peaks form (about 5-7 minutes on high speed). However, the texture may be slightly denser than traditional aquafaba sponge cake.
Why did my aquafaba not whip to stiff peaks?
Grease in the bowl or old aquafaba are common culprits. Always use a clean, grease-free bowl and ensure your aquafaba is room temperature (not straight from the fridge). If needed, strain through a fine-mesh sieve to remove any graininess. For extra stability, chill the bowl in the freezer for 5 minutes before whipping.
How do I make this cake extra moist?
Add 2 tbsp extra pineapple juice or 1 tbsp lemon juice to the wet ingredients for added moisture. For a richer texture, replace 2 tbsp applesauce with mashed banana (though this adds slight sweetness). Always ensure your cake cools completely before slicing—this helps retain moisture.
Can I bake this cake in a different pan size?
Yes, but adjust baking time accordingly. For a 9-inch pan, reduce time by 5-7 minutes, and for a 6-inch pan, increase by 5-7 minutes. Use the toothpick test as your guide—insert it into the center and check for clean results. The cake should spring back when pressed gently.
Is this cake suitable for layering with frosting?
This recipe creates a sturdy yet tender crumb perfect for layering. Let the cake cool completely before assembling. For extra stability, brush layers with simple syrup (equal parts sugar and water) before adding frosting.