
Desserts
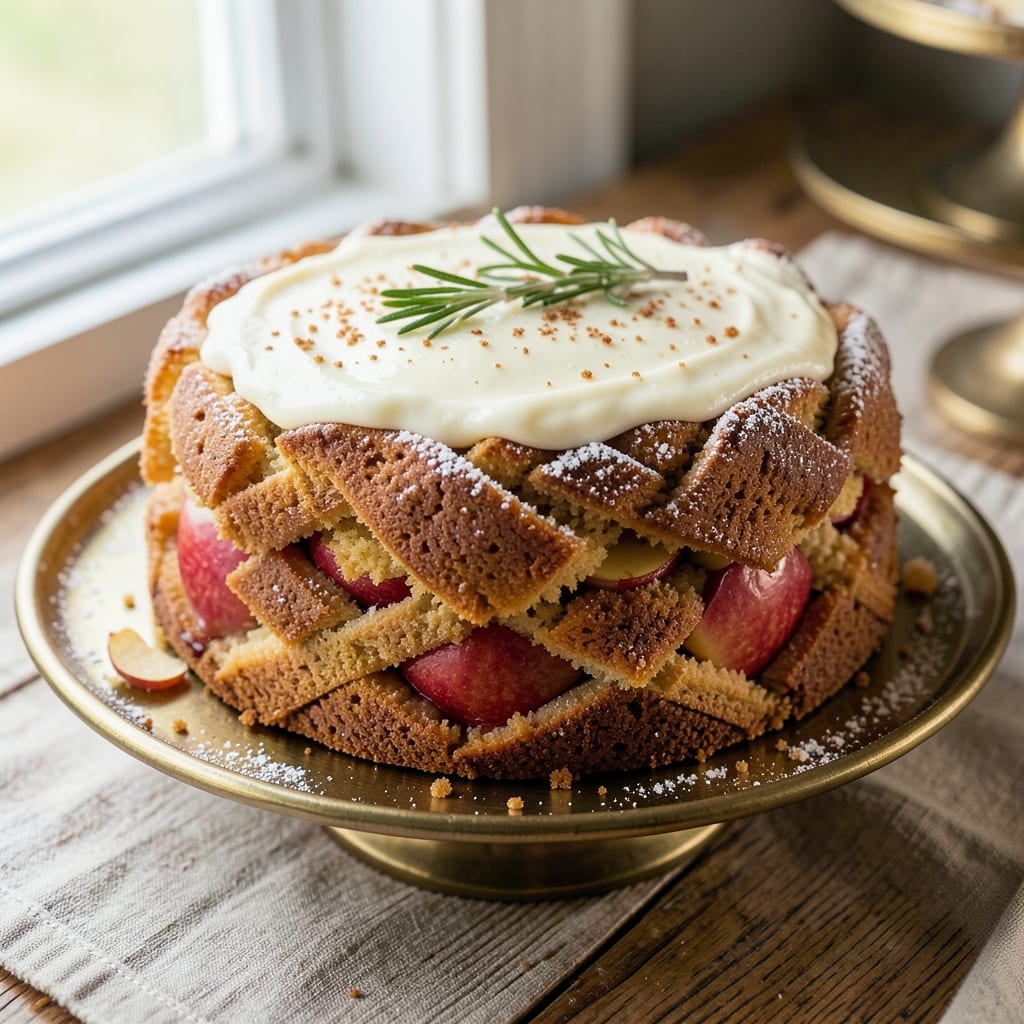
Aunt Tilly’s apple cake recipe has been passed down through generations, promising layers of tender cake and spiced apple filling that taste like autumn in every bite. 🍏 The secret lies in using a mix of tart and sweet apples, baked until the edges are golden and the filling bubbles with caramelized sweetness. This classic dessert is perfect for family gatherings or cozy afternoons with tea.
The recipe begins with a simple yet rich cake batter, layered with a spiced apple filling that balances cinnamon, nutmeg, and a touch of vanilla. Baking at 350°F ensures the cake rises evenly while the apples soften just enough to create that perfect blend of texture and flavor. The result is a cake that’s moist, fragrant, and impossible to resist.
Once out of the oven, the cake deserves a light glaze or dusting of powdered sugar to enhance its natural sweetness. Serve warm with a scoop of vanilla ice cream or a dollop of whipped cream for the ultimate comfort dessert. Whether it’s a holiday tradition or a weekend treat, this apple cake never fails to impress.
For those with dietary preferences, substitutions like almond flour or coconut oil can adapt the recipe without sacrificing flavor. The key is patience—letting the apples cook slowly to develop their natural sweetness and ensuring the layers are just set before slicing. Every slice tells a story, and this cake is the perfect way to bring warmth and nostalgia to your table.
Ingredients for aunt tilly's apple cake
Generations of apple lovers swear by these simple yet magical ingredients for Aunt Tilly's legendary cake.
| Ingredient | Amount | Notes |
|---|---|---|
| All-Purpose Flour 🌾 | 2 ½ cups | Sifted for light texture |
| Granulated Sugar 🍚 | 1 ½ cups | White or light brown |
| Unsalted Butter 🧈 | 1 cup | Softened to room temperature |
| Large Eggs 🥚 | 2 whole | Room temperature for best mixing |
| Baking Powder 🍞 | 2 tsp | Aluminum-free preferred |
| Salt 🧂 | ½ tsp | Fine sea salt preferred |
| Vanilla Extract 🌿 | 1 tbsp | Pure extract, not imitation |
| Ground Cinnamon 🌶️ | 1 ½ tsp | Freshly ground for best flavor |
| Ground Nutmeg 🌶️ | ¼ tsp | Freshly grated preferred |
| Apples 🍏 | 4 medium | Mixed tart/sweet varieties |
| Lemon Juice 🍋 | 1 tbsp | Freshly squeezed |
| Powdered Sugar 🍚 | ½ cup | For glaze, sifted |
| Heavy Cream 🥛 | ¼ cup | For glaze, optional |
The apples are the heart of this cake, so pick a mix of tart and sweet varieties—think Granny Smith with Honeycrisp or Braeburn. Local farmers markets often have the best selection, and organic apples work beautifully. Peel and slice them evenly (about 1/4-inch thick) so they cook uniformly. If you can't find fresh cinnamon sticks, Penzeys sells ground cinnamon that's perfect for baking. The nutmeg should be freshly grated if possible—it makes a world of difference. For the butter, Land O'Lakes or Plugrá are reliable choices, but any good-quality unsalted butter will do.
No baking powder? Use 1.5 tsp baking soda plus 1 tsp cream of tartar as a substitute. Running short on vanilla? Vanilla bean paste works too—just use half the amount. The apples can be prepped ahead and stored in the fridge (tossed in lemon juice) for up to 2 days before baking. Want to make it gluten-free? Almond flour or a 1:1 gluten-free blend works well, though texture will differ slightly. For the glaze, heavy cream isn't mandatory—just powdered sugar and a splash of milk or lemon juice works perfectly.
This cake keeps beautifully for 4-5 days in an airtight container at room temperature, but it's best served fresh. Wrap tightly in plastic wrap and refrigerate if keeping longer than 2 days. The glaze sets quickly, so assemble the cake right before serving. I always make a double batch—one for today and one for tomorrow. Trust me, you'll want seconds. Freeze individual layers (without glaze) for up to 3 months if you're planning ahead.
Why You'll Love This Recipe
- I’ll be real: this cake costs me pennies to make. Flour, sugar, butter, eggs—ingredients I always have on hand. And because it’s not fussy, I don’t waste money on specialty tools or expensive add-ins. Plus, leftovers? They disappear faster than I can reheat them.
- No-Fuss Mixing: I swear by this—just cream butter and sugar, toss in eggs, fold dry stuff together. No sifting, no fussing, and the cake still rises like a dream. That butter-sugar base? It’s the secret to that melt-in-your-mouth texture.
- Sweet & Simple Magic: Honestly, the flavor is what makes this recipe legendary. The apples (if you add them) caramelize just enough to balance that buttery richness, while the baking powder keeps it light. It’s not overly sweet—just perfectly, comfortably sweet.
- Weeknight Workhorse: Between us, this is my go-to for potlucks, school bake sales, or when I need a cake that won’t get gobbled up in one sitting. The proportions are generous, and it slices neatly—no one will guess it’s from a basic box.
Step-by-step instructions for Aunt Tilly's apple cake
Here's how to bake this legendary cake with perfect layers and spiced apple goodness every time.
👨🍳 Step 1: Prep the Apples and Preheat the Oven
Core and peel the 4 medium apples, then cut them into ¼-inch thick slices. Toss the apple slices with the 1 tablespoon lemon juice to prevent browning—this keeps them vibrant and bright in the cake. Arrange the apple slices in a single layer on a baking sheet lined with parchment paper.
Preheat your oven to 350°F. While it heats, position two 8-inch round cake pans on the middle rack to ensure even baking. Here's the thing—grease the pans thoroughly with butter and dust with flour, tapping out any excess. This prevents sticking and gives you that classic buttery texture Aunt Tilly's cake is famous for.
🍳 Step 2: Bake the Apples Until Tender
Bake the apple slices for 12-15 minutes until they're just tender but still hold their shape—you want them to stay intact when you layer them in the cake. They should be soft enough to pierce easily with a fork but not mushy. Let them cool completely before using, about 15 minutes on the baking sheet.
Here's where it gets fun: while the apples bake, I like to make the cake batter first. This way, everything's ready when the apples come out of the oven. The warm apples will infuse the batter with their natural sweetness and aroma as you assemble the cake.
👨🍳 Step 3: Mix the Dry and Wet Ingredients Separately
In a medium bowl, whisk together the 2.5 cups all-purpose flour, 2 teaspoons baking powder, 0.5 teaspoon salt, 1.5 teaspoons ground cinnamon, and 0.25 teaspoon ground nutmeg. Sift this mixture into another bowl to aerate it—this creates a lighter texture in the final cake. In a separate large bowl, beat the 1 cup softened unsalted butter and 1.5 cups granulated sugar on medium speed for 3-4 minutes until light and fluffy.
Add the 2 whole large eggs, one at a time, mixing well after each addition. Scrape down the sides of the bowl, then add the 1 tablespoon vanilla extract and mix until combined. This is the base of our cake—creamy, sweet, and ready for the dry ingredients. I always use room temperature eggs for the best mixing results.
🥘 Step 4: Combine and Layer the Cake
Gradually add the dry ingredients to the wet mixture, mixing on low speed just until combined. Don't overmix—you should still see a few streaks of flour. Pour half of the batter into one prepared cake pan, spreading it evenly. Arrange half of the cooled apple slices in a single layer on top, slightly overlapping them.
Spoon the remaining batter over the apples, then top with the remaining apple slices. The apples should be mostly covered but visible through the top layer of cake. This creates those beautiful apple pockets that make this cake special. Tap the pans gently on the counter to release any air bubbles.
🔥 Step 5: Bake to Golden Perfection and Glaze
Bake the cake layers for 25-30 minutes or until a toothpick inserted in the center comes out clean. The edges should be golden brown, and the top should spring back when gently pressed. Let the cakes cool in the pans for 10 minutes, then transfer to a wire rack to cool completely.
For the glaze, whisk together the 0.5 cup powdered sugar and 0.25 cup heavy cream until smooth. Drizzle half of the glaze over one cake layer, then place the second layer on top. Drizzle the remaining glaze over the top and sides. The glaze should be thick enough to hold its shape but still drizzle nicely—adjust with more powdered sugar if needed. Let the glaze set for 30 minutes before slicing.
Pro Tips For Making Aunt Tilly'S Apple Cake
- Weigh the Butter: I learned this the hard way—packed butter takes up less space than you think. Scooping it straight from the fridge means you’re probably under by 1-2 tablespoons. Use a kitchen scale for the butter and sugar combo; the cake’s texture depends on getting those measurements right.
- Fold Dry Ingredients Gently: This isn’t a pancake batter. Once you’ve mixed the wet ingredients (butter, sugar, eggs), add the flour and baking powder in three parts, folding just until combined. Overmixing develops gluten, and your cake will turn out dense instead of tender—like a sad, dry brick.
- Skip the Overmixed Apples: If your recipe includes chopped apples (and let’s be honest, it probably does), toss them in a bowl with 1 teaspoon of flour first. This keeps them from sinking to the bottom and turning the cake into a soggy mess. Also, don’t press them into the batter—just fold them in lightly.
- Bake Until the Center Springs: The cake’s done when the edges pull away from the pan and a toothpick comes out clean or with a few moist crumbs. If you pull it out too soon, the middle will stay gummy—trust me, I’ve eaten enough underbaked cake to know. Let it cool in the pan for 10 minutes first, then transfer.
Serving suggestions for aunt tilly's apple cake
Tea Pairings
Warm slices of Aunt Tilly’s apple cake pair beautifully with Earl Grey tea—the bergamot notes complement the spiced apples and buttery cake layers. I love serving it with a chamomile tea for a cozy, comforting vibe that enhances the cake’s natural sweetness. For something stronger, a spiced chai latte with cinnamon and cardamom mirrors the cake’s warm spices perfectly. 🍵
Ice Cream Toppings
A scoop of vanilla bean ice cream is my go-to pairing—it melts slightly from the cake’s warmth, creating a creamy contrast. For a richer option, try caramel or salted butter pecan ice cream to balance the tartness of the apples. If you prefer something lighter, coconut milk ice cream adds a tropical twist that still harmonizes with the spiced flavors. 🍦
Seasonal Serving Ideas
In fall, serve warm slices with a sprinkle of toasted pecans and a dollop of bourbon caramel sauce for a festive touch. During winter, pair with a warm apple cider or mulled wine to enhance the cozy, seasonal vibes. For summer, chill the cake slightly and serve with a scoop of lemon sorbet to cut through the richness. 🍂
Garnish Touches
Before serving, add a dusting of cinnamon or a few candied apple slices on top for extra visual appeal. A drizzle of honey or maple syrup adds a glossy finish and extra sweetness. For a rustic touch, sprinkle crushed graham crackers around the plate to catch any crumbs. ✨
Make-Ahead Serving
Assemble the cake layers (without glaze) up to 2 days ahead and store in an airtight container at room temperature. Add the glaze just before serving so it stays fresh and glossy. If freezing, wrap individual slices in plastic wrap and store for up to 3 months—thaw at room temperature before serving. 💫
Nutrition facts
Frequently asked questions
Can I use frozen apples instead of fresh?
Yes, but thaw them first and pat completely dry to prevent excess moisture in the cake. Frozen apples work in a pinch, though fresh apples develop better flavor and texture. If using frozen, squeeze out all liquid and consider adding an extra 1/4 teaspoon cinnamon to compensate for the lack of fresh apple aroma.
Why does my cake sink in the middle?
Oven temperature fluctuations or overmixing the batter are common culprits. Always use an oven thermometer to confirm 350°F and avoid opening the oven door during baking. For extra insurance, place a baking sheet on the lower rack to create even heat circulation.
How do I make this cake gluten-free?
Replace the all-purpose flour with a 1:1 gluten-free baking blend like Bob's Red Mill. Add 1/4 cup extra powdered sugar to compensate for reduced gluten structure. For best results, use almond flour (though texture will be denser) and consider adding 1/2 teaspoon xanthan gum to improve binding.
Can I bake this in a different pan size?
Yes, but adjust baking time accordingly. For 9-inch pans, reduce time by 5-7 minutes and for 7-inch pans, increase by 10-12 minutes. The key is to bake until a toothpick comes out clean—never rely solely on time. The cake layers should be just set when done.
What's the best way to store leftovers?
Wrap tightly in plastic wrap and store at room temperature for 3-4 days or refrigerate for up to 5 days. For longer storage, freeze individual slices (without glaze) for 3 months. Thaw at room temperature for 1-2 hours before serving to restore texture.