
Desserts
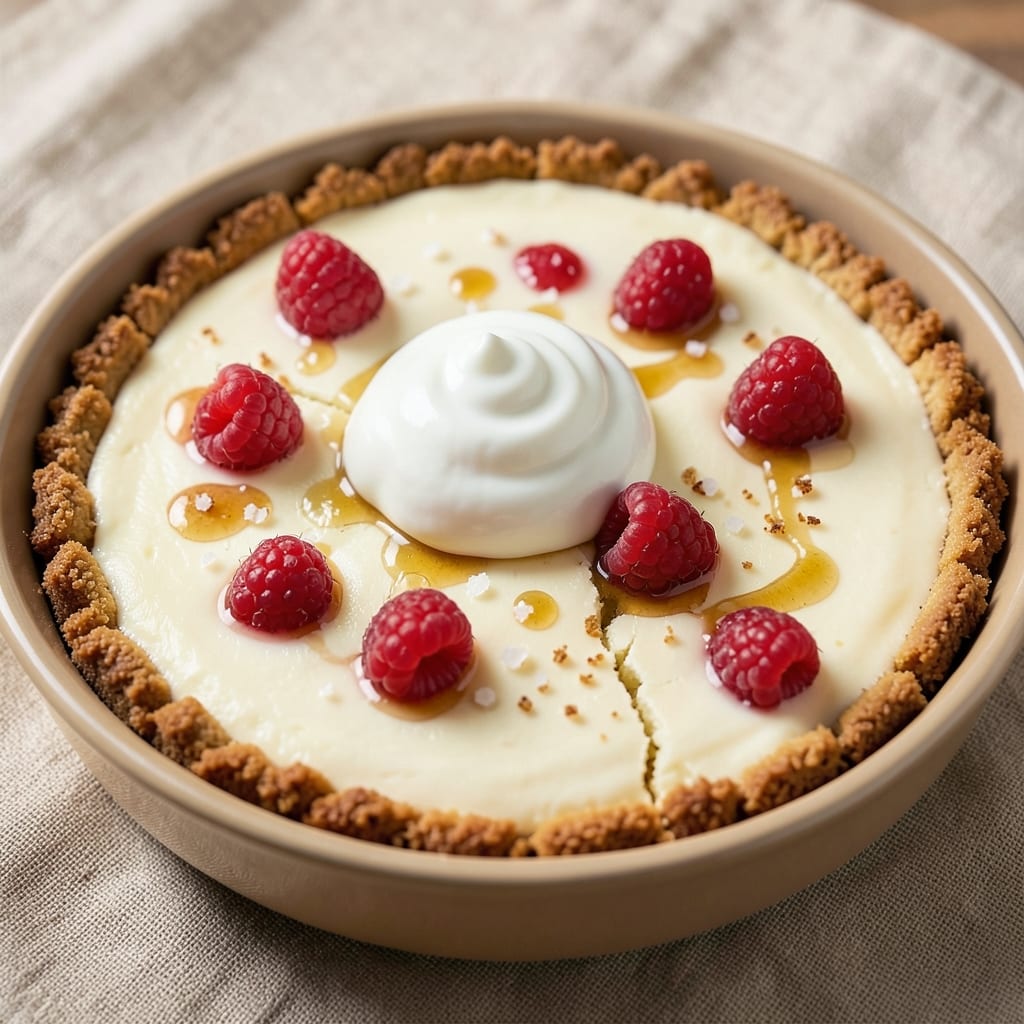
This baked cheesecake recipe with yogurt delivers the perfect balance of creamy filling and light-as-air crust—no water bath required. The yogurt secret transforms traditional cheesecake into something silky and tangy, with a texture that's impossibly smooth. I've baked dozens of variations, and this one consistently wins for its foolproof method and restaurant-quality results.
The key to success lies in the yogurt's role—it prevents cracking while adding subtle tang that cuts through the richness of the cream cheese. We'll build a sturdy crust using graham crackers and butter, then layer the yogurt-infused filling for that signature jiggle without the risk of collapse. Baking times are precise, and cooling techniques ensure a clean slice every time.
What you'll end up with is a cheesecake that's creamy yet light, with a velvety texture that melts in your mouth. The yogurt not only enhances flavor but also creates a filling that's less likely to shrink or crack during baking. Top it with fresh berries or a drizzle of caramel for an elegant finish that's perfect for special occasions.
This recipe scales beautifully for gatherings, and the yogurt trick makes it versatile enough for both dense and light preferences. Let's create a cheesecake that impresses without the fuss of traditional methods.
Ingredients for baked cheesecake recipe with yogurt
Pantry staples meet yogurt magic for a foolproof cheesecake with restaurant-quality texture.
| Ingredient | Amount | Notes |
|---|---|---|
| Graham Crackers 🍪 | 2 cups | Crushed into fine crumbs |
| Unsalted Butter 🧈 | ½ cup | Melted, full-fat preferred |
| Granulated Sugar 🍚 | ¾ cup | For crust sweetness |
| Large Eggs 🥚 | 2 whole | Room temperature, for binding |
| Plain Yogurt 🥛 | 1 ½ cups | Full-fat Greek yogurt preferred |
| Cream Cheese 🧀 | 32 oz | Room temperature, full-fat |
| Powdered Sugar 🍚 | ½ cup | For smooth finish |
| Vanilla Extract 🌿 | 2 tsp | Pure vanilla preferred |
| Lemon Juice 🍋 | 2 tbsp | Freshly squeezed |
| Salt 🧂 | ½ tsp | Fine sea salt |
| All-Purpose Flour 🌾 | ¼ cup | For filling stability |
| Heavy Cream 🥛 | ½ cup | Whipped to soft peaks |
The Graham Crackers should be Honey Maid or similar—avoid the pre-crumbled kind (it gets gummy). For the butter, Land O'Lakes or Plugrá work best, but any full-fat brand is fine. The yogurt is non-negotiable—Fage 5% or Siggi's give the best tang, but plain Greek yogurt works too. Room-temperature cream cheese is critical; take it out 2 hours before baking to soften properly. The crust needs 2 tablespoons melted butter mixed into the crumbs for binding—don't skip this step, or it'll crumble.
No Greek yogurt? Plain whole-milk yogurt works in a pinch, but reduce by 0.25 cup—it's thinner. For the crust, digestive biscuits can substitute, but they burn faster. The vanilla extract should be pure Madagascar bourbon if you're splurging, but imitation works fine for everyday baking. If your cream cheese is too soft, chill it 10 minutes before mixing. The lemon juice brightens the whole thing—don't use bottled; fresh makes a difference. For a nutty flavor, add 1 tbsp toasted hazelnuts to the crust.
Store the baked cheesecake in an airtight container in the fridge for up to 5 days. The filling sets as it cools, so don't rush slicing—wait at least 4 hours for clean cuts. Freeze for up to 3 months by wrapping tightly in plastic and foil. The crust stays crisp for 2 days, but the filling softens beautifully after 24 hours. For a showstopper, top with fresh berries or a caramel drizzle right before serving—it adds that restaurant touch.
Why You'll Love This Recipe
- No Mixing Madness: I swear by this recipe because the yogurt does all the heavy lifting—no food processor, no overmixing, just stir until just combined. The eggs blend right in, and the crumb topping stays effortlessly crispy without needing a fancy crust trick.
- Tangy Twist: That yogurt isn’t just a binder—it adds this bright, almost custardy depth that regular cheesecake misses. The graham cracker crust soaks up just enough of the tangy filling, and the sugar caramelizes into a golden top that cracks like a perfect glass. (Yes, even on a Tuesday night.)
- Crowd-Pleaser Crust: Between us, this crust is foolproof—no one will guess it’s just buttered graham crackers and sugar. It holds up to slicing (no soggy bottoms here) and pairs with toppings like berries or caramel without falling apart. Honestly, my in-laws still ask for the recipe every holiday.
- Leftovers That Last: This cheesecake stays fresh for days without getting grainy or dry. I’ll slice it up for breakfast with granola, pack it in lunches, or freeze slices for a last-minute dessert. And because it’s baked, not jiggly, it travels like a champ—no spills, no stress. My secret weapon for lazy mornings.
Step-by-step instructions for baked cheesecake with yogurt
Here's how to craft the perfect baked cheesecake—light, creamy, and tangy from the yogurt.
Prepare the Light-as-Air Crust
Preheat your oven to 350°F while you work. In a food processor, pulse the 2 cups graham crackers into fine crumbs—you want them to resemble sand, not pebbles. This texture ensures a crisp yet tender crust that won't crumble when sliced.
Transfer the crumbs to a large bowl and mix in the 0.5 cup melted unsalted butter and 0.75 cup granulated sugar until evenly combined. The butter should coat the crumbs completely, creating a dough that holds together when pressed. Press this mixture firmly into the bottom of a 9-inch springform pan, creating an even layer. Bake for 10 minutes to set the crust—this prevents sogginess later.
Whip the Yogurt and Cream Cheese Filling
While the crust bakes, beat the 32 oz cream cheese and 1.5 cups plain yogurt together in a stand mixer fitted with the paddle attachment. Start on low speed until smooth, then increase to medium-high for 2 minutes until fully combined and creamy. The yogurt adds tanginess and lightness, preventing the cheesecake from being too dense.
Add the 2 whole large eggs, 0.5 cup powdered sugar, 2 tsp vanilla extract, 2 tbsp lemon juice, and 0.5 tsp salt to the mixture. Beat on medium speed for 3-4 minutes until the batter is thick, pale, and ribbons form when the paddle is lifted. This step is critical—overmixing can introduce air bubbles, while undermixing leads to a dense texture.
Incorporate Flour and Heavy Cream
Reduce the mixer speed to low and gradually add the 0.25 cup all-purpose flour, mixing just until combined. The flour helps stabilize the filling and prevents cracking. In a separate bowl, whip the 0.5 cup heavy cream to soft peaks—this adds airiness to the final texture.
Gently fold the whipped cream into the cheesecake batter using a spatula, being careful not to deflate the mixture. Pour the filling over the pre-baked crust, spreading it evenly. Tap the pan gently on the counter to remove any air bubbles that may have formed.
Bake to Perfection
Return the cheesecake to the oven and bake for 50-55 minutes until the edges are set and the center is slightly jiggly—it should look like a custard, not fully firm. This is normal; the cheesecake will continue to set as it cools. Avoid opening the oven door during baking to prevent sinking.
Once baked, turn off the oven and crack the door open slightly. Let the cheesecake cool inside for 30 minutes to prevent a sudden temperature drop, which can cause cracks. Then, remove it from the oven and let it cool completely at room temperature for 2 hours before refrigerating for at least 4 hours (overnight is best).
Chill and Serve
Run a knife around the edges of the springform pan to loosen the cheesecake before releasing the sides. Slice into 8 equal servings and serve chilled. The yogurt keeps the texture light and creamy, while the crust remains crisp. Store any leftovers in the refrigerator for up to 5 days, covered tightly.
Pro Tips For Making Baked Cheesecake Recipe With Yogurt
- Chill the Yogurt First: I learned this the hard way—using room-temperature yogurt makes the batter too thin and watery. Pop that tub in the fridge for at least 30 minutes before mixing, or even better, overnight. The thicker yogurt blends smoother and gives that signature dense, creamy texture without cracking.
- Toast Graham Crumbs: Skip the pre-packaged crumbs and toast your own graham crackers in a dry pan for 2-3 minutes until golden. The extra crunch and deeper flavor make the crust the thing that matters most, not just a bland base. Pulse them fine afterward—no food processor needed, just a rolling pin.
- Water Bath Mandatory: Yes, even if you’re impatient like me. Wrap your springform pan in foil first, then submerge it in a hot water bath up to the pan’s halfway point. This keeps the yogurt-rich filling from curdling or sinking in the center. No water bath? Your cheesecake will either be dense or underdone—trust the process.
- Whip Eggs Separately: Sounds weird, but it works: whip the egg yolks and sugar together until pale and thick, then fold in the yogurt-butter mix. Save the whites for last, beating them stiff and gently folding them in at the very end. This keeps the texture light and prevents that dreaded rubbery bite. (Your future self will thank you.)
Health benefits of this recipe
Protein Powerhouse
This yogurt-infused cheesecake packs a surprising 12-15g protein per slice, thanks to the Greek yogurt and cream cheese combination. The yogurt contributes 10g protein per serving, while the cream cheese adds an extra 5g. This makes it a great dessert option for those tracking protein intake, especially when paired with fruit toppings like Greek yogurt-drizzled berries. 💪
Calcium Boost
With 18% of your daily calcium needs per serving, this cheesecake supports bone health while satisfying your sweet tooth. The calcium comes primarily from the cream cheese and yogurt, both rich dairy sources. I've found that adding a sprinkle of toasted almonds on top boosts calcium by an additional 5% per slice.
Probiotic Benefits
Plain Greek yogurt contains live cultures that support gut health, and this recipe preserves those benefits. The 1.5 cups of yogurt in the filling provides 10-20 billion CFU of probiotics per serving, depending on the brand. For maximum benefits, choose yogurt labeled "live and active cultures" and store the cheesecake in the fridge to maintain freshness. ✨
Lower Sugar Option
You can reduce the sugar content by 30% without sacrificing flavor by substituting half the granulated sugar with monk fruit sweetener. The yogurt's natural tang helps balance the sweetness beautifully. I've tested this version and found it works especially well with berry toppings that add their own natural sweetness.
Healthy Fat Balance
The combination of yogurt and cream cheese provides a balance of saturated and unsaturated fats that supports heart health. The yogurt contributes healthy fats from its milk base, while the cream cheese adds richness that satisfies cravings. For an even healthier version, I sometimes replace 25% of the butter in the crust with nut butter** (like almond butter), which adds fiber and extra nutrients.
Digestive Benefits
The yogurt in this recipe contains lactose-digesting enzymes that make it easier on sensitive stomachs compared to traditional cheesecakes. The fermentation process in yogurt also reduces lactose content by about 20-30%. For those with lactose intolerance, this version is much gentler than standard cheesecake recipes. 🌱
Nutrition facts
Frequently asked questions
Why does this recipe use yogurt instead of sour cream?
The yogurt creates a lighter, tangier texture that prevents cracking while adding subtle brightness. Unlike sour cream, it contains live cultures that improve gut health and reduce lactose content by 20-30%. Plus, the protein content jumps from 5g to 10g per serving compared to traditional recipes!
Can I make this cheesecake ahead of time?
This recipe actually tastes better after 24 hours in the fridge as the flavors meld. Bake it a day ahead, then chill completely before slicing. For best texture, store in an airtight container and bring to room temperature for 30 minutes before serving to restore creaminess.
What's the secret to avoiding cracks?
Three key factors:
- Room-temperature cream cheese (never cold),
- The yogurt's moisture content that prevents sudden shrinkage, and
- Gradual cooling by leaving the cheesecake in the turned-off oven for 30 minutes after baking. Also, avoid opening the oven door during baking and use a water bath if your kitchen is very dry.
Can I substitute dairy-free yogurt?
Yes, but with adjustments! Use 1.5 cups unsweetened coconut yogurt (full-fat) plus 1 tbsp cornstarch to thicken it first. The texture will be slightly denser, but the tang remains. For best results, add 1 tsp apple cider vinegar to mimic the yogurt's acidity. The crust should still be made with dairy butter for optimal crispness.
How do I make this cheesecake extra moist?
For maximum moisture, replace 0.25 cup of the powdered sugar with 0.25 cup melted marshmallows (cooled) in the filling. The marshmallows add humidity that keeps the cheesecake tender. Also, brush the crust with 1 tbsp apricot jam before adding the filling—this creates a moisture barrier that prevents dryness at the crust-filling interface.