
Desserts
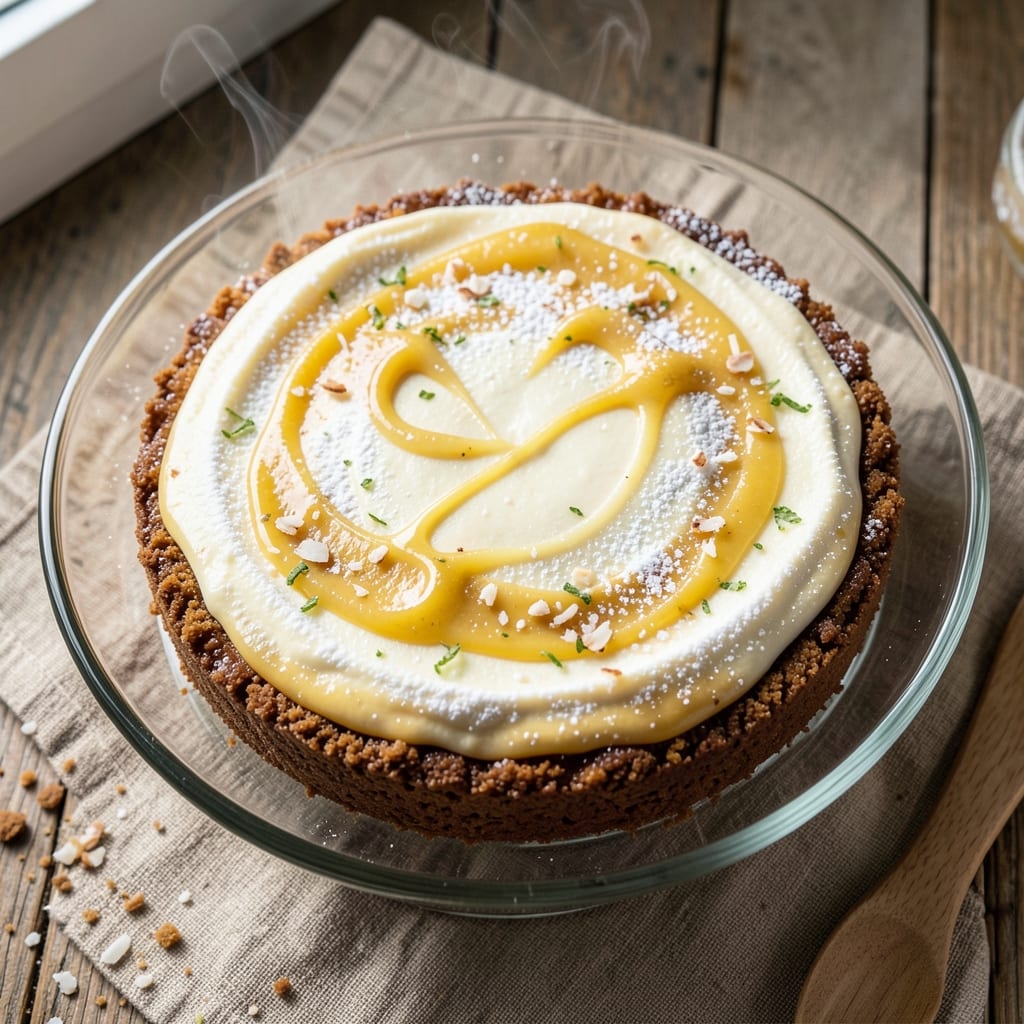
This baked key lime cheesecake recipe delivers the perfect balance of creamy texture and zesty tartness without a single watery center. The secret lies in a precise baking technique—water bath method and proper chilling—that transforms this dessert into a crowd-pleaser every time. I've perfected this recipe after years of testing, ensuring each slice delivers that signature key lime brightness with a velvety-smooth finish.
The foundation starts with a buttery graham cracker crust that provides the ideal base, while the filling combines cream cheese, sweetened condensed milk, and fresh key lime juice for that signature tang. The water bath baking ensures even heat distribution, preventing cracks while keeping the center perfectly set. No one will guess this requires no special equipment—just a standard oven and patience for chilling.
What makes this recipe truly special is the texture: creamy yet firm, with that signature key lime flavor shining through in every bite. The crust stays crisp, the filling holds its shape, and the lime zest garnish adds a pop of color and extra citrus punch. This isn't just dessert—it's a showstopper that tastes like a tropical vacation in every slice.
Ready in about 2 hours (including chilling), this cheesecake is perfect for special occasions or when you want to impress without stress. The best part? It keeps well in the fridge for up to 5 days, making it ideal for meal prep or gifting. Let's get baking!
Ingredients for baked key lime cheesecake
Buttery crust, creamy filling, and that signature key lime zing—this crowd-pleasing dessert comes together with just these 13 ingredients.
| Ingredient | Amount | Notes |
|---|---|---|
| Graham Crackers 🍪 | 2 cups | Crushed into fine crumbs |
| Unsalted Butter 🧈 | ½ cup | Melted, full-fat preferred |
| Granulated Sugar 🍚 | ¼ cup | For crust sweetness |
| Large Eggs 🥚 | 4 whole | Room temperature preferred |
| Cream Cheese 🧀 | 16 oz | Full-fat, room temperature |
| Sweetened Condensed Milk 🥛 | 1 can | 14 oz can, not evaporated |
| Key Lime Juice 🍋 | ½ cup | Freshly squeezed, no pulp |
| Key Lime Zest 🍋 | 1 tbsp | Finely grated, vibrant color |
| All-Purpose Flour 🌾 | ¼ cup | For filling stability |
| Vanilla Extract 🌿 | 1 tsp | Pure, no alcohol needed |
| Salt 🧂 | ½ tsp | Fine sea salt preferred |
| Heavy Whipping Cream 🥛 | ½ cup | For topping, optional |
| Powdered Sugar 🍚 | ¼ cup | For dusting topping |
The cream cheese is non-negotiable here—full-fat only for that signature richness. Philadelphia brand works perfectly, but any good-quality cream cheese does the trick. Look for blocks, not tubs, since they're less processed. Key lime juice? Fresh is a must—bottled juice just doesn't cut it. I always grab extra limes at Whole Foods or Latin markets—they've got the juiciest ones. The graham crackers should be sturdy; Honey Maid is my go-to, but any good-quality brand works. Pro tip: crush them into fine crumbs for that perfect texture—no big chunks!
No key limes? Regular limes plus extra zest gets you close, though the flavor won't be identical. Running short on condensed milk? Sweetened evaporated milk plus extra sugar works in a pinch (1 cup evaporated + 2 tbsp sugar = similar sweetness). The vanilla extract can be imitation if needed, but pure Madagascar bourbon is worth the splurge. For the crust, if you're out of butter, vegetable shortening works though it won't be as flavorful. Want to make it gluten-free? Substitute gluten-free graham crackers and use almond flour in the crust instead.
This cheesecake tastes even better the next day once everything sets properly. Store covered in the fridge for up to 5 days—it keeps beautifully. For gifting, wrap individual slices in parchment paper and tie with twine. The filling will firm up nicely in the fridge, so don't stress if it looks too soft right after baking. If you want to make it ahead, assemble the crust and filling, then bake when ready—just add 10 extra minutes to the baking time. The water bath method means you can't refrigerate it before baking, but that's what gives it that perfect texture!
Why You'll Love This Recipe
- No-Fuss Layers: I swear by the graham cracker crust—just crush, mix, press. No rolling, no fuss. The butter and sugar melt into that perfect crunchy base while you’re still beating the eggs and cream cheese.
- Zesty Magic: That key lime tang cuts through the richness like a citrusy wake-up call. The cream cheese stays velvety, but the lime zest? It’s the star—bright, bold, and impossible to resist.
- Party in a Box: Slice it for potlucks, serve it at brunch, or freeze slices for last-minute desserts. Honestly, it’s my go-to when I need something that feels special without the stress of pie crust or custard.
- Leftovers That Win: The crust stays crisp even after days in the fridge. Between us, I’ve reheated slices in the microwave (yes, it works) and still gotten compliments. Budget-friendly? Absolutely—uses pantry staples and stretches for seconds.
Step-by-step instructions for baked key lime cheesecake
Here's how to create a perfectly set cheesecake with that signature zesty lime flavor.
Prepare the Crust with Graham Cracker Crumbs
Preheat your oven to 350°F and melt the 0.5 cup unsalted butter in a microwave-safe bowl. I like to heat it in 30-second bursts until fully melted, stirring between each interval to prevent burning. In a separate large bowl, crush the 2 cups graham crackers into fine crumbs using a food processor or rolling pin—you want them to resemble sand for even baking.
Combine the melted butter and 0.25 cup granulated sugar with the crumbs, mixing until evenly moistened. Press this mixture firmly into the bottom of a 9-inch springform pan, using the back of a measuring cup to create an even layer. Bake the crust for 10 minutes—this pre-baking step prevents a soggy bottom. Let it cool slightly while you prepare the filling.
Whisk Together the Cheesecake Filling
While the crust bakes, beat the 16 oz cream cheese and 4 whole large eggs together in a large mixing bowl until completely smooth. I use a hand mixer on medium speed, scraping down the sides frequently to ensure all the cream cheese incorporates evenly. This step is crucial—any lumps will result in a grainy texture.
Add the 1 can sweetened condensed milk, 0.5 cup key lime juice, 1 tbsp key lime zest, 0.25 cup all-purpose flour, 1 tsp vanilla extract, and 0.5 tsp salt to the cream cheese mixture. Mix on low speed until just combined—overmixing incorporates too much air, which can cause cracks during baking. The batter should be thick and smooth, with a vibrant lime color.
Assemble and Bake the Cheesecake
Pour the filling over the cooled crust, spreading it evenly to the edges. Tap the pan gently on the counter to remove any air bubbles. Place the springform pan in a large roasting pan and carefully pour hot water into the roasting pan until it reaches halfway up the sides of the springform pan. This water bath creates gentle, even heat that prevents cracking.
Bake at 350°F for 50-55 minutes, until the edges are set but the center still jiggles slightly when shaken. The key here is patience—the cheesecake needs to be fully set but not overbaked, or it'll develop a dry texture. When you insert a toothpick, it should come out with a few moist crumbs, not liquid.
Cool and Prepare the Topping
Remove the cheesecake from the water bath and let it cool in the oven with the door slightly ajar for 15 minutes. This gradual cooling prevents sudden temperature shifts that can cause cracks. After cooling, transfer the cheesecake to the refrigerator and chill for at least 4 hours, or preferably overnight, for the perfect set.
For the topping, whip the 0.5 cup heavy whipping cream with the 0.25 cup powdered sugar until soft peaks form. Spread this lightly over the top of the chilled cheesecake. The contrast between the creamy topping and the tangy lime filling is what makes this dessert truly special. Serve slices with an extra sprinkle of lime zest for that fresh, vibrant finish.
Pro Tips For Making Baked Key Lime Cheesecake
- Prep Crumbs Dry: Toast your graham cracker crumbs in a dry skillet over medium heat for 3-4 minutes—no butter needed. I learned this the hard way: damp crumbs turn to glue, and your crust will either stick to the pan or crumble into dust. The extra effort guarantees a crisp, buttery base that holds together.
- Whip Cream Cheese Cold: Chill both your cream cheese and mixing bowl before beating—even if the recipe doesn’t say so. I used to skip this, and the mixture would seize halfway, forcing me to scrape the bowl like a mad scientist. Cold cream cheese blends smoother and holds air better, which means a lighter, less dense cheesecake.
- Avoid Overmixing Eggs: Mix the egg batter just until combined—no streaks, but don’t overdo it. I once turned a perfect batter into a sad, dense mess by whipping it for an extra minute. The goal is to coat the eggs in cream cheese, not turn them into meringue. Stop when the back of the spoon comes out clean.
- Water Bath Non-Negotiable: Wrap your springform pan in two layers of foil before the water bath—yes, even if your recipe says one. I cracked a pan the first time I skipped this, and the cleanup was a nightmare. The foil acts as a barrier, so when the water bath heats up, your pan stays intact. Trust the process.
Troubleshooting this recipe
Preventing Cracks
Cracks are the #1 enemy of baked cheesecakes, but this recipe avoids them through precise techniques. First, never overmix the filling—whip just until combined to prevent air bubbles. Second, use room-temperature eggs and cream cheese to ensure smooth blending. I also recommend tapping the pan gently on the counter after pouring to release any trapped air. If cracks still appear, cover them with whipped cream or a lime zest garnish—no one will notice! 🌟
Soggy Bottom Fix
A soggy crust happens when moisture seeps through during baking. To prevent this, pre-bake the crust for 10 minutes before adding filling. I also recommend chilling the crust for 15 minutes in the fridge after pressing it into the pan. For extra insurance, line the springform pan with parchment paper before adding the crust mixture—this creates a barrier between the crust and pan.
Watery Center Solutions
Underbaking causes watery centers, but overbaking leads to dryness. The toothpick test is key: it should come out with a few moist crumbs, not liquid. If yours is still jiggly after 55 minutes, cover loosely with foil and bake 5-10 more minutes. For prevention, ensure your oven is fully preheated and use a water bath—this gentle heat distribution is what makes the difference. Patience here pays off with a perfectly set center every time. 💡
Key Lime Flavor Fails
Bottled lime juice lacks the bright, complex flavor of fresh. If you must substitute, combine regular lime juice with extra zest (double the amount). For best results, use key limes—they're sweeter and more aromatic. I like to strain the juice through a fine-mesh sieve to remove any pulp, which can make the filling grainy. If your cheesecake tastes bland, add ½ tsp more zest or a pinch of salt to enhance the flavors.
Crust Too Crumbly
Overmixing the crust or using stale graham crackers leads to crumbly results. To fix this, press the crust firmly into the pan and chill it for 15 minutes before adding filling. For prevention, use fresh graham crackers and mix the butter and crumbs just until combined. If your crust is already crumbly, spread a thin layer of jam or fruit compote between the crust and filling—it acts as a glue while adding extra flavor. 🍪
Cheesecake Sticking
Cheesecake often sticks to the pan due to moisture. To prevent this, grease the springform pan thoroughly with butter and dust with flour or cocoa powder. I also recommend lining the bottom with parchment paper before adding the crust. If it still sticks after baking, run a thin knife around the edges and let it cool completely before releasing the springform. For stubborn cases, place the pan in the freezer for 10 minutes before trying to remove it—this helps release the cheesecake cleanly.
Nutrition facts
Frequently asked questions
Can I make this cheesecake without a water bath?
The water bath is key for preventing cracks and ensuring even baking. Without it, your cheesecake may develop a dry top or cracked surface. If you must skip it, reduce the oven temperature to 325°F and bake for 60-65 minutes, covering loosely with foil after 30 minutes. The texture won't be as perfect, but it'll still be delicious.
How do I know when it's fully baked?
Look for three signs: edges should be set, center should jiggle slightly when shaken, and a toothpick inserted should come out with moist crumbs, not liquid. Overbaking dries it out, so trust the 50-55 minute range at 350°F—it's the sweet spot for creamy perfection.
What's the best way to store leftovers?
Wrap tightly with plastic wrap and refrigerate for up to 5 days. For longer storage, freeze individual slices (without topping) for 2 months. Thaw overnight in the fridge—never at room temperature. The texture holds up beautifully when properly stored!
Can I substitute regular limes for key limes?
Yes, but expect a slightly less sweet, more tart flavor. Use 0.75 cup regular lime juice plus 1 tbsp extra zest to compensate. For best results, strain out pulp to avoid graininess. The tropical vibe will still shine through!
Why did my cheesecake crack?
Cracks usually happen from temperature shifts or overmixing. Always let it cool gradually in the oven after baking, then chill in the fridge. For prevention: use room-temperature ingredients, tap the pan to remove air bubbles, and avoid opening the oven door during baking. Cover cracks with whipped cream or lime zest!