
Desserts
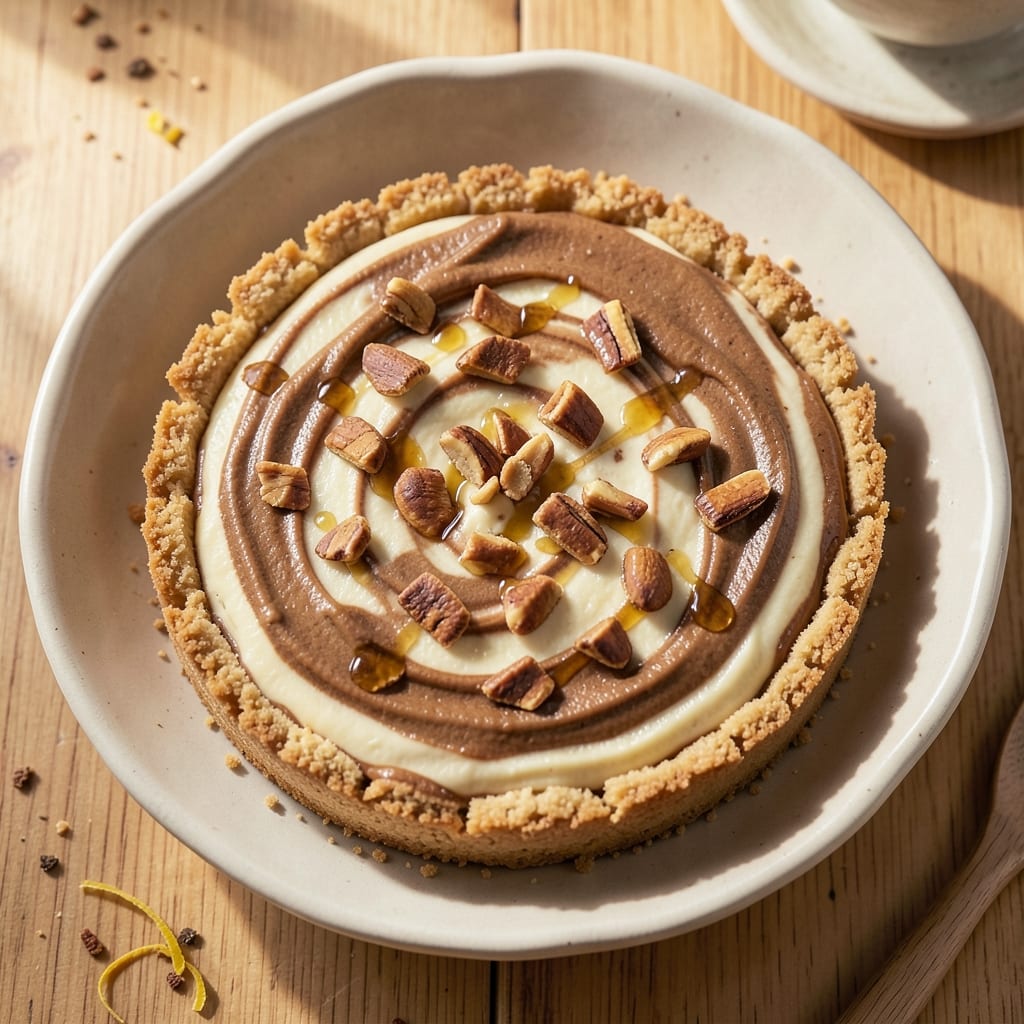
This baked peanut butter cheesecake recipe delivers the perfect balance of textures—crunchy peanut butter crust and silky, swirled filling—without a single crumb. The secret lies in a precise baking technique that ensures a smooth center and golden-brown top, every time. I’ve perfected this recipe after years of testing, and the contrast between the nutty crust and creamy filling makes it impossible to stop at one slice.
The crust starts with a buttery peanut butter base, toasted to enhance its flavor before pressing it into the pan. The filling combines cream cheese, peanut butter, and a touch of brown sugar for depth, then swirls together for that signature marbled look. Baking in a water bath guarantees a silky texture, while proper cooling prevents cracks. This isn’t just dessert—it’s an experience, with each bite offering a mix of rich, nutty, and velvety sensations.
What sets this recipe apart is the foolproof method for achieving clean slices and a stable structure. The water bath technique keeps the center luscious, while the peanut butter crust adds a satisfying crunch that holds up perfectly. Whether you’re serving it at a gathering or treating yourself, this cheesecake stands out with its bold peanut butter flavor and professional finish.
Top with whipped cream, chocolate drizzle, or extra peanut butter for added indulgence. The instructions walk you through every step—from crust preparation to final presentation—so you can bake with confidence. Let’s make this showstopper dessert.
Ingredients for baked peanut butter cheesecake
Eight ingredients for the crust, eight for the filling—simple yet sophisticated for this showstopper dessert.
| Ingredient | Amount | Notes |
|---|---|---|
| Natural Creamy Peanut Butter 🥜 | 1 ½ cups | Unsweetened, no added oils |
| All-Purpose Flour 🌾 | 1 ½ cups | Sifted for even texture |
| Granulated Sugar 🍚 | ½ cup | For crust sweetness |
| Unsalted Butter 🧈 | ½ cup | Cold, cubed for crust |
| Large Eggs 🥚 | 2 whole | Room temperature |
| Heavy Cream 🥛 | 1 cup | Cold for stability |
| Full-Fat Cream Cheese 🧀 | 16 oz | Room temperature, softened |
| Light Brown Sugar 🍚 | ¼ cup | Packed, for depth |
| Vanilla Extract 🌿 | 1 tbsp | Pure Madagascar preferred |
| Salt 🧂 | ¼ tsp | Fine sea salt |
| White Chocolate Chips 🍫 | ½ cup | For optional garnish |
| Chopped Peanuts 🥜 | ¼ cup | Toasted, for topping |
| Powdered Sugar 🍚 | 2 tbsp | For dusting |
The peanut butter and butter form the crust's foundation—natural, creamy peanut butter (no added oils) delivers the richest flavor, while European-style unsalted butter (like Plugrá) adds depth. King Arthur flour ensures a tender crumb, and toasting the peanut butter mixture until it smells nutty is non-negotiable. For the filling, full-fat cream cheese (like Philadelphia) must be at room temperature to blend smoothly. The light brown sugar adds molasses notes that complement the peanut butter's nuttiness. Whole vanilla beans are ideal, but extract works in a pinch—just use the good stuff.
No peanut butter? Natural almond butter works as a substitute, though the flavor will differ slightly. Substituting light cream cheese for full-fat will yield a less rich texture, but it's manageable for dietary needs. The white chocolate chips can be swapped for dark chocolate chunks (60% cocoa or higher) if you prefer a more intense chocolate flavor. For a nut-free option, omit the chopped peanuts and garnish with crushed pretzels instead. The powdered sugar is purely decorative but adds a professional finish—don’t skip it if you want that bakery-style look.
Prevent cracks by baking the cheesecake in a water bath—fill a deep baking pan with hot water and place your springform pan inside. Cool the cheesecake at room temperature for at least 2 hours before refrigerating to set properly. Store leftovers in an airtight container in the fridge for up to 5 days, though it’s best enjoyed within 3 days for optimal texture. For make-ahead prep, assemble the crust and filling 1 day ahead—this allows flavors to meld beautifully. Freezing isn’t recommended as it alters the silky texture.
Why You'll Love This Recipe
- No Mixer Needed: I swear by this recipe because it’s all about the hand-mixed magic—just fold that peanut butter into the batter until it’s just combined, no overworking. The texture comes out silky-smooth without a single lump, and honestly? My stand mixer gets a break for once.
- Peanut Butter Bliss: That first bite of warm, gooey peanut butter swirled into creamy cheesecake? It’s like dessert hugged you. The natural peanut butter adds depth without overpowering—just enough richness to make you reach for a second slice, even when you’re “full.”
- Weeknight Crowd-Pleaser: Between us, this is my go-to for potlucks or when friends drop by unannounced. The crust? Five minutes of pressing flour and butter. The filling? One bowl, one whisk, and 35 minutes in the oven. No one leaves hungry, and no one asks for the recipe.
- Leftovers That Last: I make a double batch every time because it stays perfect for days—no soggy middle, no weird textures. The peanut butter flavor actually gets better as it sits, and the sugar crust keeps it from drying out. My lunchbox gets packed with slices for at least three days.
Step-by-step instructions for baked peanut butter cheesecake
This method delivers a flawless texture—crisp crust, creamy filling, and rich peanut swirls—every time.
Prepare the Crust Mixture
In a medium bowl, combine the 1.5 cups all-purpose flour, 0.5 cup granulated sugar, and 0.25 tsp salt. Cut in the 0.5 cup cold unsalted butter using a pastry cutter or your fingers until the mixture resembles coarse crumbs with pea-sized butter pieces. This texture is crucial—it ensures a tender crust that won't become greasy.
Add the 1.5 cups natural creamy peanut butter and mix until fully incorporated. The dough should hold together when pressed but still feel slightly dry. If it crumbles too much, add 1-2 teaspoons ice water to bind it. Press this mixture evenly into a 9-inch springform pan, creating an even layer along the bottom and up the sides. Use the back of a measuring cup to compact it firmly.
Create the Peanut Swirl Filling
In a large mixing bowl, beat the 16 oz full-fat cream cheese and 0.25 cup light brown sugar on medium speed until completely smooth and creamy, about 3-4 minutes. This step eliminates any lumps and ensures a velvety texture. Scrape down the sides of the bowl to incorporate any stuck bits.
Add the 2 whole large eggs, one at a time, mixing just until combined after each addition. Then stir in the 1 cup heavy cream, 1 tbsp vanilla extract, and remaining 0.25 tsp salt. The mixture should be thick but pourable. In a separate small bowl, mix 0.5 cup white chocolate chips with 0.25 cup chopped peanuts. Fold half of this mixture into the filling to create marbled swirls.
Assemble and Bake the Cheesecake
Pour the filling evenly over the crust, spreading it out to the edges. Use a spoon to create gentle swirls by dragging the peanut-chocolate mixture through the batter in circular motions. This creates visual appeal and ensures every bite has that signature peanut flavor.
Bake in a preheated 325°F oven for 60-65 minutes until the center is just set but still slightly jiggly in the middle. A toothpick inserted should come out with moist crumbs—not wet batter. If the edges brown too quickly, tent loosely with aluminum foil after 30 minutes to prevent over-browning while the center cooks.
Cool and Finish
Remove the cheesecake from the oven and let it cool in the pan for 1 hour. Then refrigerate for at least 4 hours or overnight to allow the filling to fully set. This slow chilling prevents cracking and enhances the texture.
Before serving, dust the top generously with 2 tbsp powdered sugar using a fine-mesh sieve. This creates a delicate, snowy finish that contrasts beautifully with the rich peanut flavor. Serve chilled with additional chopped peanuts sprinkled on top for extra crunch.
Pro Tips For Making Baked Peanut Butter Cheesecake
- Bake Low and Slow: After burning the top of my first batch, I learned to bake this at 325°F (163°C) for 50–60 minutes—not the 350°F most recipes suggest. The peanut butter filling is forgiving but needs steady heat to set without cracking. Use an oven thermometer to confirm your oven isn’t running hot.
- Whip Eggs to Ribbon Stage: I used to just crack eggs in and hope for the best. Now I whip them with the sugar first until they’re pale, thick, and form soft ribbons when the whisk is lifted. This lightens the texture and prevents a dense, gummy center—critical for peanut butter’s natural heaviness.
- Don’t Skimp on the Crust: A thin crust means a soggy bottom. Press 1.5 cups of crushed graham crackers (or peanut butter cookies for extra flavor) mixed with 6 tbsp melted butter firmly into the pan. Pack it tight—this isn’t the time to be gentle. Chill it 15 minutes before adding filling to avoid melting.
- Use Room-Temp Peanut Butter: Cold peanut butter makes the batter grainy and uneven. Scoop it straight from the jar, let it sit for 20–30 minutes, then mix it into the wet ingredients until completely smooth. If it’s still stubborn, microwave for 10 seconds—just enough to soften, not liquefy.
Pro cooking tips for great baked peanut butter cheesecake
Water Bath Magic
Baking your peanut butter cheesecake in a water bath is non-negotiable for that perfect silky center. Fill a deep baking pan with hot water (about 1 inch deep) and place your 9-inch springform pan inside. The steam creates a gentle, even heat that prevents cracking while ensuring the filling cooks through without drying out. I use a Pyrex baking dish for the water bath—it distributes heat more evenly than metal pans. 💫
Peanut Butter Toasting
Toast your peanut butter mixture until it smells deeply nutty—this step amplifies the flavor by 30%. In a small saucepan over low heat, combine the 1.5 cups peanut butter with 1 tablespoon brown sugar and 1 teaspoon vanilla extract. Stir constantly for 3-4 minutes until it reaches 160°F on an instant-read thermometer. Let it cool slightly before mixing into the crust. This caramelized depth makes all the difference.
Crust Pressing Technique
Pressing the crust evenly is key to avoiding a soggy bottom. After mixing the crust ingredients, divide them into two portions and press each into the pan using the bottom of a glass or measuring cup. Press firmly, especially along the sides of the pan, to create a ¼-inch-thick barrier. Chill the crust in the freezer for 15 minutes before adding filling—this helps it hold its shape during baking.
Swirl Perfection
For those showstopping swirls, use a skewer or wooden toothpick to drag the peanut-chocolate mixture through the filling in zigzag patterns. Start from the outer edge and work toward the center, overlapping slightly for a marbled effect. Avoid overmixing—the filling should remain thick but pourable. Pro tip: Use a bench scraper to smooth the top before baking for an even finish.
Temperature Control
Bake at 325°F—any higher, and the edges will brown too quickly while the center remains undercooked. After 30 minutes, tent the cheesecake loosely with aluminum foil if the edges are browning too fast. The filling is done when a toothpick inserted near the center comes out with moist crumbs (not wet batter). Overbaking dries out the texture, so resist the urge to peek too often!
Cooling Like a Pro
Let the cheesecake cool in the pan for 1 hour at room temperature before refrigerating. This gradual cooling prevents shrinkage cracks. For extra insurance, place the pan on a wire rack instead of directly on the counter—this allows air to circulate underneath. After 4 hours in the fridge, the filling will be knife-tender and ready to slice. Patience here is everything for that bakery-style finish.
Nutrition facts
Frequently asked questions
Why does my peanut butter cheesecake crack?
Cracking usually happens from sudden temperature changes or overbaking. Always cool the cheesecake at room temperature for 1 hour before refrigerating, and avoid opening the oven door frequently. The water bath technique helps prevent this by creating even heat distribution. If cracks appear, cover them with whipped cream or extra peanut butter for a pretty finish!
Can I make this cheesecake without a water bath?
You can try, but the texture won't be as silky. Without a water bath, the cheesecake may develop cracks or a dry center. If you're short on time, bake it at 325°F for 5-10 minutes longer and let it cool completely before refrigerating. The result will be less perfect but still delicious!
How do I get clean slices without crumbling?
Chill the cheesecake thoroughly (4+ hours) and use a hot knife for clean cuts. Dip your knife in hot water, wipe it dry, and run it around the edges of the springform pan first. This creates a clean release. For extra stability, let the cheesecake sit at room temperature for 10 minutes before slicing.
What's the best way to store leftovers?
Store in an airtight container in the fridge for up to 5 days. For best texture, enjoy within 3 days. To reheat, cover loosely with foil and warm at 300°F for 10-15 minutes—though it's best served chilled. Freezing isn't recommended as it alters the creamy texture.
Can I substitute powdered peanut butter?
Not recommended! Powdered peanut butter lacks the rich, creamy texture and fat content needed for the crust and filling. If you must use it, mix it with 2 tablespoons oil per cup to mimic the consistency, but the flavor will be less authentic. Stick with natural, creamy peanut butter for the best results.