
Desserts
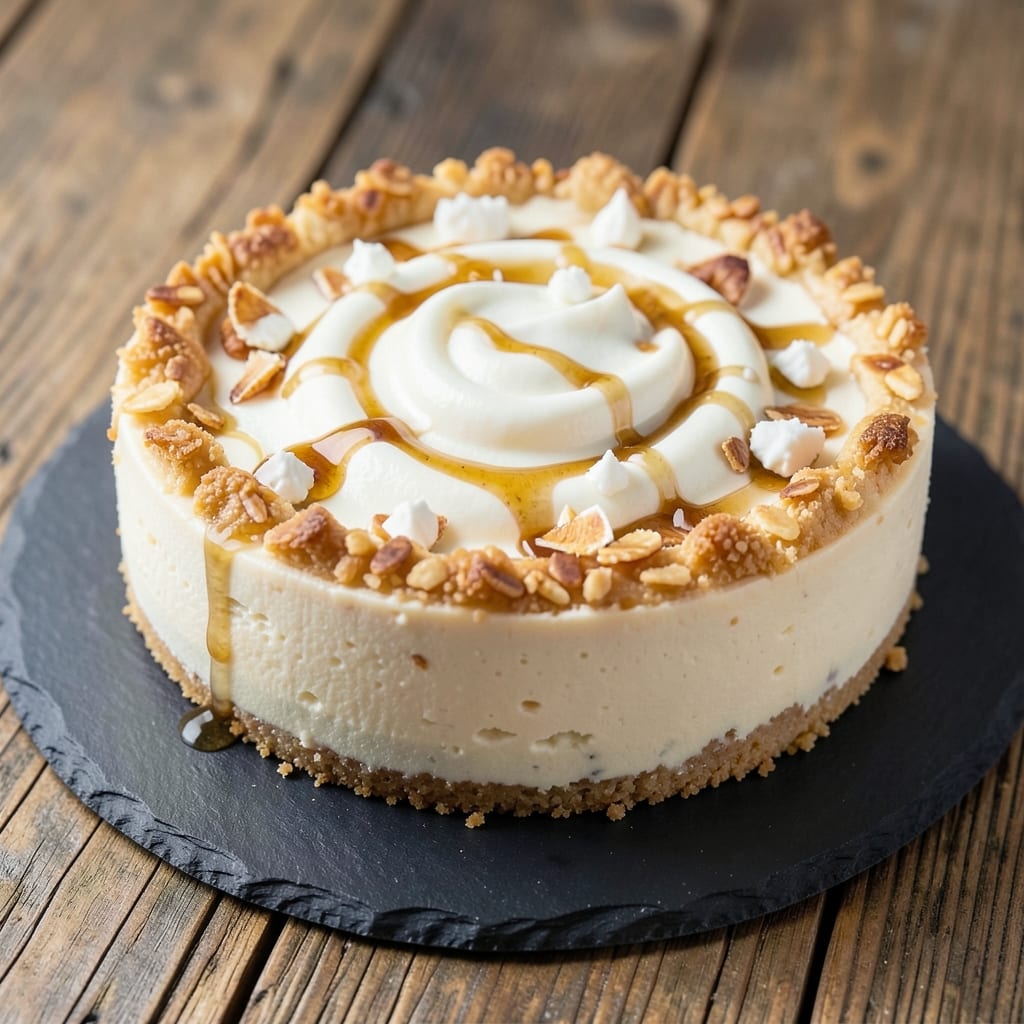
This vegan baked tofu cheesecake delivers all the creamy, rich layers of classic cheesecake without dairy—no one will guess it's plant-based. 💛 The secret lies in blending silken tofu with cashews and coconut cream, creating a velvety texture that bakes up perfectly smooth with a delicate crust. I've perfected this recipe after years of testing, ensuring it holds its shape while staying luscious in every bite.
The magic happens with a foolproof method: blending the tofu mixture until completely smooth eliminates any graininess, while the crust gets a head start in the oven to prevent sogginess. We use a combination of vegan cream cheese and coconut oil for that signature tangy richness, balanced by a touch of vanilla and lemon zest for brightness. The result? A cheesecake that's dense yet tender, with clean flavors that shine through.
What makes this recipe truly special is how it fools even non-vegans—the texture is unmistakably cheesecake-like, not overly nutty or dry. The crust stays crisp at the edges while remaining tender in the center, and the top develops a beautiful golden patina that's irresistible. Serve it chilled with fresh berries or a drizzle of vegan caramel for that restaurant-quality finish.
Whether you're baking for a celebration or simply craving a decadent treat, this recipe delivers restaurant-quality results at home. The best part? It's completely customizable—add cocoa powder for chocolate flavor, swap the crust for gluten-free ingredients, or top with toasted coconut for extra texture. Let's create something extraordinary together.
Ingredients for baked tofu cheesecake
Silken tofu and coconut cream create the velvety foundation for this restaurant-quality vegan cheesecake.
| Ingredient | Amount | Notes |
|---|---|---|
| Extra-Firm Silken Tofu 🥬 | 16 oz | Drained and pressed for best texture |
| Raw Cashews 🥜 | 1 ½ cups | Soaked in hot water for 15 minutes |
| Full-Fat Coconut Cream 🥥 | 13 ½ oz | From can, refrigerated overnight |
| Vegan Cream Cheese 🧀 | 8 oz | Miyoko's brand preferred |
| Pure Maple Syrup 🍯 | ¼ cup | Grade B for depth of flavor |
| Pure Vanilla Extract 🌿 | 1 tbsp | Bourbon-infused for complexity |
| Lemon Zest 🍋 | 1 tbsp | Freshly grated from organic lemon |
| Vanilla Bean Paste 🌿 | 1 tsp | For visible speckles of flavor |
| Almond Flour 🌰 | 1 ½ cups | Blanched, for ultra-fine texture |
| Coconut Oil 🫒 | ½ cup | Melted, for crust binding |
| Cane Sugar 🍬 | ¼ cup | For caramelization in crust |
| Sea Salt 🧂 | ½ tsp | Fine grain, for delicate seasoning |
| Cold Water 💧 | 2 tbsp | For crust consistency |
| Unsweetened Applesauce 🍎 | ¼ cup | For moisture in crust |
The silken tofu is non-negotiable for that signature creamy texture—Kite Hill brand or Nakata work best, but any extra-firm will do if pressed thoroughly. Trader Joe's carries excellent options, and I always buy the organic variety for cleaner flavor. The cashews should be raw and unsalted—soaking them in hot water for 15 minutes softens them perfectly for blending. For the coconut cream, Thai Kitchen brand is my go-to; refrigerate the can overnight so the thick cream separates cleanly from the water. The vegan cream cheese? Miyoko's is the gold standard, but Violife works well too if you're on a budget.
No silken tofu? Extra-firm tofu pressed for 30 minutes works in a pinch, though the texture won't be quite as luxurious. Running short on cashews? Macadamia nuts at 1:1 ratio add richness, though they're pricier. The coconut cream can be substituted with full-fat coconut milk from a can, but you'll need to use the thick cream portion only. For the crust, almond flour is essential—it prevents the crust from becoming crumbly. Swap the cane sugar for coconut sugar if you prefer a deeper molasses flavor, though it may darken the crust slightly. The vanilla bean paste adds professional-level flavor without overpowering.
Prevent the crust from absorbing moisture by baking it for 10 minutes at 350°F before adding the filling. Store the assembled cheesecake in an airtight container in the fridge for up to 5 days, though it's best enjoyed within 3 days for optimal texture. For longer storage, freeze the baked cheesecake (without the crust) for up to 3 months. To serve, let it sit at room temperature for 15 minutes before slicing—this ensures clean cuts every time. The crust can be made a day ahead and stored in the fridge, but assemble the filling just before baking for the best results.
Why You'll Love This Recipe
- No Blender Necessary: I’ll admit—this isn’t your typical cheesecake. The silken tofu and cashews blend into a velvety batter without needing a high-speed blender. My food processor does the job just fine, and honestly? The texture comes out smoother than most store-bought versions.
- Sweet-Salty Magic: That maple syrup isn’t just for sweetness—it caramelizes slightly on the edges, creating this perfect contrast with the tangy vegan cream cheese. The coconut cream adds richness without overpowering, and between us, the first bite tastes like dessert and comfort food had a baby.
- Weeknight Dessert Fix: Forget waiting for company to bake something fancy. This holds together like a dream, so you can prep the crust the night before and bake it first thing in the morning. My kids think it’s their birthday cake—(yes, even on a Tuesday night).
- Budget-Friendly Indulgence: A single block of silken tofu and a small bag of cashews stretch into four servings, and the coconut cream? You’ll use the rest in smoothies or curries. I’ve made this for potlucks, and no one bats an eye—until they ask for the recipe, of course.
Step-by-step instructions for baked tofu cheesecake
Here's how to craft layers of velvety tofu filling and nutty crust for a plant-based dessert that rivals traditional cheesecake.
👨🍳 Step 1: Prepare the Crust Components
In a food processor, combine the 1.5 cups almond flour, 0.5 cup coconut oil (melted), 0.25 cup cane sugar, 0.5 tsp sea salt, 2 tbsp cold water, and 0.25 cup unsweetened applesauce. Pulse until the mixture forms a thick, crumbly dough that holds together when pressed. The texture should resemble wet sand—neither too dry nor sticky.
Transfer the crust mixture to a 9-inch springform pan and press firmly into the bottom and up the sides, creating an even layer about ¼-inch thick. Use the back of a spoon to smooth the surface. Chill in the refrigerator while you prepare the filling—this prevents the crust from softening when you add the warm cheesecake layer later.
🍳 Step 2: Blend the Silky Tofu Filling
Drain and press the 16 oz extra-firm silken tofu for 15 minutes using a tofu press or by placing it between heavy books wrapped in towels. This removes excess moisture for that signature silky texture. Cut the pressed tofu into cubes and transfer to a high-speed blender.
Add the 1.5 cups raw cashews (soaked in hot water for 15 minutes), 13.5 oz full-fat coconut cream (strained if needed), 8 oz vegan cream cheese, 0.25 cup pure maple syrup, 1 tbsp pure vanilla extract, 1 tbsp lemon zest, and 1 tsp vanilla bean paste. Blend on high for 2-3 minutes until completely smooth and creamy, scraping down the sides as needed.
⏰ Step 3: Assemble and Bake the Cheesecake
Preheat your oven to 350°F. Pour the blended filling over the chilled crust, smoothing the top with a spatula. Tap the pan gently on the counter to eliminate any air bubbles that might have formed during pouring. The filling should reach just below the rim of the pan.
Bake for 45-50 minutes until the edges are set and the center still jiggles slightly (about ½-inch movement). The top should be golden brown with a slight crust, but don't overbake—this prevents cracking. For even baking, place a baking sheet on the rack below the pan to catch any drips.
🥘 Step 4: Cool and Set Properly
Remove the cheesecake from the oven and let it cool in the pan for 1 hour at room temperature. This gradual cooling prevents sudden temperature shifts that could cause cracks. After 1 hour, transfer the pan to the refrigerator and chill for at least 4 hours, or preferably overnight.
Run a knife around the edge of the pan before releasing the springform to ensure clean slices. Serve chilled, allowing each piece to sit for 2 minutes before cutting to maintain its elegant structure. The final texture should be silky in the center with a firm, nutty crust that holds together beautifully.
Pro Tips For Making Baked Tofu Cheesecake
- Drain and Press Silken Tofu: Skip the soft, watery mess by pressing your extra-firm silken tofu for 20 minutes—wrap it in a clean towel, place a heavy pan on top, and let gravity do the work. This isn’t just about texture; it guarantees your cheesecake holds its shape instead of collapsing like a sad soufflé.
- Soak Cashews Overnight: I used to soak cashews for just a few hours, thinking it was enough. Wrong. Soak them for at least 8 hours—or better yet, overnight—so they blend into a creamy, lump-free base. No one wants gritty texture in their cheesecake filling.
- Bake Low and Slow: That 350°F oven setting? Too aggressive. Drop it to 325°F and bake for 10-15 minutes longer than the recipe says. This prevents a cracked top and ensures the center sets without turning rubbery. Patience here makes all the difference.
- Mix Coconut Cream First: Whip the full-fat coconut cream until stiff peaks form before folding it into the rest of the batter. This lightens the texture and keeps the cheesecake from feeling dense—like you’re eating a brick instead of dessert. Trust the process.
Troubleshooting this dish
Crust Too Soggy
If your crust ends up soggy, the filling was likely too wet or the crust wasn't properly pre-baked. I always bake the crust for 10 minutes at 350°F before adding the filling to create a moisture barrier. For extra insurance, brush the crust with 1 tbsp melted coconut oil after baking to create a protective seal. 💧
Filling Too Grainy
Graininess usually means the tofu wasn't blended long enough or wasn't pressed properly. Use a high-speed blender and blend the filling for 2-3 minutes, scraping down the sides every 30 seconds. For ultra-smooth results, strain the mixture through a fine-mesh sieve before pouring into the crust. I've found Vitamix blenders excel at achieving that silky texture.
Cracked Top Surface
Sudden temperature changes cause cracks, so avoid opening the oven door frequently during baking. Let the cheesecake cool gradually in the pan for 1 hour at room temperature before refrigerating. For extra protection, cover the edges with aluminum foil during the final 15 minutes of baking to prevent over-browning.
Filling Didn't Set Properly
Underbaking or insufficient chilling time leads to a runny center. Bake until the edges are set but the center still jiggles slightly (about ½-inch movement). Then chill for at least 4 hours—I often leave mine overnight. If you're short on time, place the baked cheesecake in the freezer for 2 hours before serving.
Crust Separating
This happens when the crust isn't properly pressed or the filling is too hot when poured. Press the crust firmly into the pan and chill it completely before adding the filling. Let the filling sit at room temperature for 10 minutes before pouring to reduce temperature shock. I also find that using almond flour instead of other nut flours prevents separation better.
Weak Flavor Profile
If your cheesecake tastes bland, the vanilla and lemon zest might need boosting. Use bourbon-infused vanilla extract for depth, and add ½ tsp lemon extract along with the zest. For extra richness, increase the vegan cream cheese to 10 oz—it adds that signature tangy flavor. A pinch of sea salt also enhances all the flavors.
Nutrition facts
Frequently asked questions
Can I make this recipe without a springform pan?
Yes, but you'll need a well-greased 9-inch round cake pan with a removable bottom. Line the bottom with parchment paper first to prevent sticking. After baking, chill completely before removing the cheesecake from the pan. The texture will be identical, but you may need to run a thin knife around the edges to loosen it before serving.
How do I add chocolate flavor to this recipe?
Add ½ cup cocoa powder to the filling mixture when blending with the tofu. For extra richness, replace 2 oz of the vegan cream cheese with 2 oz vegan dark chocolate (melted and cooled). The chocolate will enhance the silky texture while adding deep cocoa notes. Pair with raspberry compote for a showstopping dessert!
Why does my vegan cheesecake taste too nutty?
The cashews provide creaminess, but too much can overpower the delicate flavors. Reduce the cashews to 1 cup and add ½ cup cooked quinoa (cooled) to the filling for neutral bulk. Also ensure you're using unsalted cashews and balance with an extra ½ tsp sea salt in the filling.
Can I make this gluten-free?
Replace the almond flour in the crust with 1.5 cups gluten-free oat flour or 1 cup gluten-free 1:1 baking flour. For extra binding, add 1 tbsp ground flaxseed mixed with 3 tbsp water to the crust mixture. The texture will remain firm and delicious while being completely gluten-free.
How long can I store the baked cheesecake?
Store the fully chilled cheesecake in an airtight container in the fridge for up to 5 days. For longer storage, wrap individual slices in plastic wrap and freeze for up to 3 months. Thaw overnight in the fridge before serving. The texture remains perfect when properly stored!