
Desserts
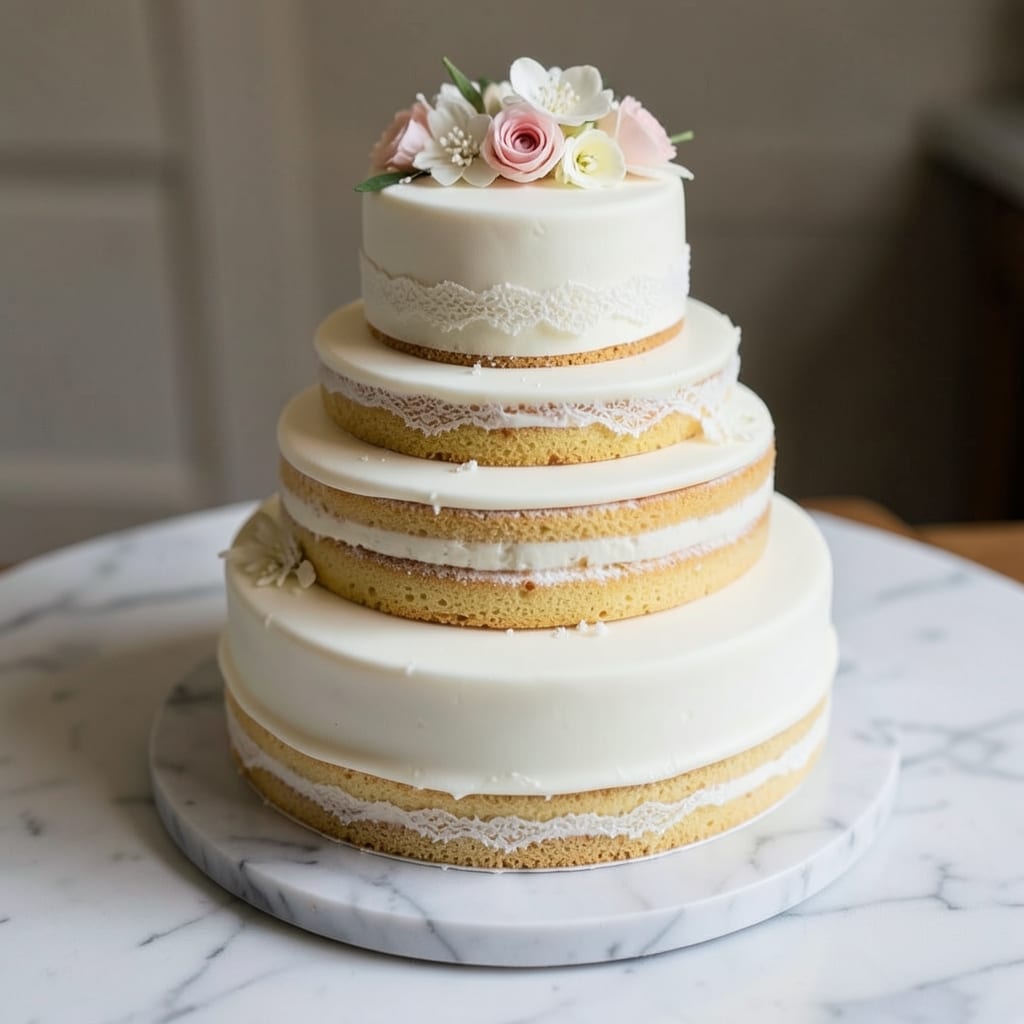
This bakery-style wedding cake recipe delivers the elegant, multi-tiered perfection brides dream of—with a buttery vanilla cake base, velvety buttercream filling, and flawless fondant finishes. 💫 The secret lies in precise layering techniques that ensure stability while creating show-stopping visual appeal. I’ve perfected this method after years of cake decorating, and it’s designed to impress even the most discerning guests.
The foundation begins with light, moist vanilla cake layers, baked to a perfect golden finish and cooled evenly to prevent crumbling. Between each layer, rich buttercream—smooth, pipeable, and slightly sweet—creates a luscious filling that holds the tiers together. For the signature bakery look, we’ll cover the cake in rolled fondant, smoothed to a flawless sheen before adding delicate floral accents or custom designs.
What sets this apart is the professional-tiered assembly—using dowels and weights to ensure perfect alignment, so your cake stands tall and elegant. The fondant finish isn’t just decorative; it’s a protective layer that keeps the cake fresh for days, making it ideal for weddings where timing is everything. Every detail, from the crumb coat to the final touches, is designed to look effortless—because your wedding day deserves nothing less.
Whether you’re a seasoned baker or tackling your first multi-tiered cake, this recipe breaks down the process into manageable steps—from baking and filling to decorating. The result? A stunning, bakery-quality centerpiece that tastes as incredible as it looks. Let’s get started on creating your dream cake.
Ingredients for bakery style wedding cake
Twelve essential ingredients transform into bakery-quality wedding cake tiers with flawless fondant finishes.
| Ingredient | Amount | Notes |
|---|---|---|
| All-Purpose Flour 🌾 | 6 cups | Sifted for light texture |
| Granulated Sugar 🍚 | 2 ½ cups | Superfine for smooth batter |
| Unsalted Butter 🧈 | 2 cups | Cold, cubed for cake layers |
| Large Eggs 🥚 | 6 whole | Room temperature for even mixing |
| Vanilla Extract 🌿 | 2 tsp | Pure Madagascar preferred |
| Baking Powder 🍞 | 2 tsp | Freshly opened for lift |
| Salt 🧂 | ½ tsp | Fine sea salt preferred |
| Milk 🥛 | 1 ½ cups | Whole milk for richness |
| Powdered Sugar 🍚 | 4 cups | For buttercream, sifted |
| Heavy Whipping Cream 🥛 | 2 cups | Cold, full-fat for stability |
| Vanilla Bean Paste 🌿 | 1 tbsp | Intensifies vanilla flavor |
| White Fondant 🎂 | 3 lbs | Ready-to-roll, 1/8" thick |
| Corn Syrup 🍯 | 1 tbsp | For fondant flexibility |
| Shortening 🧈 | 1 tbsp | For fondant smoothness |
| Cake Dowels 🪵 | 12 pieces | 1/4" diameter, 6" long |
The flour and sugar are your foundation—King Arthur or Gold Medal brands work best for that tender crumb. Butter is non-negotiable; Plugrá or Land O'Lakes unsalted in 1-pound blocks stay cold longer. Eggs should be room temperature—cold ones create air pockets. For vanilla, Madagascar Bourbon extract or vanilla bean paste elevates the flavor. Baking powder must be fresh—test by mixing with water; if it fizzes, it's good. Milk adds moisture, but heavy cream in the buttercream makes all the difference—Trader Joe's has the best-priced full-fat option.
No powdered sugar? Confectioners' sugar works in a pinch, but sift it well to avoid lumps. Shortening in fondant prevents cracking—Crisco is reliable. Corn syrup keeps fondant pliable; if you can't find it, light corn syrup works. Vanilla bean paste costs more but gives that authentic bakery depth. Cake dowels are a game-changer—Amazon sells them in bulk, or craft stores carry them. For fondant, Wilton or Sugarflair brands roll out smoothly. Pro tip: Knead fondant with cornstarch-dusted hands to prevent sticking.
Store cake layers between parchment at room temperature for 24 hours before assembly. Buttercream keeps 5 days refrigerated, but bring to room temp before piping. Fondant stays fresh 3 days wrapped in plastic—reheat with warm water vapor if stiff. Assembled cake holds 3 days at room temp or 1 week refrigerated. Freeze tiers separately for up to 3 months—thaw overnight before decorating. Dowels prevent collapsing; insert 24 hours before serving to let tiers stabilize.
Why You'll Love This Recipe
- No-Fuss Layers: I swear by this method—just mix, bake, and repeat. Three simple bowls (flour, sugar, butter, eggs) and you’ve got the base for a showstopper. No fancy equipment, no stress.
- Butter-Sugar Magic: That creamed butter and sugar combo? It’s what makes this cake sing. The vanilla deepens the flavor, and the crumb? So tender it melts in your mouth. (Yes, even without frosting.)
- Crowd-Pleaser Every Time: Birthday, shower, or just because—this cake handles any occasion. Bake it ahead, stack it, and watch people lose their minds over how "bakery-style" it looks. (Pro tip: Add a sprinkle of powdered sugar before serving.)
- Budget-Friendly Luxury: You’re using pantry staples, not specialty ingredients, but it tastes like a $200 cake. Leftovers? Toast them for French toast or crumble them into cookies. Waste? None.
Step-by-step instructions for tiered wedding cake assembly
Here's how to craft a bakery-worthy wedding cake with flawless layers and professional fondant finishes.
👨🍳 Step 1: Prepare the Cake Layers for Perfect Texture
Preheat your oven to 350°F and grease three 8-inch round cake pans with the 2 cups unsalted butter, reserving ½ cup for later. In a stand mixer, cream the remaining 1½ cups butter with the 2.5 cups granulated sugar on medium-high speed for 5 minutes until light and fluffy. This step is crucial—you're incorporating air for that signature bakery-style rise.
Add the 6 whole large eggs one at a time, mixing well after each addition. Then whisk together the 6 cups all-purpose flour, 2 tsp baking powder, and ½ tsp salt in a separate bowl. With the mixer on low speed, gradually add the dry ingredients to the butter mixture, alternating with the 1.5 cups milk in 3 additions. End with the 2 tsp vanilla extract and mix just until combined—overmixing develops gluten and makes the cake dense.
🔥 Step 2: Bake and Cool Layers for Even Height
Divide the batter evenly among the prepared pans. Bake for 25-30 minutes or until a toothpick inserted in the center comes out clean and the tops spring back when touched. Here's the thing—your layers should be about 1½ inches thick when baked. Let the cakes cool in the pans for 10 minutes, then transfer to a wire rack to cool completely.
Once completely cooled, level the tops with a serrated knife if needed. This ensures perfectly flat layers for clean stacking. Wrap each layer in plastic wrap and store at room temperature until ready to assemble. I like to do this step at least 4 hours before decorating to prevent condensation from affecting the fondant.
🥘 Step 3: Create Silky Buttercream and Assemble Layers
In a stand mixer fitted with the whisk attachment, beat the 2 cups heavy whipping cream on high speed until soft peaks form. Gradually add the 4 cups powdered sugar and the reserved ½ cup butter, mixing on medium-high speed until smooth and fluffy. Add the 1 tbsp vanilla bean paste for that professional vanilla depth.
Place the first cake layer on a cake stand or plate. Pipe a generous border of buttercream around the edge, then place a cake dowel in the center. Add the second layer, repeating the buttercream border and dowel process. Top with the final layer, then cover the entire cake with a thin crumb coat of buttercream. Chill for 30 minutes—this prevents crumbs from getting into your fondant later.
🍳 Step 4: Cover with Fondant for Flawless Finishes
Roll out the 3 lbs white fondant between two sheets of parchment paper to about ⅛-inch thickness. Add 1 tbsp shortening and 1 tbsp corn syrup to make it more pliable. Cover the chilled cake with the fondant, smoothing it gently with your hands. Use a fondant smoother or bench scraper to create clean edges and remove any air bubbles.
Here's where the magic happens: use a sharp knife or fondant cutter to create clean edges. For a professional look, I like to add a simple ruffled trim around the base. Let the fondant set for 30 minutes before adding any decorations. The fondant should be smooth and taut—no wrinkles or cracks. If you see any imperfections, gently smooth them with your fingers or a fondant smoother.
⏰ Step 5: Final Touches and Doweling for Stability
Insert the remaining 9 cake dowels evenly around the cake's circumference, spacing them about 2 inches apart. This provides structural support for your multi-tier design. For a 3-tier cake, repeat the buttercream and fondant process for each additional tier, using 6-inch and 4-inch round cake pans for the smaller tiers.
Let the cake set for at least 24 hours before serving—this allows the fondant to fully harden and the flavors to meld. The final result should be a stunning, bakery-style wedding cake with perfectly smooth fondant, clean edges, and stable structure. Each slice will reveal that beautiful, moist cake texture we worked so hard to achieve.
Pro Tips For Making Bakery Style Wedding Cake
- Weigh Your Butter—Don’t Scoop: I learned this the hard way—packed butter in measuring cups loses air, making your cake dense. Use a kitchen scale for 227g (1 cup) and press it into the bowl with a rubber spatula to distribute those fat pockets evenly. Your crumb will thank you.
- Room-Temp Eggs and Butter: Cold butter and eggs from the fridge won’t mix smoothly, leading to lumps or underdeveloped structure. Let them sit in warm water (not hot) for 10 minutes—just until they yield slightly when pressed. This isn’t about speed; it’s about even emulsification.
- Skip the Overmixing: Once the flour hits the wet ingredients, stop mixing after just 20 seconds. Overworking the batter develops gluten, turning your tender cake into a chewy brick. Scrape the bowl once, then fold gently—your cake’s lightness depends on it.
- Bake in Stages: Wedding cakes need patience. Bake the first 10 minutes at 350°F (175°C), then drop to 325°F (160°C) for the rest. This prevents a dark crust while ensuring even doneness. A toothpick with moist crumbs (not wet batter) is your goal—no one wants a soggy middle.
Creative variations of bakery style wedding cake
Classic Vanilla Variations
For a citrus twist, add 1 tbsp lemon or orange zest to the cake batter alongside the vanilla extract. The bright notes complement the buttercream beautifully. I’ve also used ½ tsp almond extract for a sophisticated marzipan-like depth—just reduce the milk slightly to balance moisture. 🍊
Chocolate Infusions
Swap 1 cup of the all-purpose flour for ½ cup Dutch-process cocoa powder and add ¼ cup hot coffee to the batter. This creates a mocha-infused cake that pairs perfectly with chocolate buttercream. For a chocolate-dipped tier, melt ½ cup dark chocolate and drizzle over the fondant-covered cake before decorating.
Fruit-Filled Layers
Replace the buttercream with jam or compote for a modern twist. I love raspberry jam (about 1 cup) sandwiched between layers, or passion fruit curd for a tropical vibe. Seal the edges with a thin buttercream border to prevent leaks. For a showstopper, add a mirror-glaze (equal parts powdered sugar and water) over the fondant for a glossy finish.
Spiced Chai Twist
Infuse the milk with 1 chai tea bag (steeped and cooled) before adding it to the batter. Add ½ tsp ground cardamom and ¼ tsp cinnamon to the dry ingredients for warmth. Top with a caramel buttercream and toasted coconut flakes for a cozy, aromatic cake that feels like a hug. 🌿
Nutty Crunch Layers
Press toasted pecans or hazelnuts (about ½ cup) into the bottom of each cake pan before baking for texture. For a nut-filled cake, fold ½ cup chopped toasted walnuts into the batter. Pair with a honey buttercream and caramel drizzle for a decadent, textured bite. Store nuts in the freezer to prevent rancidity.
Seasonal Adaptations
For spring, use lavender-infused sugar (steep 1 tbsp dried lavender in ½ cup sugar overnight) in the cake batter. In fall, add pumpkin puree (replace ½ cup milk with ½ cup puree) and top with maple glaze. Winter calls for spiced rum buttercream—simmer ½ cup rum with the sugar before creaming.
Nutrition facts
Frequently asked questions
Can I make this wedding cake without fondant?
For a simpler version, replace the fondant with a thick buttercream coating or Swiss meringue buttercream. Use a piping bag with a star tip to create textured patterns that mimic fondant's smooth finish. Just be sure to apply a crumb coat first to prevent crumbs from showing through.
How do I prevent my cake tiers from collapsing?
Use cake dowels (at least 3 per tier) inserted vertically through the center of each layer. Space them evenly around the cake's circumference for maximum stability. Also, let the buttercream set for 30 minutes before adding fondant, and never stack tiers until the cake is completely cooled.
Can I bake this cake ahead of time?
Yes! Bake the layers 2 days ahead and store wrapped at room temperature. Assemble the cake 1 day before serving, then cover with fondant. The fondant-covered cake stays fresh for 3 days at room temperature or 1 week refrigerated. For long-term storage, freeze assembled tiers (without fondant) for up to 3 months.
What's the best way to transport a multi-tier cake?
Use a sturdy cake board with a 2-inch border around the base. Place the cake in a large cardboard box with 1-2 inches of packing material on all sides. Secure the box with tape and transport it horizontally in your vehicle. Never stack tiers on top of each other during transport—keep them flat.
How do I make my buttercream extra stable for stacking?
Chill the cake layers for 30 minutes after applying the crumb coat. Use powdered sugar that's been sifted to remove lumps, and beat the buttercream until it's thick but pipeable. For extra stability, add 1 tsp meringue powder to the buttercream mixture before whipping. This creates a firmer structure that holds up better during assembly.