
Desserts
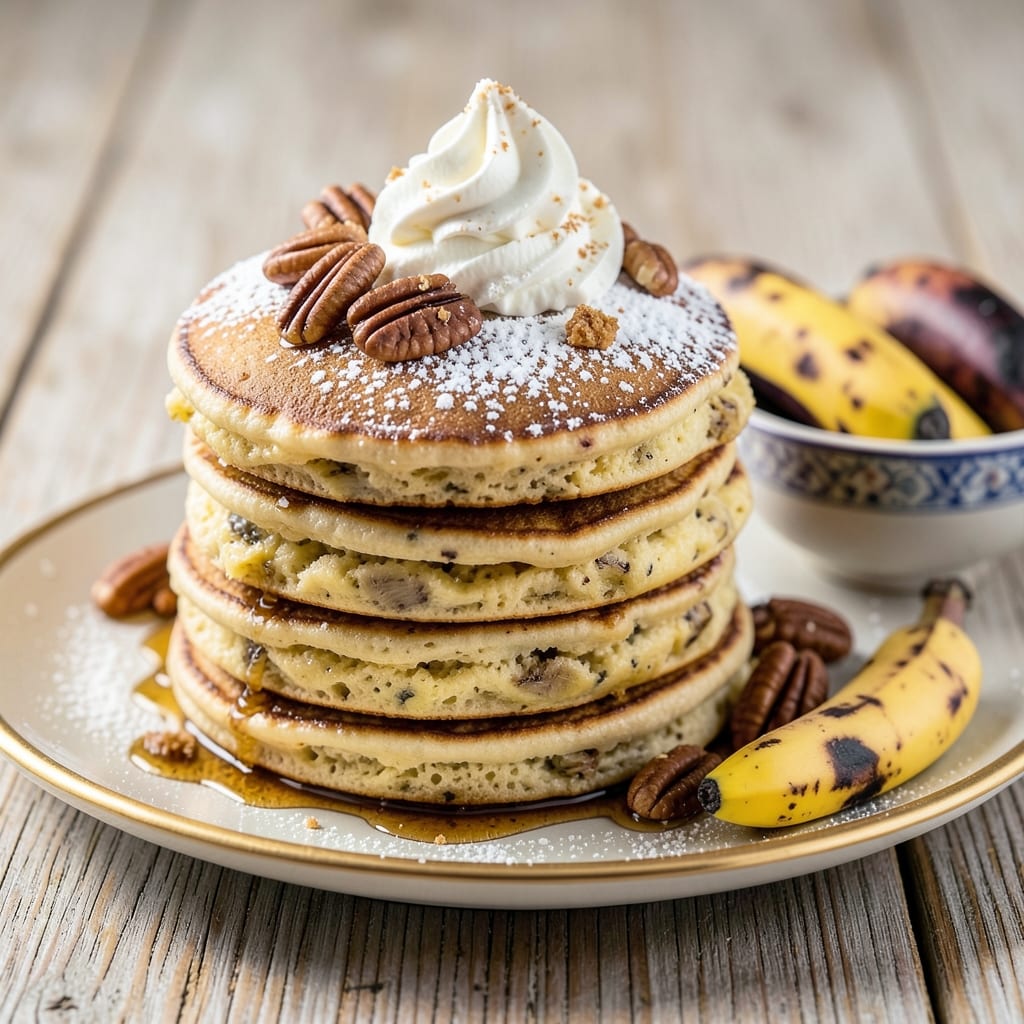
This banana cake pancake recipe delivers stackable sweetness with layers of moist, tender texture that bridges the best of pancakes and cake. 💛 The secret lies in blending ripe bananas with cake flour and buttermilk, creating fluffy pancakes that stay soft even after cooking. I've perfected this hybrid batter to eliminate dry edges while keeping the golden-brown finish you love in classic pancakes.
The magic happens with a foolproof technique that combines cake batter consistency with pancake cooking. You'll work with a slightly thicker batter that cooks up fluffy yet dense enough to hold toppings beautifully. The recipe includes optional add-ins like walnuts or chocolate chips for extra texture, but the base remains simple with just a handful of pantry staples.
What you'll end up with is a stack of moist, cake-like pancakes that can be enjoyed warm with syrup, whipped cream, or fresh berries. Each bite delivers that perfect balance of tender crumb and subtle banana sweetness—no one will believe they're not from a bakery. The best part? These pancakes reheat beautifully, making them perfect for brunch prep.
Whether you're serving a crowd or treating yourself to a decadent breakfast, this recipe delivers restaurant-quality results at home. The batter comes together in minutes, and with just 15 minutes of cooking time, you'll have a stack that looks as impressive as it tastes. Let's get started!
Ingredients for banana cake pancake
These pantry staples plus a few ripe bananas create restaurant-quality pancakes that taste like cake!
| Ingredient | Amount | Notes |
|---|---|---|
| Ripe Bananas 🍌 | 2 large | Mashed, about 1 cup |
| All-Purpose Flour 🌾 | 1 ½ cups | Sifted for fluffy texture |
| Cake Flour 🍞 | ½ cup | For tender crumb |
| Granulated Sugar 🍚 | ½ cup | Light brown preferred |
| Baking Powder 🧂 | 1 tsp | Aluminum-free preferred |
| Baking Soda 🧂 | ½ tsp | Freshly opened |
| Salt 🧂 | ½ tsp | Fine sea salt |
| Buttermilk 🥛 | 1 ½ cups | Homemade or store-bought |
| Large Eggs 🥚 | 2 whole | Room temperature |
| Unsalted Butter 🧈 | ½ cup | Melted, full-fat |
| Vanilla Extract 🍯 | 1 tsp | Pure extract preferred |
| Walnuts 🌰 | ½ cup | Chopped, optional |
| Dark Chocolate Chips 🍫 | ½ cup | Semi-sweet, optional |
| Maple Syrup 🍁 | ¼ cup | For serving, optional |
Ripe bananas are the star here—look for those with brown spots (the sweeter, the better). Trader Joe's or Whole Foods usually have the ripest ones. I always grab extra because they're perfect for smoothies too. The cake flour makes these pancakes extra tender, but if you don't have it, add 1 tbsp cornstarch to the all-purpose flour. For the buttermilk, if you're fresh out, mix 1.5 tbsp lemon juice or vinegar with 1.5 cups milk and let it sit for 5 minutes.
No buttermilk? Plain yogurt works in a pinch—just use the same amount. Want to skip the eggs? Flax eggs (1 tbsp ground flaxseed + 3 tbsp water per egg) keep these vegan-friendly. The walnuts and chocolate chips are totally optional, but they add that bakery-style crunch. Penzeys or Ghirardelli chocolate chips melt beautifully. For extra decadence, fold in 1 tsp cinnamon with the dry ingredients—it brings out the banana flavor perfectly.
This batter keeps in the fridge for 3 days—perfect for brunch prep. For best results, cook immediately after mixing, but you can refrigerate overnight. The pancakes reheat beautifully in a toaster or oven at 300°F for 10 minutes. Store leftovers in an airtight container with parchment paper between layers to keep them soft. Freeze extras for up to 3 months—just thaw overnight in the fridge before reheating.
Why You'll Love This Recipe
- No Overripe Bananas Wasted: I’ll never toss another spotted banana again—this recipe turns them into something so good, you’ll forget they were too ripe. The mash blends right into the batter, no extra steps, and that natural sweetness cuts down on sugar.
- Cakey-Pancake Magic: That combo of all-purpose and cake flour? It’s the secret—light, airy pancakes with a tender crumb, but still sturdy enough to flip. Drizzle with honey or nut butter, and you’ve got a dessert that feels like breakfast.
- Breakfast for Any Occasion: Weekday mornings? Check. Sunday brunch? Even better. Double the batter, freeze half, and you’ve got a grab-and-go option for lazy days. (Yes, even on a Tuesday night.)
- Budget Breakfast Win: Flour, sugar, and bananas—this is the kind of recipe that doesn’t break the bank. A batch feeds four for under $3, and leftovers reheat in seconds. My wallet and my kids thank me every time.
Step-by-step instructions for banana cake pancake stacks
Here's how to create fluffy, moist layers that taste like banana cake in every bite!
👨🍳 Step 1: Mash the Bananas and Mix Dry Ingredients
Start by mashing the 2 large ripe bananas in a medium bowl until completely smooth—no lumps allowed. I like to press them through a fine-mesh sieve to get an ultra-smooth texture that blends perfectly into the batter. In a separate bowl, whisk together the 1.5 cups all-purpose flour, 0.5 cup cake flour, 0.5 cup granulated sugar, 1 tsp baking powder, 0.5 tsp baking soda, and 0.5 tsp salt. Sift the dry ingredients together once to ensure no lumps remain—this creates those signature fluffy layers.
Here's the thing—ripeness matters! Overripe bananas (with brown spots) add natural sweetness and moisture, but if they're too mushy, the pancakes may be dense. Aim for bananas with some brown speckling but still firm enough to hold their shape when mashed.
🥘 Step 2: Combine Wet Ingredients and Fold Gently
In a large mixing bowl, combine the 1.5 cups buttermilk, 2 whole large eggs, 0.5 cup melted unsalted butter, and 1 tsp vanilla extract. Whisk until smooth—this is your wet base. Now, gently fold in the mashed bananas until just combined. I use a spatula and cut through the center to avoid overmixing, which keeps those pancakes light and airy.
Next, add the dry ingredients to the wet mixture in three parts, folding gently after each addition. Stop mixing as soon as the batter comes together—overmixing develops gluten, which makes pancakes tough. The ideal batter should be thick but pourable, like heavy cream. If it's too thick, add 1-2 tablespoons of buttermilk to loosen it.
🍳 Step 3: Fold in Walnuts and Chocolate Chips
Remove the bowl from the mixer and gently fold in the 0.5 cup chopped walnuts and 0.5 cup dark chocolate chips using a silicone spatula. I like to distribute them evenly throughout the batter so every bite has a mix of chewy walnuts and rich chocolate. Don't overmix here—just swirl them in until they're dispersed. The batter should still look thick and slightly streaky with flour.
This is where the magic happens—those optional add-ins give each pancake texture contrast. The walnuts add crunch, while the chocolate chips melt into gooey pockets. If you're feeling fancy, save a few extra chocolate chips for topping after cooking!
🔥 Step 4: Cook Pancakes on Medium Heat
Heat a nonstick skillet or griddle over medium heat (around 350°F). Lightly grease with butter or oil—just enough to prevent sticking, but not so much that it steams the pancakes. Pour ¼ cup portions of batter onto the skillet, spacing them about 2 inches apart. You should get about 4 pancakes from this recipe, but they'll stack beautifully!
Cook until bubbles form on the surface and the edges look set (2-3 minutes), then flip carefully with a spatula. Cook the other side for another 1-2 minutes until golden brown. The pancakes are ready when they release easily from the pan and have a crispy, slightly domed top. If the top browns too quickly, reduce the heat slightly—we want that cake-like texture, not burnt edges.
🥞 Step 5: Stack and Serve Warm
Transfer the cooked pancakes to a plate and keep them warm in a 200°F oven while you finish cooking the rest. Here's the fun part—stack them high! Spread a thin layer of 0.25 cup maple syrup between each pancake (if using) and top with extra chocolate chips or walnuts. Serve immediately while they're warm and moist—these pancakes are best eaten straight from the stack!
Each bite should deliver that perfect balance of fluffy texture, banana sweetness, and subtle crunch from the walnuts. The secret to keeping them moist? Don't skip the buttermilk—it reacts with the baking soda to create those tender, cake-like layers. Enjoy with extra syrup on the side for dipping!
Pro Tips For Making Banana Cake Pancake
- Mash Bananas First: Stop tossing those bananas into the batter whole—I learned this the hard way when I ended up with uneven pancakes and a weird texture. Use a fork to crush them until smooth, then press through a fine-mesh sieve to remove skins and lumps. This keeps the batter light and prevents gummy spots.
- Use Cake Flour Right: That extra cake flour isn’t just filler—it’s what makes these pancakes tender. Sift it with the all-purpose flour before mixing, and don’t skimp on the baking powder (1½ teaspoons for a 12-inch pancake batch). If your batter looks too thick, add 1 tablespoon of buttermilk at a time, but no more—this isn’t a cake, and overdoing it flattens the flavor.
- Medium Heat Only: High heat turns these pancakes into hockey pucks. Medium is where the magic happens—let the first side cook until bubbles form around the edges (about 2 minutes), then flip once when the center still looks slightly wet. Rushing it leads to dry, dense pancakes, and nobody wants that.
- Add Sugar Gradually: Dumping all the sugar in at once makes the batter too sweet and can trigger over-browning. Mix half the sugar with the dry ingredients first, then fold in the rest with the mashed bananas. This balances the sweetness and keeps the pancakes from tasting cloying—trust me, your taste buds will notice.
Storing and reheating this banana cake pancake
Fridge Storage Tips
Store leftover banana cake pancakes in an airtight container with parchment paper between layers to maintain moisture. They’ll stay fresh in the fridge for up to 3 days—just reheat in a toaster or oven at 300°F for 10 minutes for that warm, fluffy texture. I always keep a stack ready for quick breakfasts by prepping the batter the night before and cooking fresh in the morning. 🥞
Freezer-Friendly Method
For long-term storage, freeze pancakes individually on a tray lined with parchment paper before transferring to a freezer bag. This prevents sticking and makes reheating easier. Thaw overnight in the fridge, then warm in a toaster or oven at 350°F for 8-10 minutes—they’ll taste almost as good as fresh! I’ve kept these pancakes frozen for up to 3 months without losing their moist crumb.
Reheating Perfection
Toaster reheating works best for a crispy exterior while keeping the inside soft. For oven reheating, wrap pancakes in foil and bake at 300°F for 10 minutes, then unwrap and broil for 1-2 minutes to crisp the top. Avoid microwaving—it makes them rubbery. Pro tip: Brush reheated pancakes with a little melted butter and warm maple syrup to revive their fresh-from-the-griddle flavor. ✨
Make-Ahead Batter
Prep the batter ahead of time and store it in the fridge for up to 24 hours. When ready to cook, let it sit at room temperature for 10 minutes to loosen slightly. This works especially well for brunch crowds—just mix, cook, and stack while the batter’s still cold. The pancakes will still turn out fluffy and moist, just like fresh! Perfect for lazy mornings when you don’t want to measure ingredients last-minute.
Reviving Dry Pancakes
If your pancakes lose moisture overnight, don’t toss them! Place them in a single layer on a baking sheet and bake at 300°F for 5-7 minutes with a splash of milk or cream sprayed on top. The steam will restore their softness. I’ve saved many a forgotten stack this way—it’s a game-changer for busy weeks. 💫
Serving Warm Tips
Serve reheated pancakes immediately with warm maple syrup, whipped cream, or fresh berries to enhance their cake-like texture. For a restaurant-style presentation, stack them high and drizzle with extra syrup, then sprinkle with chopped walnuts or crushed candy bars for crunch. The contrast of warm pancakes with cool toppings is pure comfort food magic.
Nutrition facts
Frequently asked questions
Why do these pancakes taste like cake?
The secret lies in the blend of cake flour and buttermilk, which creates a tender, crumbly texture similar to cake. The ripeness of the bananas adds natural sweetness and moisture, while the gentle folding technique prevents overdevelopment of gluten for that cake-like softness.
Can I make these pancakes without eggs?
Replace the 2 eggs with 2 flax eggs (mix 2 tbsp ground flaxseed with 6 tbsp water, let sit for 5 minutes to thicken). The texture will still be moist and fluffy, though slightly denser. For extra richness, add 1 tbsp melted coconut oil to the batter.
How do I prevent burnt edges on the pancakes?
Cook on medium-low heat (around 325°F) and avoid overcrowding the pan. Use a nonstick skillet and lightly grease with butter or oil. If the edges brown too quickly, reduce heat slightly and cover with a lid for 30 seconds to steam the pancakes gently.
What's the best way to stack these pancakes?
For a restaurant-style stack, spread a thin layer of maple syrup or whipped cream between each pancake. Top with extra chocolate chips, walnuts, or crushed candy bars for crunch. Use a pancake warmer or keep in a 200°F oven while assembling to maintain warmth.
Can I use this batter for waffles?
Yes! Pour the batter into a preheated waffle iron (sprayed with oil) and cook until golden brown and crispy. The cake flour keeps them tender inside while the waffle iron creates those classic grid patterns. Cook at medium heat for 3-4 minutes—they'll be ready when the iron releases them easily.