
Desserts
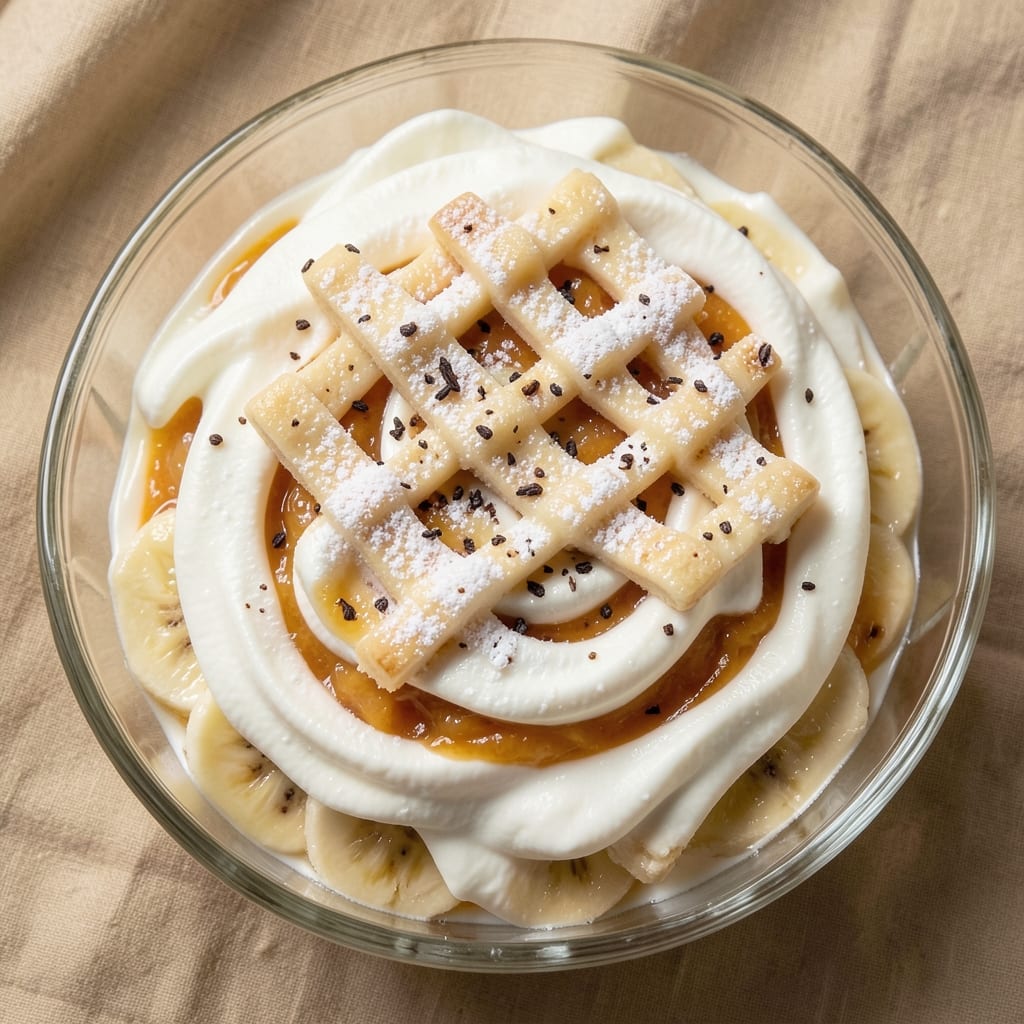
This banana cream cake filling recipe delivers restaurant-quality swirls with just 10 minutes of hands-on work and no baking required. The secret lies in balancing ripe banana puree with stabilized whipped cream—creating a texture that's light yet rich, perfect for layering between cake or spooning over trifles. I developed this version after testing countless combinations, and it's the one that finally stays smooth and creamy even after hours in the fridge.
The magic happens with cornstarch and gelatin, which prevent the filling from becoming watery while keeping it airy and luscious. You'll start with whipped cream as the base, then fold in banana puree and stabilizers for that signature velvety consistency. What makes this recipe truly foolproof is the two-stage whipping method, ensuring no deflation and maximum fluffiness.
Once assembled, you'll have a filling that's bright yellow with subtle banana sweetness, perfect for swirling into vanilla or sponge cake layers. The texture remains creamy yet firm enough to slice cleanly, making it ideal for cake decorating or trifle assembly. It's the kind of filling that transforms any dessert from ordinary to showstopping with minimal effort.
This recipe yields about 2 cups of filling—enough to generously fill a 9-inch two-layer cake or create stunning cupcake swirls. Store covered in the refrigerator for up to 5 days or freeze for 3 months without compromising texture. Pair it with pound cake, vanilla sponge, or even graham crackers for ultimate versatility.
Ingredients for banana cream cake filling
Nine ingredients transform into velvety banana cream filling that stays perfect for days.
| Ingredient | Amount | Notes |
|---|---|---|
| Heavy Whipping Cream 🥛 | 2 cups | Cold for best whipping |
| Ripe Bananas 🍌 | 2 large | Mashed into puree |
| Granulated Sugar 🍚 | ½ cup | Fine grain preferred |
| Cornstarch 🌾 | 1 tbsp | For texture stability |
| Unflavored Gelatin 🍯 | 1 ½ tsp | Bloomed in 3 tbsp cold water |
| Vanilla Extract 🌿 | 1 tsp | Pure vanilla preferred |
| Salt 🧂 | ¼ tsp | Fine sea salt |
| Lemon Juice 🍋 | 1 tbsp | Freshly squeezed |
| Powdered Sugar 🍚 | 2 tbsp | For final dusting |
The bananas are everything here—ripe to the point of being slightly mushy (think brown spots, not green). Grab 3-4 at the grocery store and let them sit on the counter overnight for maximum sweetness. The heavy whipping cream needs to be cold straight from the fridge—skip the thawing. For the gelatin, blooming it properly is key: sprinkle it over 3 tbsp cold water and let it sit for 5 minutes before heating. I always buy Knockbox unflavored gelatin from Trader Joe's—it dissolves perfectly every time.
No ripe bananas? Cook them down with a splash of water until mushy, then mash. Swap powdered sugar for granulated if needed—just add a pinch more. The lemon juice brightens the flavor, but if you're avoiding acid, 1/2 tsp cream of tartar works too. For a nutty twist, toast 1 tbsp chopped walnuts and fold them in at the end. The filling stays stable thanks to the cornstarch and gelatin combo—this prevents that dreaded watery texture after hours in the fridge.
This filling keeps 5 days in the fridge covered tightly, or 3 months frozen in an airtight container. For freezing, portion into 1/2 cup servings—thaw overnight in the fridge. The powdered sugar dusting is optional but adds that professional touch. I always make a double batch: one for cake filling, one for banana cream pie bars the next week. Store any leftovers with a thin layer of plastic wrap touching the surface to prevent a skin from forming.
Why You'll Love This Recipe
- Here’s what sold me: this costs pennies per serving but tastes like a bakery special. Heavy cream and ripe bananas stretch further than you’d think, and the cornstarch keeps it from breaking the bank. Leftovers? Even better—it keeps for days in the fridge.
- No Overripe Bananas Wasted: Honestly, this filling is my lifesaver when those bananas get too soft for smoothies. Mash them right up with sugar and cornstarch, simmer until thick—it’s basically turning kitchen waste into something luxurious. (Yes, even on a Tuesday night.)
- Velvet Smooth Texture: That gelatin trick? Absolute magic. The whipped cream folds in like a dream, giving you that signature banana cream cake consistency—creamy but not gluey, with just enough structure to hold its shape. My daughter calls it "cloud food," and I don’t argue.
- Layering Made Simple: Between us, layering cake and filling can feel intimidating. But this filling? It’s the easy part. Spread it between cake layers, top with whipped cream, and boom—restaurant-quality dessert without the fuss. (Not the prettiest, but the taste makes up for it.)
Step-by-step instructions for banana cream cake filling
This velvety filling comes together in minutes with no oven needed—just patience and precise technique.
Bloom the Gelatin Properly
Place the 1.5 teaspoons unflavored gelatin in a small bowl and sprinkle over 3 tablespoons cold water. Let it sit for 5 minutes until it thickens into a gel-like consistency. This blooming step is crucial—it activates the gelatin so it sets properly later. I always use cold water here because warm water would melt the gelatin before it absorbs moisture.
While waiting, mash the 2 large ripe bananas into a smooth puree using a fork or potato masher. You want no lumps—this ensures your filling will be silky, not grainy. Set the banana puree aside for now. The gelatin should now resemble jelly when you lift it with a spoon—this is your signal it's ready for the next step.
Whip the Cream to Stiff Peaks
In a separate, chilled mixing bowl, whip the 2 cups cold heavy whipping cream using a hand mixer or stand mixer on high speed until it forms stiff peaks. This means when you lift the beaters, the cream should hold its shape for a moment before slowly collapsing. The bowl should feel noticeably cooler to the touch—this tells you the cream is properly chilled and ready for folding.
Don't rush this step. Under-whipped cream will result in a filling that's too thin and won't hold its shape. I like to stop mixing just as the peaks form—over-whipping can make the cream grainy. Keep the bowl and beaters cold by chilling them in the freezer for 10 minutes before starting if your kitchen runs warm.
Combine Wet Ingredients
In a medium saucepan, combine the banana puree, 0.5 cup granulated sugar, 1 tablespoon cornstarch, 1 teaspoon vanilla extract, 0.25 teaspoon salt, and 1 tablespoon lemon juice. Cook over medium heat, stirring constantly, until the mixture thickens to a pudding-like consistency—about 5-7 minutes. You'll know it's ready when it coats the back of a spoon and leaves a clear trail when you run your finger through it.
Remove from heat and immediately stir in the bloomed gelatin until fully dissolved. This step is important because the gelatin needs to be evenly distributed to create that perfect set. Let the mixture cool to room temperature while you prepare the whipped cream. If you rush this cooling step, the gelatin won't activate properly and your filling won't set correctly.
Fold Everything Together
Once the banana mixture has cooled to room temperature, gently fold in the stiffly whipped cream using a spatula. Work quickly but carefully to maintain the cream's airiness. I like to use a figure-eight motion when folding—this incorporates the cream without deflating it. The mixture should be smooth and thick, like a luxurious mousse. If it looks too thin, let it rest for 10 minutes to thicken further.
Finally, dust the top with 2 tablespoons powdered sugar for that classic banana cream finish. This isn't just for decoration—it adds a delicate sweetness and prevents the filling from drying out. Transfer to a serving dish, cover with plastic wrap pressed directly on the surface, and refrigerate for at least 4 hours (or overnight) to set completely. The longer it chills, the firmer it becomes—perfect for slicing clean layers in cakes.
Pro Tips For Making Banana Cream Cake Filling
- Chill the Cream First: Pop that heavy whipping cream in the fridge for at least 30 minutes before whipping—cold cream whips faster and holds its shape better. I used to skip this and end up with a sad, grainy mess that wouldn’t set properly.
- Mash Bananas Thoroughly: No lumps allowed—mash those bananas until smooth, then strain them through a fine-mesh sieve if you’re picky (like me). I learned this the hard way when a hidden chunk turned my filling into a textural disaster.
- Bloom Gelatin Right: Sprinkle that unflavored gelatin over cold water and let it sit for at least 5 minutes before heating—no rushing. I once tried tossing it in hot liquid and ended up with a clumpy, rubbery nightmare that ruined the whole batch.
- Whip in Sugar Gradually: Fold in the granulated sugar slowly while whipping the cream, or you’ll deflate the mixture faster than a balloon in a windstorm. Start with half, whip, then add the rest—this keeps the filling light and fluffy.
Essential equipment for perfect results
Mixing Tools
You'll need a stand mixer or hand mixer for whipping the cream to stiff peaks—I recommend the KitchenAid Artisan Series for its powerful motor and durable attachments. A chilled mixing bowl is essential to prevent the cream from warming too quickly, so keep it in the freezer for 10 minutes before starting. For folding, a flexible silicone spatula (like OXO Good Grips) works best—it glides through the mixture without tearing the delicate whipped cream structure. 🥛
Measuring Equipment
Precision matters with this recipe, so invest in a stainless steel measuring cups set (I use Farberware) for accurate dry ingredients. A small saucepan with helper handle (like Cuisinart MultiClad) makes heating the banana mixture easier to control. For the gelatin, a small glass bowl (I prefer Pyrex) lets you see when it's properly bloomed. A digital kitchen scale (such as OXO Good Grips) ensures perfect measurements for the powdered sugar dusting.
Heat Control Tools
A candy or instant-read thermometer (like Thermoworks Thermapen) helps monitor the banana mixture's temperature—it should reach 160°F but not boil. For even heat distribution, use a medium-sized saucepan with a flat bottom to prevent scorching. If you're worried about burning, a double boiler setup (your saucepan over a pot of simmering water) gives you more control over the cooking process. 🔥
Storage Containers
For short-term storage, use glass airtight containers (I love Le Parfait)—they maintain freshness and let you see the filling's texture. For freezing, quart-sized silicone freezer bags (like Stasher) work best—they're stackable and prevent freezer burn. Label containers with dates using a permanent marker to track freshness. A parchment-lined tray helps portion leftovers neatly for easy reheating or refreezing.
Decorating Extras
To elevate presentation, keep powdered sugar sifters (like Norpro) handy for dusting. For cake assembly, a long serrated knife (such as Dexter-Russell) ensures clean cuts through layers. A piping bag with large tip (I use Ateco #807) helps create professional swirls when filling cakes. For trifle assembly, clear glass bowls (like Corelle) showcase the vibrant yellow filling beautifully. 💫
Nutrition facts
Frequently asked questions
Can I make this banana cream filling without gelatin?
Yes, but your filling may be less stable. Replace the gelatin with 1 tablespoon cornstarch mixed with 1 tablespoon cold water (slurry) and add it to the banana mixture while cooking. The texture will be softer and may not hold its shape as well when sliced, but it'll still taste delicious. For best results, use this version as a topping rather than a cake filling.
How do I prevent the filling from separating?
Separation happens when the whipped cream and banana mixture aren't properly combined or if the cream melts. Always fold the cooled banana mixture into the whipped cream gently using a spatula. Work quickly but carefully, and avoid overmixing. Also, make sure your mixing bowl is chilled and your cream is cold before whipping. If separation occurs, simply whisk the filling gently to recombine before serving.
Can I use this filling for cupcakes?
This recipe works perfectly for cupcakes. After baking your cupcakes, let them cool completely, then use a piping bag with a large star tip to pipe the filling between layers or directly onto each cupcake. The filling will hold its shape beautifully, creating stunning swirls. For extra flair, top with a dollop of whipped cream and a sprinkle of powdered sugar before serving.
What's the best way to layer it in a cake?
For a classic look, spread a thin layer of the filling between each cake layer using an offset spatula. Then, pipe additional filling around the edges of each layer in a decorative swirl pattern. After assembling all layers, place the cake in the fridge to set for at least 4 hours before slicing. This ensures clean, professional-looking slices every time. For extra stability, chill the cake overnight.
Can I make this filling ahead of time?
This filling is perfect for making ahead! Prepare it up to 3 days in advance and store it in an airtight container in the refrigerator. The flavor actually improves as it sits, becoming more developed. If you need to store it longer, freeze it for up to 3 months**. Thaw overnight in the fridge before using. The texture will be slightly firmer after freezing, but it warms up beautifully.