
Desserts
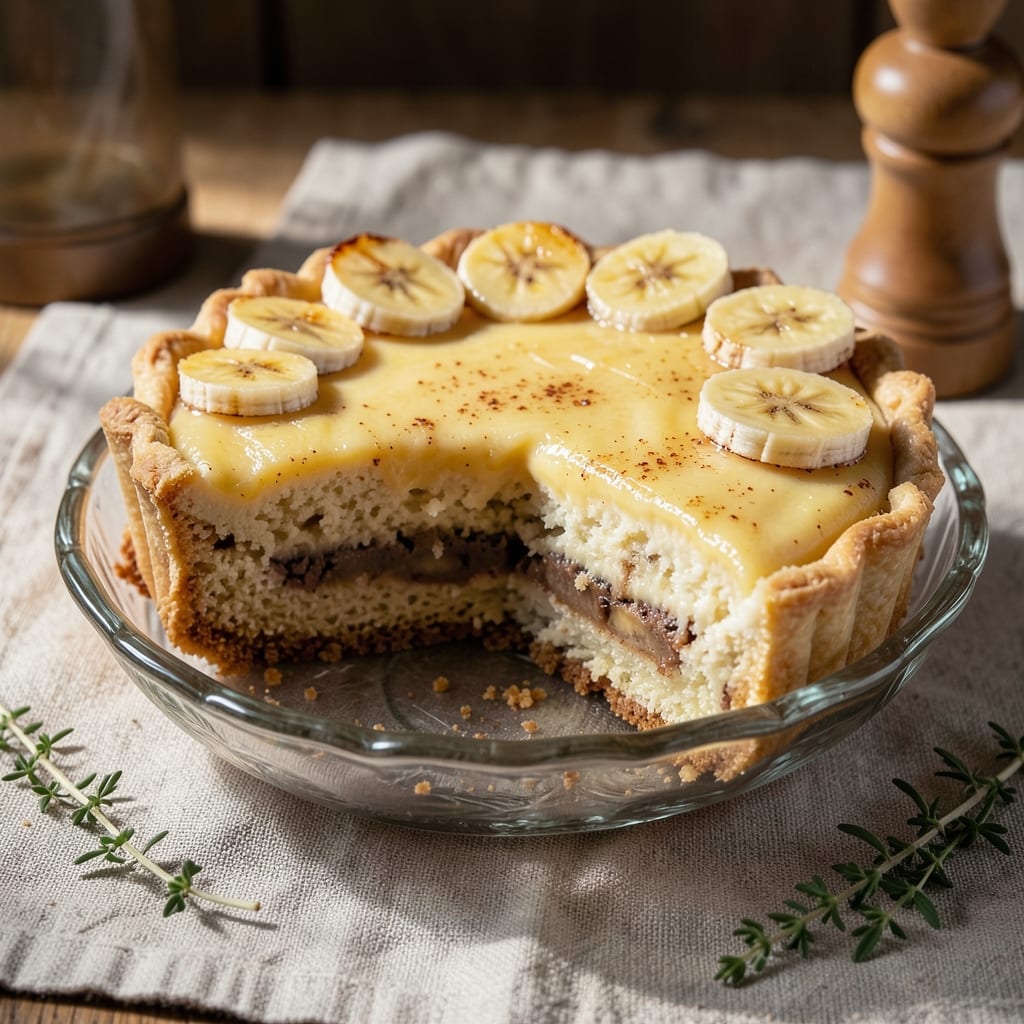
This banana custard cake filling recipe delivers the kind of velvety, dreamy texture that makes every bite feel like a bakery secret. 💛 The magic lies in tempering eggs just right to create a smooth, custard-like consistency that swirls beautifully through cake layers or sits luxuriously in a trifle. I developed this after years of testing—balancing ripe banana flavor with creamy custard that never curdles or tastes overly sweet.
The key to success is patience: simmering the milk and banana mixture until thickened, then carefully tempering the eggs to prevent scrambling. This isn't just filling—it's a flavor experience where ripe bananas shine through without overpowering the delicate custard base. The result? A filling so creamy it practically melts in your mouth, with just enough sweetness to satisfy.
Perfect for layering between cake batter or filling individual cake slices, this custard transforms ordinary desserts into showstoppers. The texture remains silky even after baking, while the banana flavor adds depth that pairs beautifully with vanilla or chocolate cakes. Once you try this, store-bought fillings will never compare.
Ready in about 30 minutes of active time (plus cooling), this recipe requires just 8 simple ingredients—no fancy equipment needed. Whether you're making a classic banana cake or experimenting with new dessert combinations, this custard filling will elevate your baking game. Let's get started!
Ingredients for banana custard cake filling
Eight simple ingredients transform into velvety banana custard that elevates any dessert.
| Ingredient | Amount | Notes |
|---|---|---|
| Ripe Bananas 🍌 | 1 ½ cups | Mashed, no brown spots |
| Large Eggs 🥚 | 4 whole | Room temperature preferred |
| Granulated Sugar 🍚 | 1 cup | White or light brown |
| All-Purpose Flour 🌾 | ¼ cup | For thickening custard |
| Whole Milk 🥛 | 1 ½ cups | Room temperature preferred |
| Unsalted Butter 🧈 | ½ cup | Cut into small pieces |
| Vanilla Extract 🌸 | 1 tbsp | Pure vanilla preferred |
| Salt 🧂 | ¼ tsp | Fine sea salt preferred |
Ripe bananas are non-negotiable here—look for those with soft spots but no brown. Trader Joe's and Whole Foods carry perfectly ripe ones year-round. The eggs should be room temperature for best tempering—just pull them out 20 minutes before starting. Butter matters too: European-style melts more smoothly, but any unsalted works. If you're using brown sugar, expect a slightly deeper caramelized flavor after baking, but white sugar keeps the custard's delicate sweetness.
No vanilla extract? Vanilla bean paste works perfectly, or even a scraped vanilla bean. Short on bananas? Substitute with 1 cup pumpkin puree—it adds moisture without altering the texture much. The flour is just for thickening; if you're worried about gluten, arrowroot powder at half the amount does the job just as well. Milk too warm? Place the carton in cold water for 10 minutes to bring it down to room temp. And if you're making this ahead, cool the custard quickly in an ice bath to prevent graininess.
This custard keeps beautifully—5 days in the fridge sealed tightly. For longer storage, freeze in 1-tablespoon portions (perfect for individual cake slices). Thaw overnight in the fridge. The texture remains silky even after baking, but if it thickens too much, just whisk in a splash of milk to restore that dreamy consistency. I always make a double batch—one for filling, one for banana cream pie—because it disappears faster than you'd think.
Why You'll Love This Recipe
- No Overripe Waste: I swear by this recipe—it turns those spotted, squishy bananas into something magical. No sad fruit bowl leftovers here; just a smooth, velvety filling that makes you forget they were ever past their prime.
- Silky Smooth Magic: That custardy texture? Pure comfort. The eggs and milk create a rich, almost pudding-like consistency, while the flour just thickens it just enough to hold its shape. It’s the kind of filling that makes you slow down and savor every bite.
- Double Duty Filling: Here’s what sold me—this works in cakes, cupcakes, or even as a standalone dessert. Need a quick breakfast? Spread it on toast. Packing lunches? It’s perfect in a jar with graham crackers. Honestly, I’ve used it in at least three different ways this month.
- Budget Buster: Between us, this is my go-to when I’m trying to stretch ingredients. A few bananas, a handful of eggs, and basic pantry staples? That’s it. No specialty items, no markup—just pure, reliable flavor that won’t break the bank. (Yes, even on a Tuesday night.)
Step-by-step instructions for banana custard cake filling
Here's how to create that dreamy, velvety banana custard that'll make your cake layers sing.
🍳 Step 1: Melt Butter and Infuse with Banana
In a medium saucepan, melt the 0.5 cup unsalted butter over medium-low heat until completely liquid but not browned. Add the 1.5 cups mashed ripe bananas and stir constantly for 2-3 minutes until the mixture becomes fragrant and slightly thickened. Here's the thing—this step develops the banana's natural sweetness and creates a silky base for your custard.
Watch for the mixture to bubble gently around the edges—that's your signal it's ready for the next ingredients. If you see any browned bits forming, immediately reduce the heat to low to prevent burning. The butter should smell nutty and rich, with a subtle banana aroma that'll make your kitchen smell amazing.
👨🍳 Step 2: Whisk Eggs and Sugar Until Pale
In a separate large bowl, whisk together the 4 whole large eggs and 1 cup granulated sugar until the mixture is pale yellow and thickened—about 3-4 minutes of vigorous whisking. You'll notice the mixture will nearly triple in volume and become slightly ribbony when you lift the whisk. This step is crucial for creating that signature custard texture.
I like to use a stand mixer with the whisk attachment for this part—it ensures even incorporation and prevents any egg whites from over-beating. If you're doing this by hand, just be patient and keep whisking until the mixture is completely smooth with no streaks of egg yolk remaining.
🍳 Step 3: Temper the Egg Mixture
Slowly pour the hot banana-butter mixture into the egg mixture while whisking constantly to temper the eggs. This gradual addition prevents the eggs from scrambling. Once fully incorporated, return the combined mixture to the saucepan over medium-low heat.
Stir continuously with a wooden spoon for 5-7 minutes until the mixture thickens enough to coat the back of the spoon. You'll see it go from a runny consistency to a velvety, pudding-like texture. Real talk: don't walk away during this step—constant stirring prevents lumps and ensures even cooking.
🥘 Step 4: Add Milk and Flour Mixture
In a small bowl, whisk together the 1.5 cups whole milk, 0.25 cup all-purpose flour, 1 tbsp vanilla extract, and 0.25 tsp salt until smooth. Slowly ladle this mixture into the saucepan while stirring constantly. The custard will thicken noticeably within 1-2 minutes of adding the milk mixture.
Continue cooking for another 2-3 minutes until the custard reaches 170-175°F on an instant-read thermometer. It should coat the spoon completely and leave a clear path when you run your finger through it. If it thickens too much before reaching temperature, whisk in 1-2 tablespoons of hot milk to adjust the consistency.
⏰ Step 5: Cool and Prepare for Layering
Immediately transfer the custard to a heatproof bowl and press plastic wrap directly onto the surface to prevent a skin from forming. Let it cool to room temperature, then refrigerate for at least 1 hour (or up to 24 hours) until completely chilled and thickened. This cooling step is essential—it allows the custard to set properly for that perfect swirl texture in your cake.
Once cooled, you'll notice the custard will have a glossy sheen and a smooth, pudding-like consistency. It should hold its shape when spooned but still be spreadable enough to create those beautiful swirls in your cake layers. If it's too thick, whisk in 1-2 tablespoons of milk to reach the ideal piping consistency.
Pro Tips For Making Banana Custard Cake Filling
- MASH BANANAS UNTIL SILKY: I learned this the hard way—lumpy banana custard filling is a crime. Use a fork first to break up the flesh, then press through a fine-mesh sieve or blend with a hand mixer until completely smooth. No visible specks, no excuses.
- WHISK EGGS COLD: Room-temperature eggs are overrated here. Whisk the eggs and sugar over an ice bath while mixing—it keeps the custard from curdling when you add the hot milk later. (Yes, even if you’re impatient like me.)
- STRAIN THE MIXTURE: Flour clumps are the enemy of creamy texture. After combining all wet and dry ingredients, pour the batter through a fine sieve or cheesecloth into your baking dish. It’s extra work, but the result is worth it.
- UNDERBAKE SLIGHTLY: The filling should set but still jiggle just a little in the center—like a wobbly Jell-O. Overbaking turns it into glue. If your oven runs hot, cover the dish loosely with foil 5 minutes before the estimated time.
Essential equipment for this dish
Medium Saucepan
Start with a medium (3-quart) saucepan—this size gives you enough room to stir without splashing while keeping the mixture hot enough to thicken properly. I prefer Calphalon Classic Stainless Steel because it heats evenly and prevents scorching. Avoid non-stick pans for this recipe—they don’t conduct heat as well, which can lead to uneven cooking. If you’re making a double batch, move up to a 4-quart saucepan to maintain proper heat distribution. 🔥
Whisk and Bowl
A balloon whisk is your best friend for tempering eggs—it incorporates air and creates that signature ribbony texture. I use a OXO Good Grips Whisk because it’s sturdy and comfortable to hold for the 3-4 minutes of vigorous whisking required. For the egg mixture, a large (5-quart) mixing bowl prevents spills when pouring in the hot banana-butter mixture. If you’re short on space, a stand mixer bowl works perfectly, but hand-whisking is totally fine if you’re patient.
Instant-Read Thermometer
An instant-read thermometer is non-negotiable for this custard—it ensures you hit the 170-175°F range without overcooking. I swear by the Thermoworks ThermoPop for its speed and accuracy. Without one, you risk either an undercooked custard (that won’t set properly) or an overcooked one (that turns grainy). Pro tip: Wipe the probe clean between uses to avoid residue affecting readings. This tool is especially critical when adding the milk mixture, as the custard thickens rapidly once it reaches temperature.
Plastic Wrap and Heatproof Bowl
Once your custard is done, transfer it to a heatproof glass or stainless-steel bowl—I love Pyrex bowls because they’re durable and won’t warp. Press plastic wrap directly onto the surface to prevent a skin from forming while it cools. This step is often overlooked, but it’s what keeps your custard silky and smooth. If you’re in a hurry, place the bowl in an ice bath for 10 minutes to speed up cooling, but don’t skip the refrigeration step entirely—it’s essential for the custard to set properly before layering. ✨
Optional: Stand Mixer
While not required, a stand mixer with a whisk attachment saves time and effort when combining eggs and sugar. I use my KitchenAid Artisan Series on medium speed for 3-4 minutes—it whips the eggs to a pale, thickened consistency without over-beating. If you’re hand-whisking, just be prepared to put in some elbow grease. The mixer also comes in handy if you’re making a large batch or plan to use the custard for multiple desserts, like both a cake and a trifle. 💡
Nutrition facts
Frequently asked questions
Can I use this banana custard filling in a trifle instead of a cake?
This custard works perfectly in trifles—its creamy texture holds up beautifully when layered with sponge cake, whipped cream, and fruit. For best results, chill the custard completely before assembling, then add a final layer of whipped cream and fresh banana slices on top. The custard will maintain its velvety consistency even after sitting overnight.
Why did my custard turn grainy or lumpy?
Graininess usually happens from one of three issues: overheating the eggs, not stirring constantly during cooking, or letting the custard cool too quickly. To fix it, whisk in 1-2 tablespoons of hot milk and cook for another 1-2 minutes while stirring vigorously. For prevention, always temper the eggs slowly and maintain medium-low heat throughout the process.
How can I make this custard less sweet?
Reduce the sugar to ¾ cup instead of 1 cup for a more subtle sweetness. You can also add ½ teaspoon of cinnamon or ¼ teaspoon of nutmeg to enhance the banana flavor naturally. For extra richness, use ripe bananas with natural sweetness—overripe ones (with brown spots) work perfectly and need less sugar.
Can I substitute dairy milk with a plant-based alternative?
Yes, but with adjustments: use full-fat coconut milk (not light) for the best texture, or oat milk with 2 tablespoons cornstarch to help thicken. The custard may be slightly thinner, so you might need to cook it 1-2 minutes longer. Test consistency by checking the spoon-coating method—it should reach 170-175°F regardless of milk type.
What's the best way to store leftover custard?
Store in an airtight container in the fridge for up to 5 days, or freeze in 1-tablespoon portions for individual cake slices. Thaw overnight in the fridge—never at room temperature. To restore thickness after refrigeration, whisk in 1 tablespoon of milk per ½ cup of custard. The texture remains silky even after freezing!