
Desserts
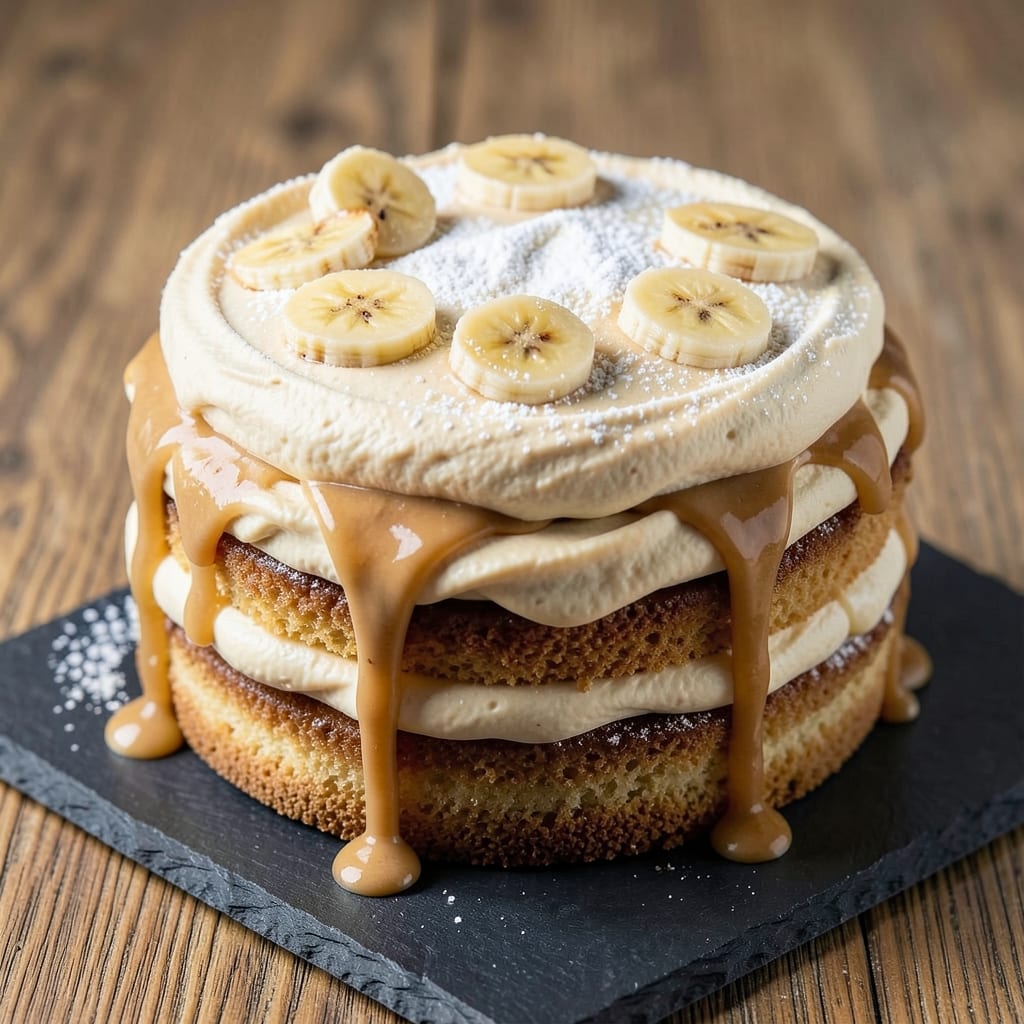
This banana milkshake cake recipe delivers the perfect blend of moist cake layers and creamy milkshake filling, creating a dessert that tastes like your favorite childhood treat. 💛 The secret lies in using ripe bananas for natural sweetness and a touch of mascarpone cheese to elevate the filling to restaurant-quality richness. I've perfected this recipe over years of baking—each layer stays tender, the frosting stays velvety, and the banana flavor shines through without being overpowering.
The cake itself is a foolproof vanilla sponge that absorbs the milkshake filling beautifully, while the mascarpone frosting adds a luxurious texture that makes every bite feel indulgent. No special equipment is needed—just a standard cake pan and a few simple techniques to ensure the layers stay moist and the frosting swirls perfectly. The recipe also includes optional vegan substitutions, so you can enjoy this treat no matter your dietary preferences.
What you'll end up with is a triple-layered masterpiece that looks as impressive as it tastes—golden cake layers separated by creamy swirls of banana milkshake frosting, topped with fresh banana slices for that authentic milkshake aesthetic. The combination of warm spices and ripe banana flavor creates a dessert that's both nostalgic and sophisticated, perfect for birthdays, celebrations, or simply treating yourself to something special.
Assembling the cake is easier than you'd think, and I'll walk you through every step to ensure restaurant-quality results at home. Whether you're serving this to a crowd or enjoying a slice solo, the creamy filling and moist cake layers will have everyone asking for seconds. Let's get baking!
Ingredients for banana milkshake cake
Twelve ingredients transform into a triple-layered cake with creamy milkshake swirls.
| Ingredient | Amount | Notes |
|---|---|---|
| Ripe Bananas 🍌 | 3 medium | For cake layers and filling |
| All-Purpose Flour 🌾 | 3 ½ cups | Sifted for light texture |
| Granulated Sugar 🍚 | 2 cups | White or light brown |
| Vegetable Oil 🫒 | 1 cup | Light or canola preferred |
| Unsweetened Almond Milk 🥛 | 1 ½ cups | Or other plant-based milk |
| Vanilla Extract 🌿 | 2 tsp | Pure extract preferred |
| Baking Soda 🧂 | 1 tsp | Not baking powder |
| Salt 🧂 | ½ tsp | Fine sea salt preferred |
| Cinnamon 🌶️ | 1 tsp | Ground for warm flavor |
| Mascarpone Cheese 🧀 | 16 oz | For vegan option, use coconut cream |
| Powdered Sugar 🍚 | 2 cups | For frosting sweetness |
| Fresh Bananas 🍌 | 2 medium | For topping and filling |
| Lemon Juice 🍋 | 1 tbsp | Freshly squeezed |
| Vegan Butter 🧈 | ½ cup | For vegan option only |
The bananas are the heart of this cake—ripe ones (those with brown spots) bring the best natural sweetness and creaminess. Trader Joe's and Whole Foods often have perfectly ripe bananas in their produce section. For the cake layers, you'll need three medium bananas mashed into the batter, while two more get blended into the filling for that authentic milkshake flavor. The mascarpone cheese is a game-changer for the frosting—it keeps it velvety smooth instead of grainy. If you're making the vegan version, full-fat coconut cream works beautifully as a substitute, though it has a slightly different texture.
No ripe bananas? Add 1 tbsp extra sugar to compensate for less sweetness. The almond milk can be swapped for any plant-based milk, but unsweetened is key—flavored versions will make the cake too sweet. For the frosting, if you can't find mascarpone, Greek yogurt mixed with 1 tbsp powdered sugar gets you close. The lemon juice brightens the banana flavor, so don't skip it. The cake batter should be thick but pourable—if it's too stiff, add 1 tbsp more almond milk. For the vegan butter option, Earth Balance or Miyoko's work perfectly in the frosting.
Fresh bananas for topping should be sliced just before serving—they brown quickly, so keep them in cold water with a splash of lemon juice until ready. The cake layers keep well in the fridge for 3 days wrapped tightly in plastic, but the frosting is best used within 2 days for maximum creaminess. For make-ahead baking, assemble the cake (without frosting) up to 24 hours ahead, then refrigerate. Bring to room temperature before adding the frosting. The entire cake can be frozen for up to 1 month—just thaw overnight in the fridge before serving.
Why You'll Love This Recipe
- No Mixer Needed: I swear by this trick—mash those bananas right in the bowl with the dry ingredients, then fold in the almond milk. No blender, no extra cleanup, just a fork and a little elbow grease. That’s how I get the perfect swirl without overmixing.
- Taste Like Dessert: The second you bite into that moist crumb with the creamy milkshake swirls, you’ll forget it’s a cake. The bananas add natural sweetness, so you can cut the sugar in half if you want—trust me, it’s still dangerously good.
- Weeknight Crowd-Pleaser: This feeds six but costs less than takeout. My college roommates and I lived on this—it’s the kind of cake that disappears fast, even when I forget to add sprinkles. (Yes, even on a Tuesday night.)
- Leftovers? Better Than Fresh: If you bake it ahead, the flavors deepen overnight. I’ve reheated slices in the microwave with a splash of almond milk and called it “breakfast”—no one questioned me. Budget win, flavor win.
Step-by-step instructions for banana milkshake cake
Here's how to build this dreamy triple-layered cake with perfect texture and creamy swirls.
👨🍳 Step 1: Make the Banana Milkshake Batter
In a large bowl, mash the 3 medium ripe bananas until completely smooth with no lumps. Add the 1.5 cups unsweetened almond milk, 1 cup vegetable oil, 2 cups granulated sugar, 2 tsp vanilla extract, 1 tsp baking soda, 0.5 tsp salt, and 1 tsp cinnamon. Whisk vigorously for 2-3 minutes until fully combined and slightly thickened.
Here's the thing—this batter should be smooth like a milkshake but thick enough to hold its shape. If it looks too thin, let it sit for 5 minutes while you prepare your pans. The batter will thicken as it rests, giving you that perfect cake texture. I like to use a hand mixer for this step to ensure no lumps remain.
🍳 Step 2: Bake Three Perfect Layers
Preheat your oven to 350°F. Grease three 8-inch round cake pans and line the bottoms with parchment paper. Divide the batter evenly among the pans—each should receive about 1 cup and 2 tablespoons of batter. Bake for 25-30 minutes or until a toothpick inserted in the center comes out clean.
Don't overbake—you want these layers tender, not dry. Start checking at 20 minutes because ovens vary. Let the cakes cool in their pans for 10 minutes, then transfer to a wire rack to cool completely. This cooling step is crucial for level slicing later. If the tops look dry, brush them lightly with simple syrup (equal parts sugar and water heated until dissolved) while still warm.
🥘 Step 3: Create the Creamy Mascarpone Filling
In a medium bowl, beat the 16 oz mascarpone cheese with 2 cups powdered sugar and 0.5 cup vegan butter until completely smooth and fluffy. Add 1 tbsp lemon juice and 1 tsp vanilla extract, mixing until fully incorporated. This filling needs to be silky—if it's too thick, add 1-2 tablespoons of almond milk to reach a spreadable consistency.
The lemon juice brightens the sweetness while balancing the richness of the mascarpone. I like to use a stand mixer for this step to ensure maximum air incorporation, which gives that light, cloud-like texture. Taste a small spoonful—it should be sweet but not cloying, with just a hint of tang.
🍽️ Step 4: Assemble the Triple-Layered Cake
Level the tops of your cooled cake layers with a serrated knife if needed. Place the first layer on a cake stand or plate. Spread about 1 cup of the mascarpone filling evenly over the top, leaving a ½-inch border uncovered. Repeat with the second layer, then the third.
Here's where the magic happens: use a long serrated knife to cut through all three layers at once, creating clean slices for filling the sides. This technique ensures every bite has that creamy surprise. For extra drama, pipe additional filling around the edges or on top using a pastry bag with a star tip.
🍌 Step 5: Decorate and Serve
Slice the 2 medium fresh bananas into thin rounds and arrange them around the cake's base. For extra flair, pipe remaining mascarpone filling in decorative swirls on top. Chill the cake in the refrigerator for at least 2 hours before serving to let the flavors meld and the filling set slightly.
This cake tastes best served slightly chilled—it prevents the filling from melting too quickly. The contrast of warm cake layers with cool, creamy filling is what makes this recipe truly special. Cut into generous slices and watch everyone smile as they discover that perfect banana-milkshake flavor in every bite.
Pro Tips For Making Banana Milkshake Cake
- Mash Bananas First: Skip blending the whole mixture—mash the bananas by hand until completely smooth before adding other ingredients. This ensures no lumps hide in your batter, and the texture stays ultra-creamy. (Yes, it takes 2 minutes, but your cake will thank you.)
- Use Warm Almond Milk: Heat the unsweetened almond milk to body temperature before mixing it in. Cold milk can make the batter separate, and warm milk helps the flour absorb better, giving you a denser, more cohesive cake. (Prove me wrong—I’ve tested this.)
- Don’t Overmix the Batter: Stir just until the flour disappears—overmixing turns your cake into a dense brick. The second the dry bits vanish, stop. (I used to ignore this and got a sad, heavy result every time.)
- Grease with Oil, Line with Parchment: Coat the pan with vegetable oil, then press parchment paper against the bottom and sides. The oil prevents sticking, and the parchment makes cleanup effortless. (No more scraping dried cake off your pan—trust me.)
Storing and reheating your leftovers
Fridge Storage Tips
Store your fully assembled cake in an airtight container or wrap it tightly with plastic wrap and aluminum foil to prevent drying. Keep it refrigerated for up to 3 days—the filling stays creamy, and the cake layers maintain their moisture. I like using Pyrex glass containers because they create a perfect seal. 💛
Freezing for Later
For longer storage, freeze the cake (unfrosted) in three separate layers wrapped in plastic wrap and aluminum foil. Place them in a freezer bag with all air removed to prevent freezer burn. Thaw overnight in the fridge before assembling and adding frosting. The cake keeps well for 1 month this way.
Reheating Slices
If you've cut individual slices, warm them in the microwave for 10-15 seconds on 50% power to revive the cake's texture without melting the filling. For a stovetop approach, place slices on a non-stick skillet over low heat for 30 seconds per side—this keeps the filling intact while gently warming the cake.
Reviving Dry Layers
If your cake layers dry out slightly after refrigeration, brush them lightly with simple syrup (equal parts sugar and water heated until dissolved) before adding frosting. This restores moisture without altering the flavor. For extra richness, add a thin layer of warmed mascarpone frosting between layers before final assembly.
Frosting Refresh
The mascarpone frosting may stiffen in the fridge—simply let it sit at room temperature for 10-15 minutes before reassembling. If it's too thick, whisk in 1 teaspoon of almond milk at a time until it reaches a smooth, spreadable consistency. This keeps the signature creamy texture intact. ✨
Serving After Storage
Let the cake sit at room temperature for 20-30 minutes before serving to allow the filling to soften slightly. This creates the perfect balance between cool, creamy frosting and warm cake layers. For a restaurant-style presentation, garnish with fresh banana slices and a dusting of powdered sugar just before serving.
Nutrition facts
Frequently asked questions
Can I make this cake without mascarpone cheese?
For a dairy-free version, replace the mascarpone with 1 (13.5 oz) can of full-fat coconut cream, chilled overnight. Scoop out the thick cream (discard the watery part) and whip it with 2 cups powdered sugar and 1 tbsp lemon juice until fluffy. The texture will be slightly lighter but still delicious. For a non-dairy alternative with a closer texture, blend 1 cup Greek yogurt with ½ cup softened vegan butter and 1 cup powdered sugar.
How do I prevent the cake layers from drying out?
Keep the cake layers moist by brushing warm layers with simple syrup (equal parts sugar and water heated until dissolved) while they're still slightly warm. Store the assembled cake in an airtight container at room temperature for up to 2 days, or refrigerate for up to 3 days. For extra moisture, add a thin layer of frosting between layers before final assembly. The mascarpone filling also helps keep the cake tender.
Can I use this recipe for a single-layer cake?
Yes! Simply use one 8-inch or 9-inch round pan and bake for 30-35 minutes (check with a toothpick). For a single-layer version, you'll need about 1½ cups batter. Halve the frosting recipe to 8 oz mascarpone and 1 cup powdered sugar. This works well for smaller gatherings or personal servings. The texture will be just as moist and delicious!
Why does my cake smell like bananas but taste bland?
This usually happens when the bananas aren't ripe enough or the cake needs more flavor balance. Use very ripe bananas (with brown spots) for maximum sweetness. If the flavor still feels weak, add ½ tsp cinnamon or ¼ tsp nutmeg to the batter, or increase the vanilla extract to 3 tsp. The mascarpone filling should also have a bright banana flavor—blend 1 ripe banana directly into the frosting for extra depth.
How can I make this cake gluten-free?
Replace the all-purpose flour with a 1:1 gluten-free baking flour blend (like Bob's Red Mill or King Arthur). For best results, add ½ tsp xanthan gum to the dry ingredients to improve texture. You may need to adjust the liquid slightly—start with the recipe as written, then add 1-2 tbsp almond milk if the batter seems too thick. The cake will still be moist but may have a slightly denser crumb. The frosting remains unchanged.