
Desserts
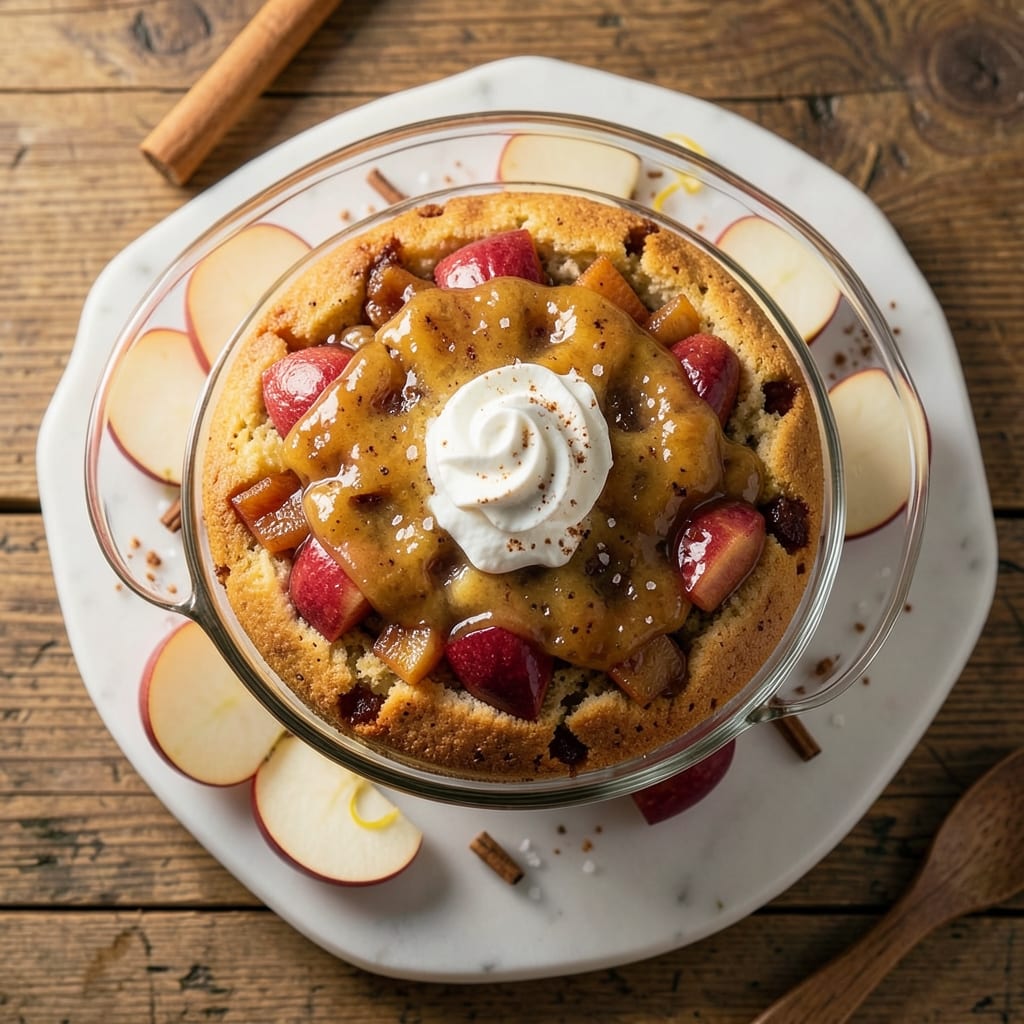
This apple pie poke cake recipe delivers the cozy comfort of classic apple pie in every moist, spiced bite—with the fun, interactive twist of a poke cake. The secret lies in a tender vanilla cake base infused with warm cinnamon, layered with a rich, buttery apple pie filling that stays gooey and fragrant. I developed this recipe after years of perfecting both pie crusts and poke cakes, and this hybrid brings the best of both worlds: the nostalgia of apple pie with the convenience of a one-layer dessert.
The magic happens in the assembly: a foolproof method of layering the cake base with pre-baked apple pie filling, then poking holes for that signature poke cake texture. The filling stays perfectly balanced—sweet but not cloying, with just the right amount of cinnamon and brown sugar caramelization. Baking at the right temperature ensures the cake stays soft while the filling sets into a luscious, spiced apple compote that oozes with every forkful.
What you’ll end up with is a dessert that’s equal parts impressive and effortless—a restaurant-quality treat that looks stunning with minimal effort. The top remains soft and pillowy, while the filling delivers that familiar apple pie experience without requiring a deep-dish pan or hours of baking. This recipe is perfect for holiday gatherings, potlucks, or even a special weekend dessert when you want to impress without stress.
Serve it warm with a scoop of vanilla ice cream or a dollop of whipped cream to enhance the apple pie flavors even more. The best part? It’s beginner-friendly—no advanced techniques required, just layering and baking. Let’s get started on creating this crowd-pleasing fusion dessert!
Ingredients for apple pie poke cake
The perfect blend of cozy apple pie and playful poke cake—just 14 ingredients for restaurant-quality dessert magic.
| Ingredient | Amount | Notes |
|---|---|---|
| All-Purpose Flour 🌾 | 2 ½ cups | Sifted for light texture |
| Granulated Sugar 🍚 | 1 ½ cups | White or light brown |
| Unsalted Butter 🧈 | 1 cup | Cold, cubed for cake layers |
| Large Eggs 🥚 | 4 whole | Room temperature preferred |
| Vanilla Extract 🌸 | 2 tsp | Pure extract, not imitation |
| Baking Powder 🧂 | 2 tsp | Aluminum-free preferred |
| Ground Cinnamon 🌿 | 1 tbsp | Freshly ground for warmth |
| Salt 🧂 | ½ tsp | Fine sea salt preferred |
| Apples 🍎 | 6 medium | Peeled, cored, diced (Honeycrisp or Granny Smith) |
| Light Brown Sugar 🍚 | 1 cup | Packed firmly for filling |
| Lemon Juice 🍋 | 2 tbsp | Freshly squeezed |
| Vanilla Bean Paste 🌸 | 1 tbsp | For richer flavor |
| All-Purpose Flour 🌾 | ¼ cup | For dusting cake pan |
| Vanilla Ice Cream 🍦 | 2 cups | For serving (optional) |
The apples are non-negotiable—Honeycrisp or Granny Smith give the best texture and flavor. Trader Joe's or Whole Foods carry these reliably, but any crisp apple works in a pinch. Peeled and diced small (about 1/4-inch pieces), they caramelize beautifully in the filling. For the cake, King Arthur flour is my go-to—it bakes up extra tender, but any good all-purpose will do. The butter? Plugrá or Land O'Lakes unsalted are my favorites—they stay cold longer when cubed, which keeps the cake layers light. If you're baking in a dry climate, let your butter sit out for 30 minutes before creaming to avoid a dense cake.
No vanilla bean paste? Pure vanilla extract plus a pinch of vanilla sugar works, but you'll miss that depth. Short on apples? Substitute with 2 cups of canned apple pie filling (no sugar added)—just warm it up and spread it like a pro. The baking powder is crucial here—Aluminum-free gives a lighter texture, but regular works if that's what you've got. For the filling, if you can't find brown sugar, white sugar plus 1/2 tsp molasses mimics that caramelized flavor. And trust me on the lemon juice—it brightens the apples and balances the sweetness without overpowering. If you're feeling fancy, toss the diced apples with 1 tsp of cornstarch before baking to thicken the filling slightly.
The cake layers keep best for 2 days wrapped in plastic at room temperature, but they're at their peak on day one. The filling, once baked, can be stored separately for 4 days in the fridge—just reheat gently before assembling. For the full poke cake experience, assemble and serve immediately, but if you need to prep ahead, bake the cake layers, store them, then assemble and bake the final time when ready. The ice cream? Store-bought vanilla is fine, but homemade takes this dessert to another level. Freeze any leftovers (with or without ice cream) for up to 3 months—just thaw at room temperature before serving.
Why You'll Love This Recipe
- No Mixer Needed: I swear by this recipe when I’m in a rush—just whisk the dry ingredients in a bowl, then fold in the butter until it looks like crumbs. No stand mixer, no fuss, and still comes out tender.
- Taste Like Fall: That buttery vanilla cake base with the warm apple pie spice? It’s like biting into a slice of grandma’s pie, but in cake form. Honestly, the cinnamon-sugar swirl makes it feel like dessert every time.
- Weeknight Crowd-Pleaser: Between us, this is my go-to for book club nights or lazy Sundays. The cake layers keep well, and the poke method means it stays moist—no one will guess it’s not from a bakery.
- Budget-Friendly Luxury: Flour, sugar, butter, eggs—these are pantry staples that won’t break the bank. Plus, the leftovers? Perfect for breakfast the next morning, toasted with a little extra butter. My secret weapon for stretching ingredients.
Step-by-step instructions for apple pie poke cake
Here's how to create this magical dessert that combines all the cozy flavors of apple pie with the fun texture of a poke cake.
Prepare the Apple Filling
In a large bowl, combine the 6 medium apples that you've already peeled, cored, and diced. Add the 1 cup light brown sugar, 2 tbsp lemon juice, and 1 tbsp vanilla bean paste. Toss everything together until the apples are evenly coated and the sugar begins to caramelize slightly. This step is where all that warm apple pie flavor develops.
Let the apple mixture sit for 10 minutes at room temperature while you prepare the cake batter. This resting time allows the flavors to meld together and the apples to soften just enough to create a perfect filling. You'll notice the mixture becomes slightly sticky and the aroma fills your kitchen - that's your cue it's ready for the next step.
Make the Cake Batter
In a separate large mixing bowl, cream together the 1 cup unsalted butter and 1.5 cups granulated sugar using an electric mixer on medium speed for 3-4 minutes. The mixture should become light and fluffy, nearly doubling in volume. Scrape down the sides of the bowl with a spatula to ensure even mixing.
Add the 4 whole large eggs, one at a time, mixing well after each addition until fully incorporated. Then stir in the 2 tsp vanilla extract and 1 tbsp vanilla bean paste. The vanilla bean paste adds an extra layer of depth that makes this dessert truly special. Mix on low speed just until combined - no need to overmix here.
Combine Dry Ingredients
In a medium bowl, whisk together the 2.5 cups all-purpose flour, 2 tsp baking powder, 1 tbsp ground cinnamon, and 0.5 tsp salt. Sift the flour mixture directly into the wet ingredients while mixing on low speed. This prevents lumps and ensures a smooth batter. Mix just until combined - you should still see some flour streaks.
Gently fold in the prepared apple mixture using a spatula, being careful not to overmix. The batter will be thick and slightly chunky, which is perfect for that classic poke cake texture. This is where all the flavors come together - the buttery cake base with the warm apple pie filling throughout.
Bake the Cake
Preheat your oven to 350°F. Grease and flour an 8-inch round cake pan using the 0.25 cup all-purpose flour for dusting. Pour the batter into the prepared pan and smooth the top with a spatula. Bake for 45-50 minutes or until a toothpick inserted in the center comes out clean.
As the cake bakes, you'll notice it rises beautifully and develops a golden crust. The apples will caramelize slightly, creating pockets of warm apple flavor throughout. When the top springs back when touched and the toothpick test passes, it's time to remove from the oven. Let the cake cool in the pan for 10 minutes before transferring to a wire rack to cool completely.
Serve with Ice Cream
Once the cake has cooled completely, it's time to serve. Slice the cake into 8 equal wedges - perfect for sharing with friends or family. The texture should be moist with pockets of apple filling throughout, creating that signature poke cake experience.
For the ultimate presentation, serve each slice with a scoop of 2 cups vanilla ice cream on the side. The warm cake contrasts beautifully with the cold ice cream, creating a dessert experience that's both comforting and exciting. Each bite delivers layers of flavor - the buttery cake, warm spiced apples, and creamy vanilla ice cream all working together in perfect harmony.
Pro Tips For Making Apple Pie Poke Cake
- Chill the Butter First: Cold butter makes all the difference in this cake—no one wants a greasy mess. Cut it into small cubes and refrigerate for 20 minutes before creaming, or even toss them in the freezer for 10. I learned this the hard way after a batch turned out more like a dense brownie than a fluffy poke cake.
- Whisk Eggs Like a Pro: Beat those eggs until they’re pale, thick, and triple in volume—this isn’t the time to rush. Use a stand mixer with the whisk attachment for 3-5 minutes, or by hand until ribbons form when you lift the beaters. Overmixed? You’ll end up with a tough cake. Under-mixed? It’ll sink like a stone.
- Skip the Overmixing: Once you fold in the flour, stop as soon as it’s just combined. Stirring too much develops gluten, and that’s how you end up with a cake that’s more bread-like than tender. Think "marbled" rather than "smooth"—a few streaks are fine.
- Use Room-Temp Apples: If you’re adding diced apples (even if it’s just for flavor), let them sit at room temp for 30 minutes before mixing. Cold apples release moisture unevenly, which can make your cake gummy. Warm them up first, and you’ll get even distribution—no one wants a surprise apple pocket.
Flavor customization for this recipe
Spice Level Boost
For those who love their apple pie with extra warmth, add ½ tsp ground cardamom or ¼ tsp nutmeg to the cake batter. These spices deepen the flavor profile without overpowering the cinnamon. I like to toast the spices in a dry pan for 30 seconds before adding them to the batter—this intensifies their aroma. If you're feeling adventurous, a pinch of cayenne pepper (just ⅛ tsp) adds a subtle kick that pairs surprisingly well with the sweet apples. 🌶️
Sweetness Variations
Adjust the sugar levels to match your preference. For a less sweet version, reduce the granulated sugar in the cake to 1 cup and use ½ cup maple syrup instead of some of the brown sugar in the filling. If you prefer a caramelized finish, sprinkle 2 tbsp coarse sugar over the baked cake before serving—it’ll melt into a glossy glaze as you cut. For a tangy twist, add 1 tbsp apple cider vinegar to the filling to brighten the flavors. 🍯
Fruit Swaps
While apples are classic, this recipe works beautifully with other fruits. Swap the apples for pears or berries—toss 2 cups mixed berries (like blueberries or raspberries) with 1 tbsp cornstarch and 1 tbsp lemon juice for a jammy filling. For a tropical twist, use diced pineapple or mango, but reduce the sugar in the filling to ½ cup since these fruits are naturally sweeter. Just
Texture Tweaks
Want a crunchier texture? Fold ½ cup chopped pecans or walnuts into the batter before baking. For extra moisture, replace 2 tbsp of the butter with 2 tbsp Greek yogurt or sour cream—this keeps the cake tender while adding a subtle tang. If you prefer a denser texture, reduce the baking powder to 1.5 tsp and increase the flour to 2.75 cups. The cake will still be delicious, just with a slightly chewier bite. 🥜
Flavor Infusions
Elevate the vanilla flavor by infusing the butter. Melt ½ cup of the butter with 1 vanilla bean (split and scraped) and let it cool before mixing with the remaining butter. For a boozy twist, add 2 tbsp bourbon or apple brandy to the filling—simmer it briefly to cook off the alcohol before mixing with the apples. If you love citrus, zest 1 lemon or orange and fold it into the cake batter for a bright, aromatic note. 🍋
Nutrition facts
Frequently asked questions
Why does this recipe use both vanilla extract and vanilla bean paste?
The vanilla extract provides the classic vanilla flavor we all know, while the vanilla bean paste adds depth and complexity. The paste contains tiny vanilla bean specks that burst with flavor as they bake, creating a more luxurious taste experience. Using both ensures that even if you're short on one, the dessert still tastes amazing.
Can I make this cake without a round pan? What shape works best?
This recipe works beautifully in square or rectangular pans too. For a 9x9-inch pan, bake for 35-40 minutes at 350°F. The key is to adjust baking time based on your pan size—just check with a toothpick. Square pans create fun, easy-to-serve slices perfect for gatherings.
What's the best way to store leftovers?
Wrap cooled slices tightly in plastic wrap and store at room temperature for 2 days. For longer storage, freeze slices (without ice cream) for up to 3 months. Thaw overnight in the fridge. The cake texture stays best when not refrigerated—just bring to room temperature before serving.
How do I prevent the cake from being too dense?
Don't overmix the batter—stop as soon as the flour disappears. Use cold butter (not melted) and sift your dry ingredients. Also, make sure your eggs are room temperature. These steps keep the cake light and airy. If your cake turns out slightly dense, the extra moisture from the apple filling will still make it delicious!
Can I make this ahead of time for a party?
Yes! Bake the cake layers 1 day ahead and store wrapped at room temperature. On serving day, assemble with filling and bake as directed. For the filling, you can prep it 2 days ahead and refrigerate—just warm it slightly before spreading. The flavors actually improve overnight as they meld together.